Crochet 101
Crochet, French for “hook”, is a type of fiber art that uses a hook and yarn to create textiles made of interlocking loops. Crochet can be worked in three ways, rows, rounds, and freeform.
Essential Crochet Tools
Hooks
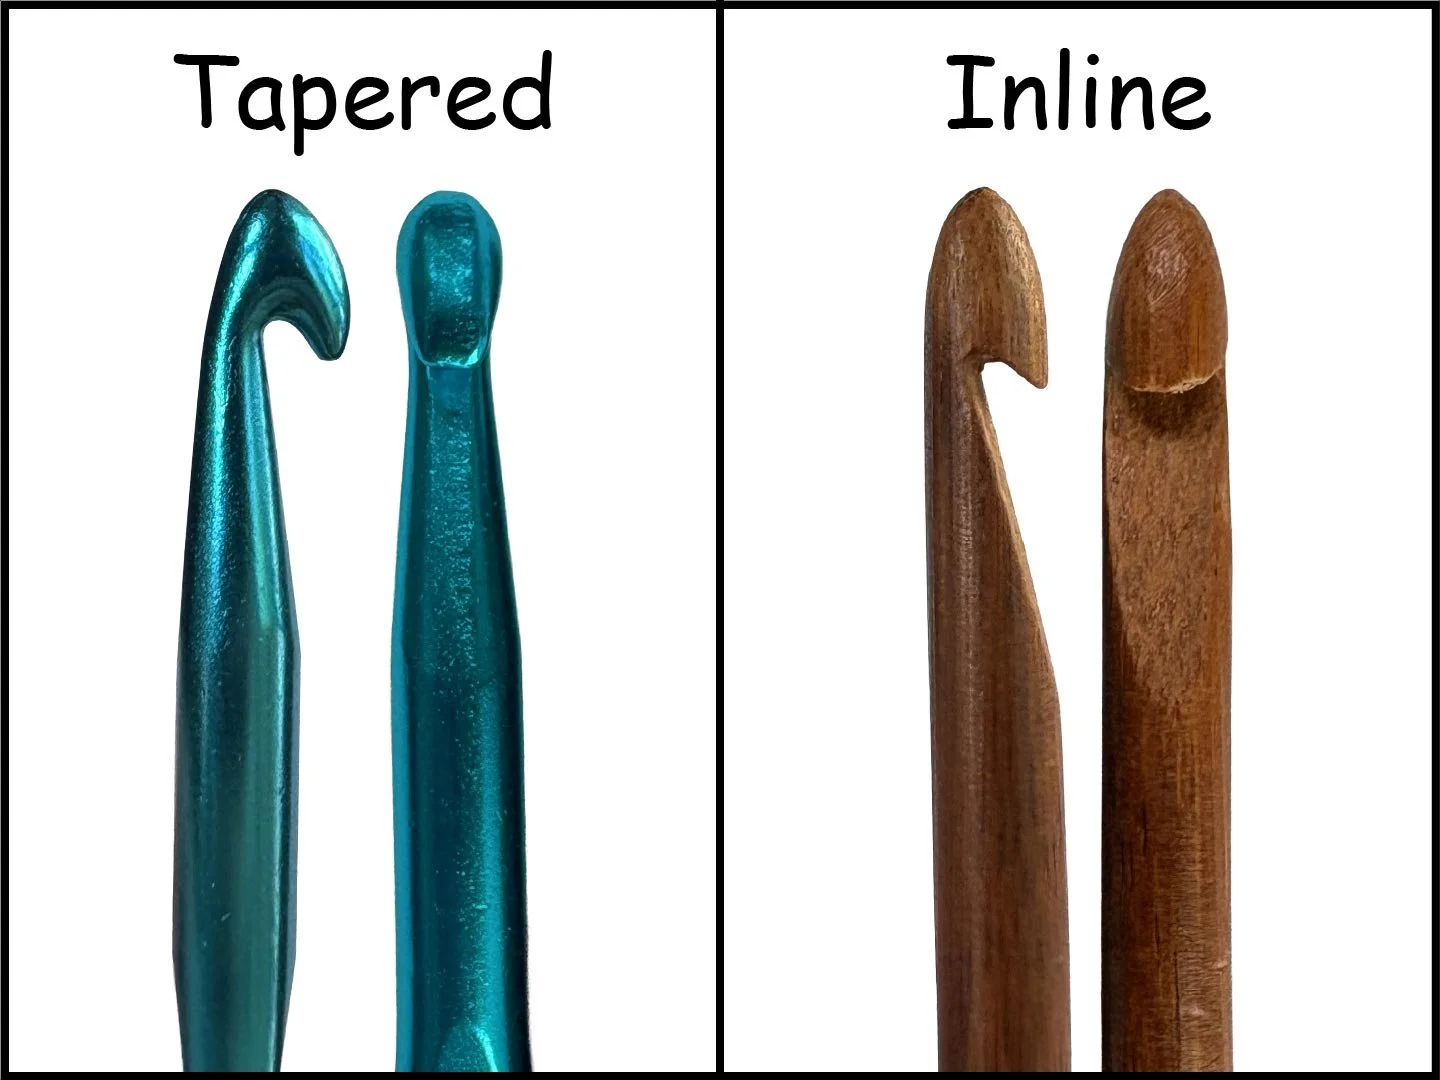
Hooks come in a variety of materials such as metal, plastic, and wood. Some may have an added cushion for a more comfortable grip. There are two style hooks, tapered or inline. Tapered hooks, my favorite, taper in at the throat where inline hooks do not. I suggest testing different materials and styles as the best hook to use is the one most comfortable for you. Hook sizes go by an alphanumeric code or by mm size. Refer to your yarn label for the recommended hook size.
Yarn
Yarn is made of spun fiber and comes in many different materials. Cotton and lightweight wool are great for summer clothing, while thicker wools are best for winter. Hemp is strong and resistant to mold and UV light making it useful for household items as well as outdoor clothing. Smooth, light colored, tight twisted yarns are easiest to see and work with for beginners.
Thread Scissors
Small pair of sharp scissors for snipping yarn ends.

Stitch Markers
Insert into stitches to keep stitch counts, mark sewing notches, and identify end of rounds. Made of plastic or metal, these markers come is different colors and styles. Some even help remind you what size hook you’re working with.

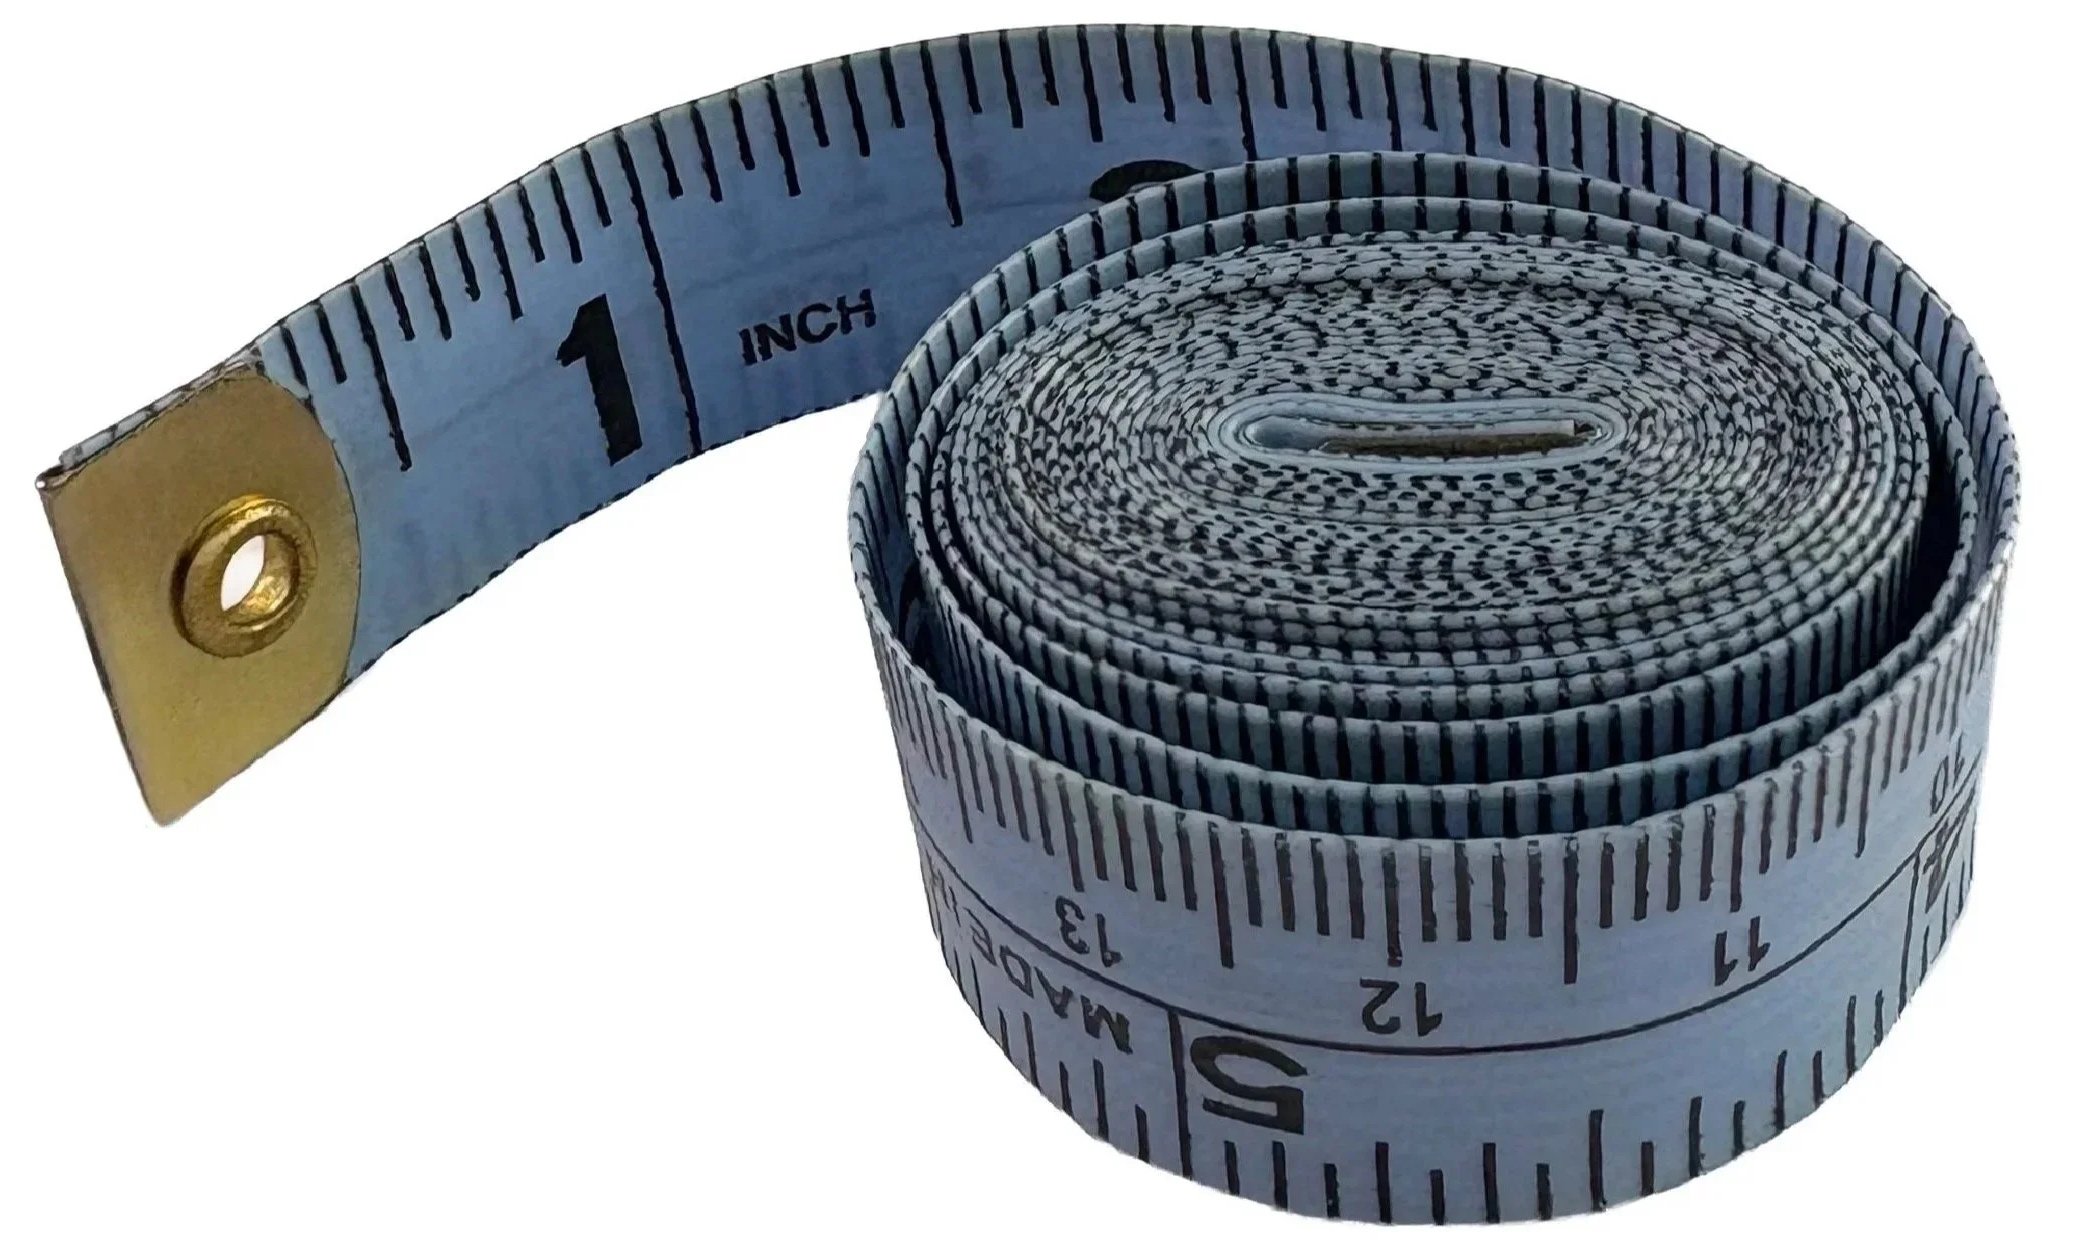
Measuring Tape & Seam Gauge
A measuring tape is a flexible rulers great for taking 3D measurements needed of a person or object to complete your project. A seam gauge is helpful for measuring gauges and other samples.

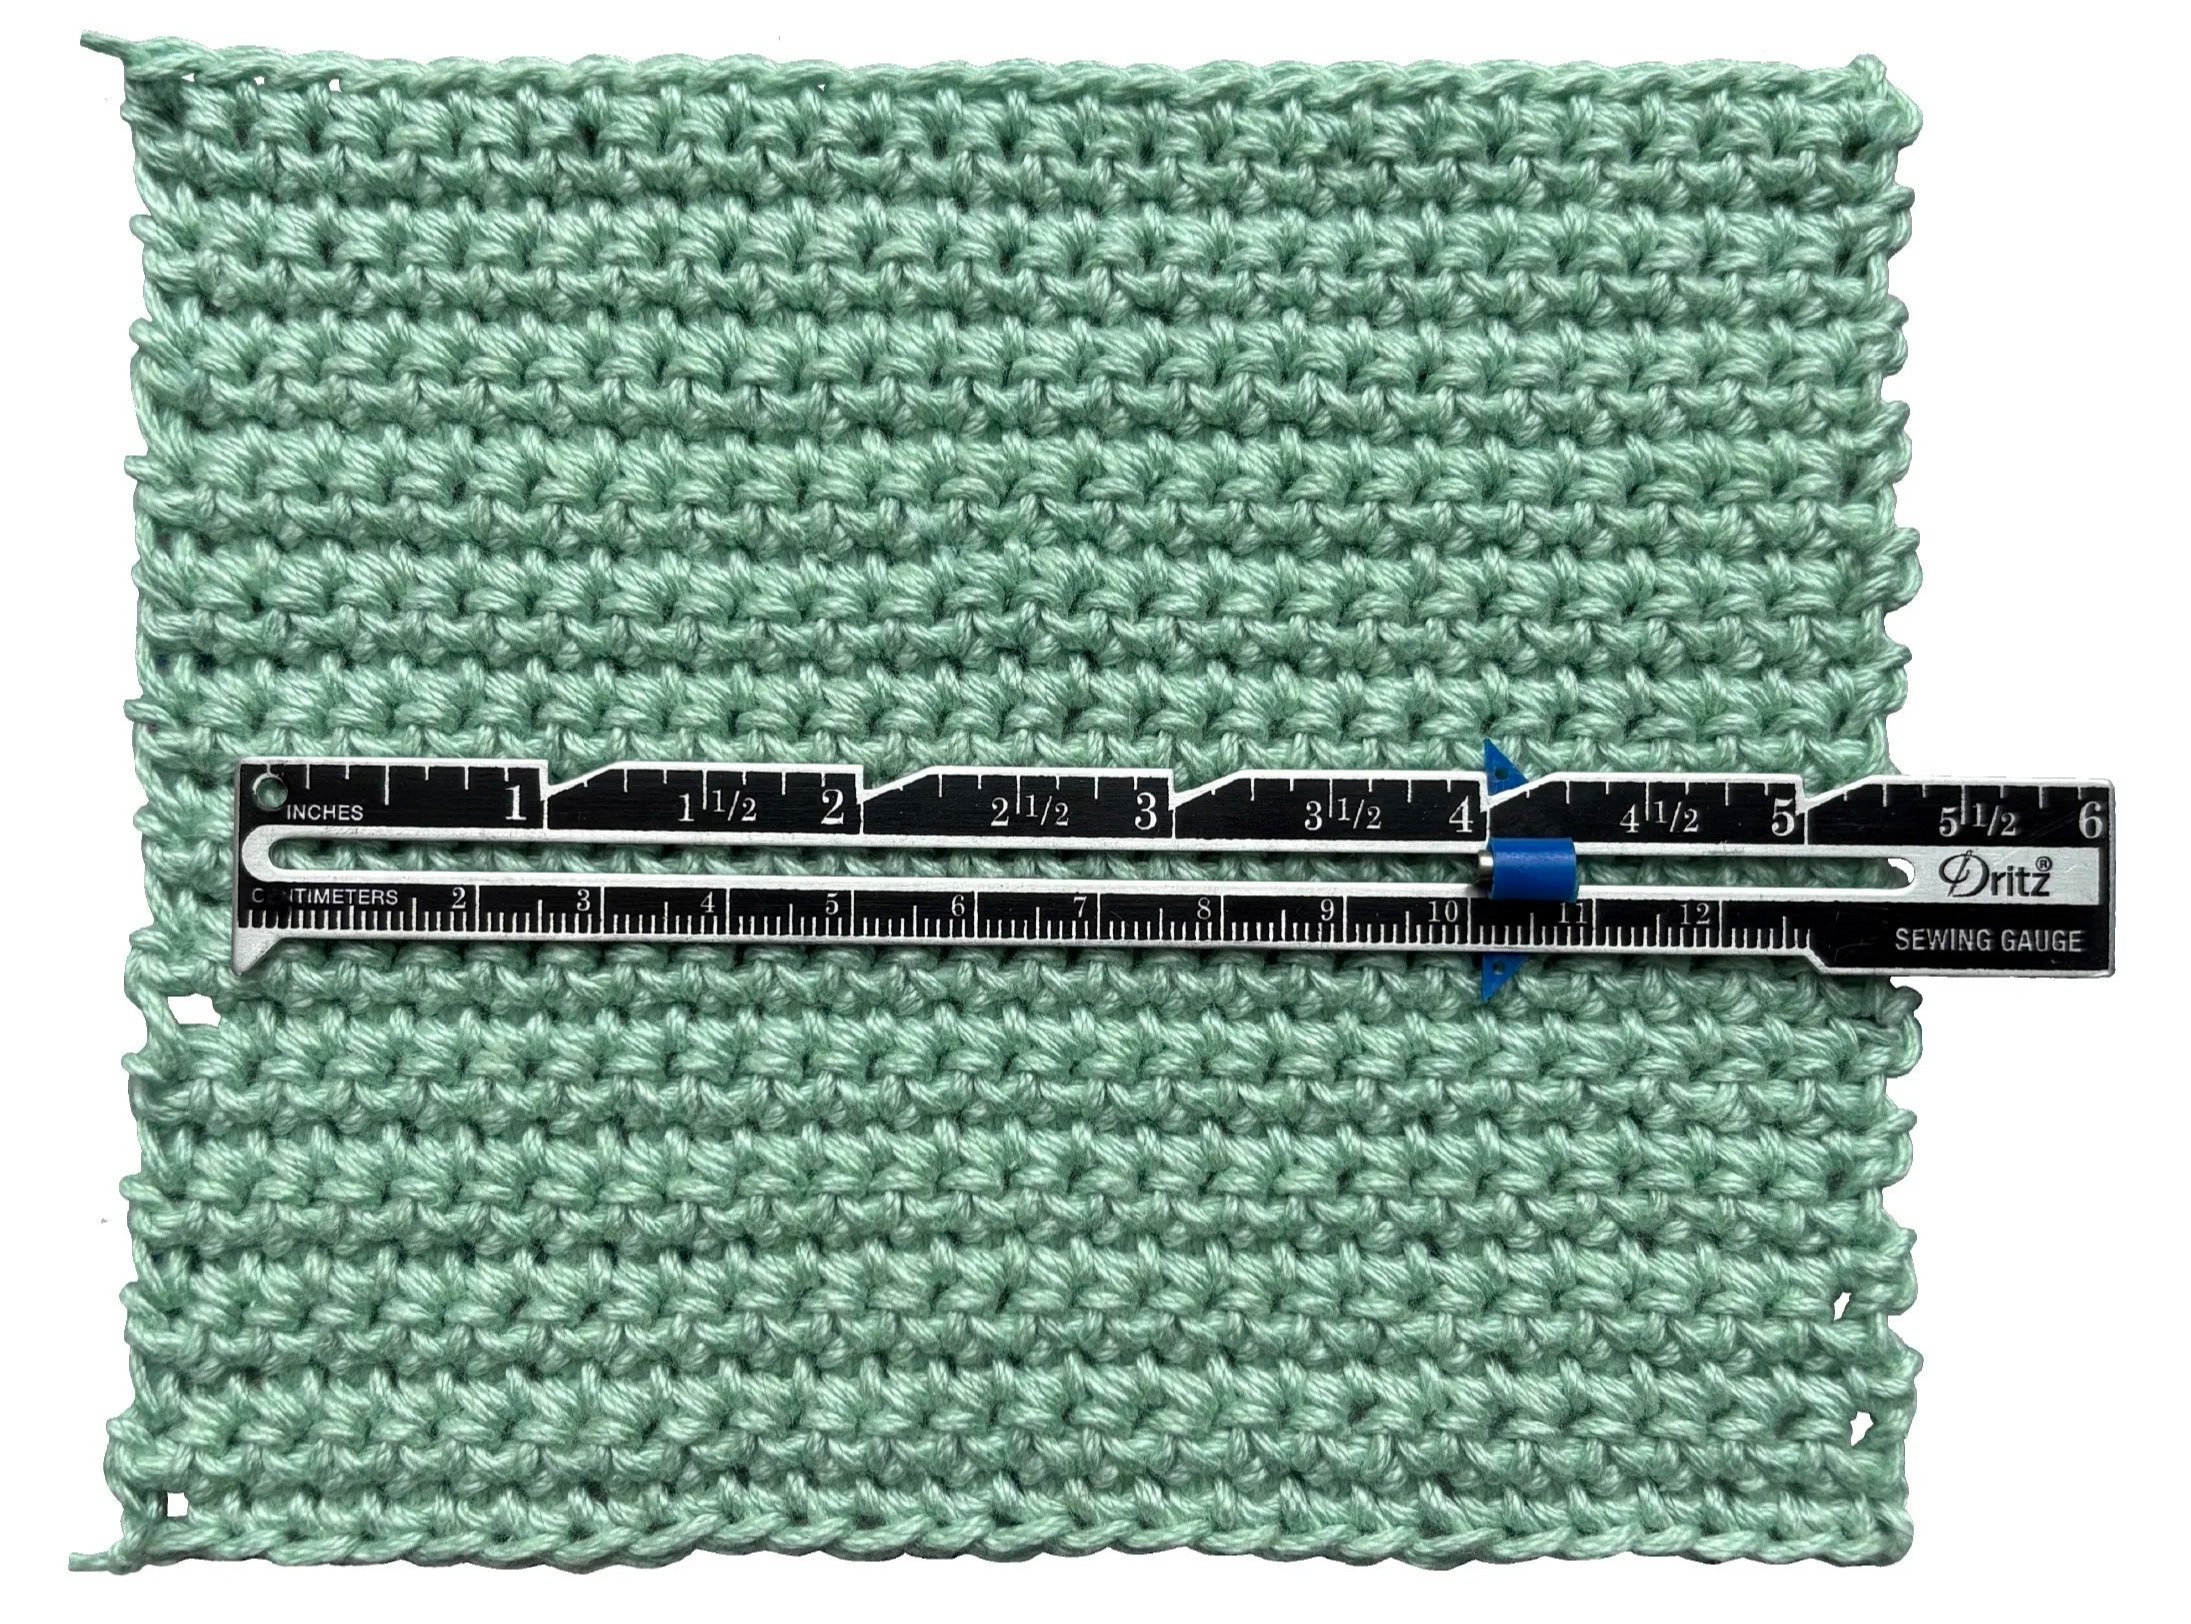
Gauge
The number of stitches and rows/rounds in a given measurement of a crochet piece.
Start by making a sample swatch of the pattern you want to use. Count how many stitches and rows/rounds fit in a specific measurement. Compare these measurements to the size you want your project to be and determine how many stitches and rows/rounds you need. A gauge on a yarn label, and for most pattens, is based on how many stitches and rows there are in a 4” (10cm) measurement of single crochet worked in rows. You should always create your own gauge as size may vary by yarn, hook, and crocheter’s tension.
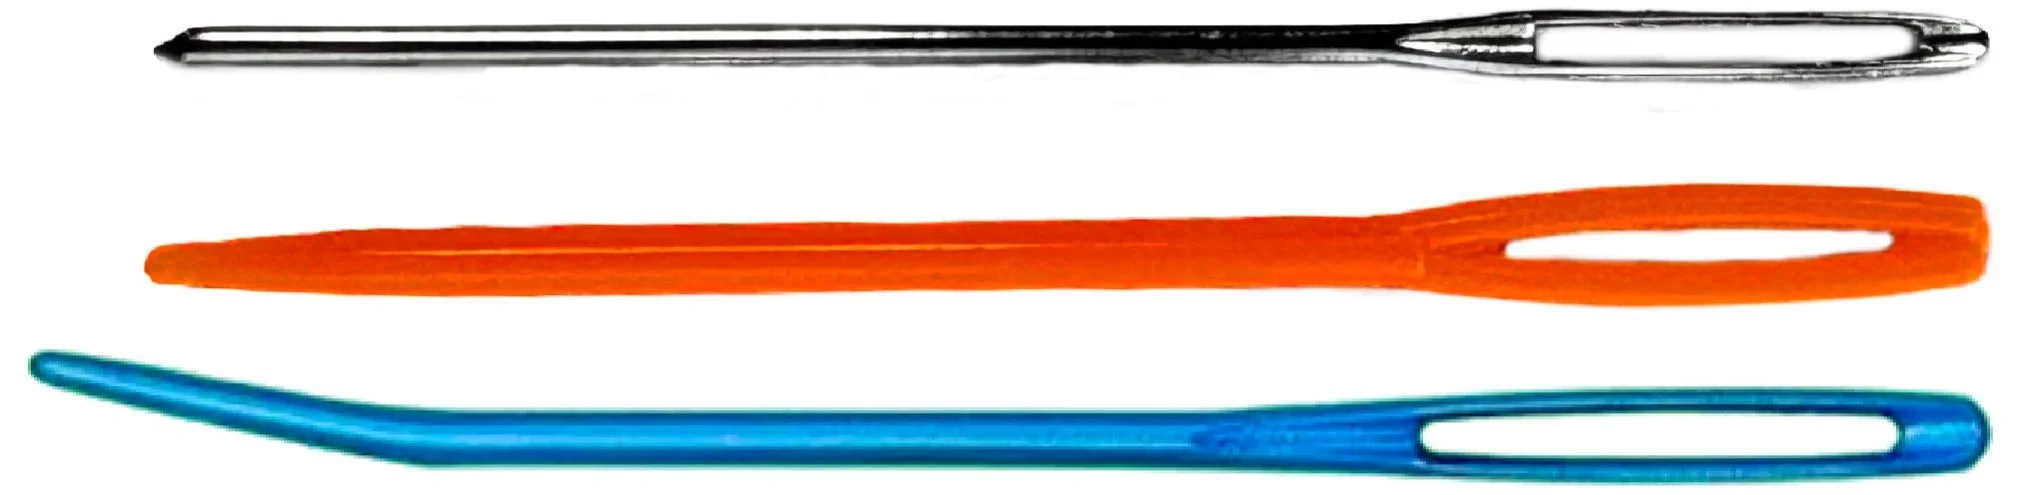
Yarn/Tapestry Needles
These needles are longer and thicker than your average sewing needle. Crocheters used them to weave in yarn ends and sew crochet pieces together. I prefer metal needles, as they are sturdier, however you can find them in plastic as well. Ones with bent ends are helpful with hard to reach places and sewing seams together.
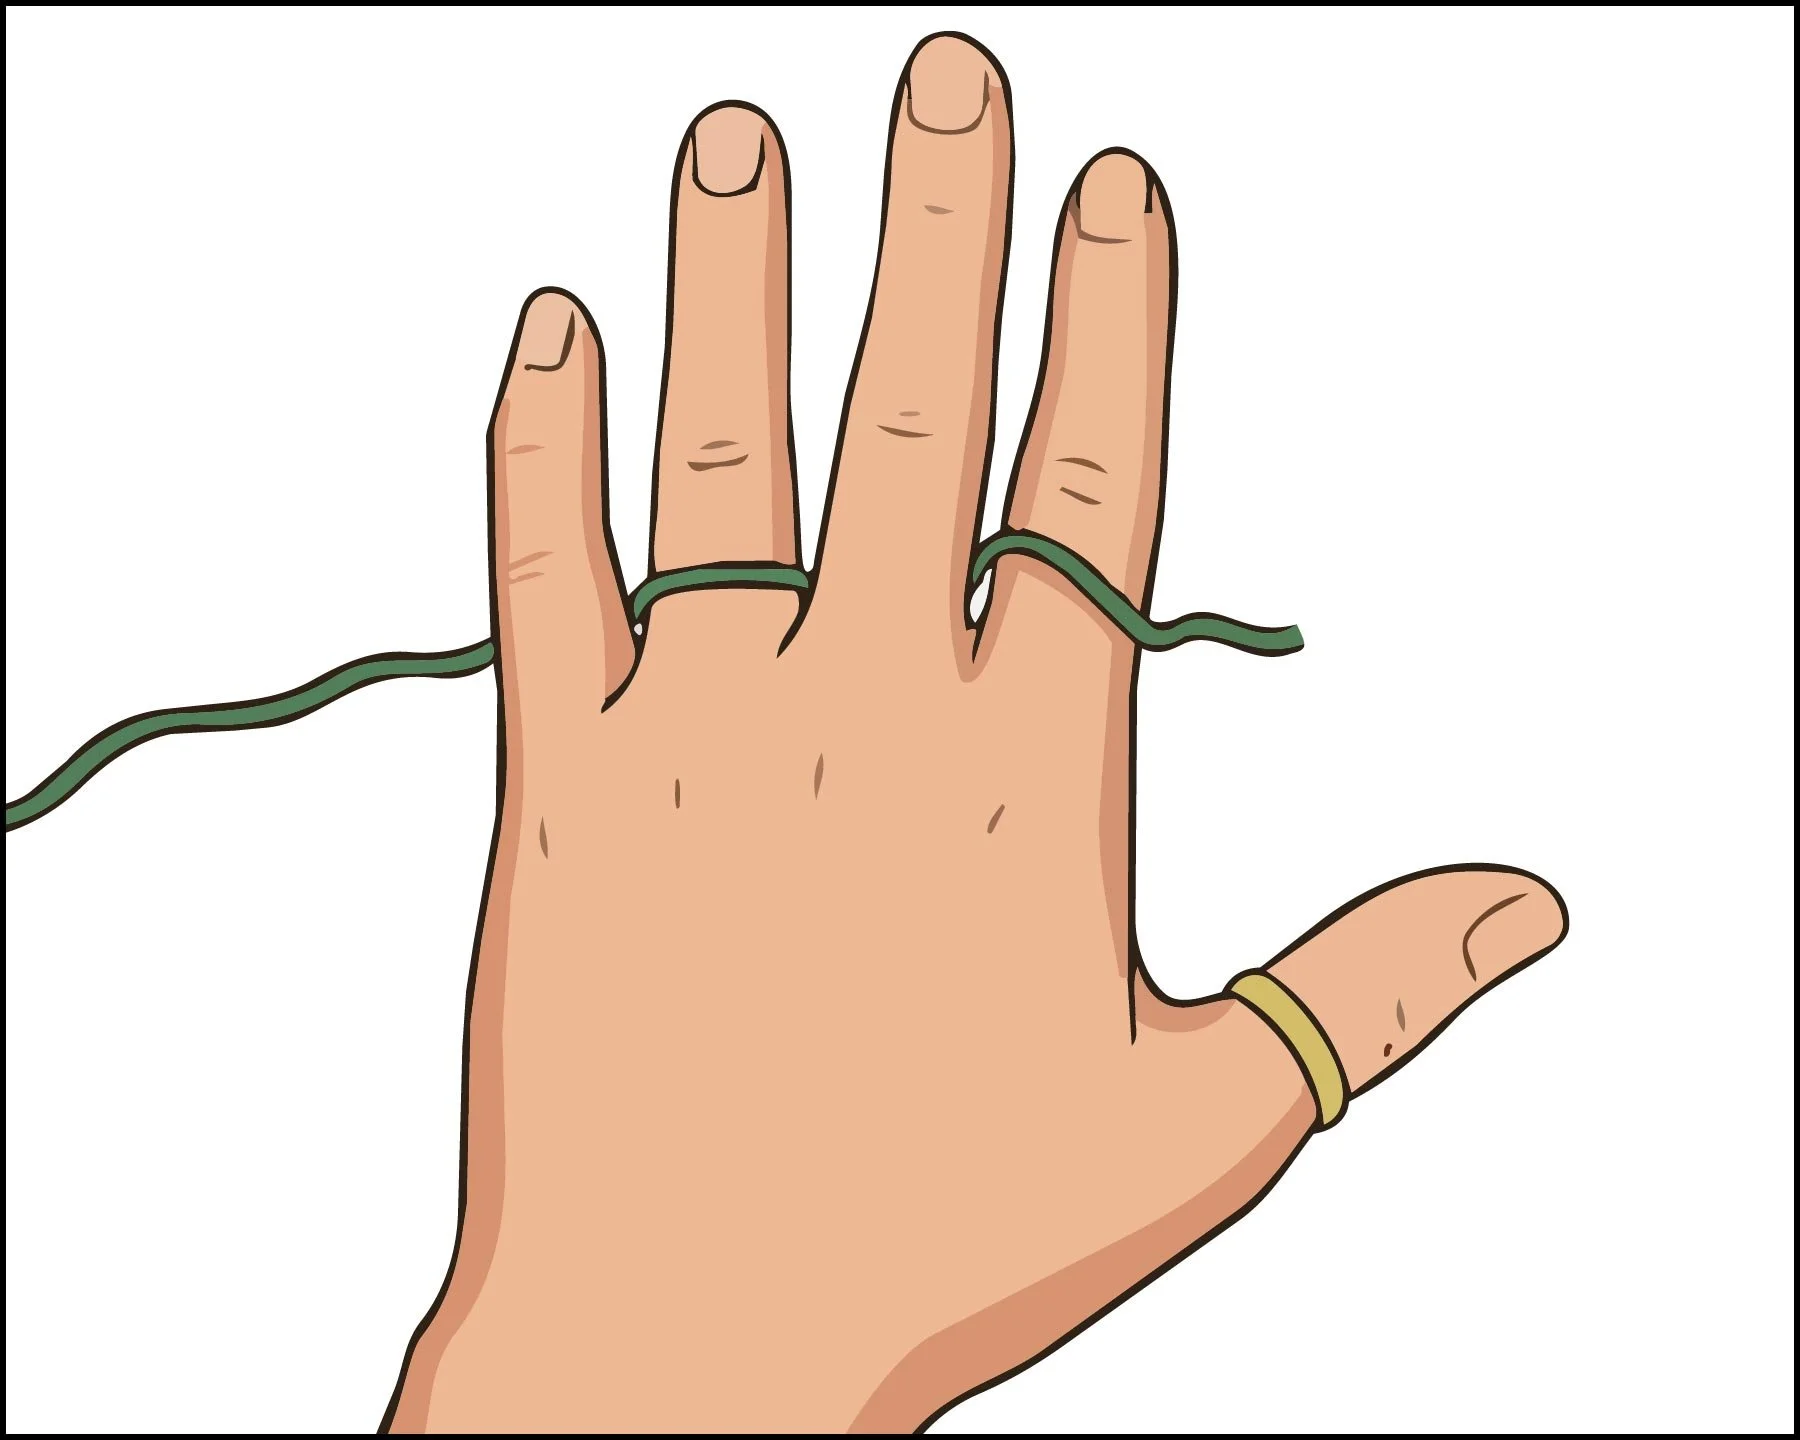
How to hold your hook and yarn
Weave yarn between the fingers of your non-dominant hand. This will help you control your tension as you work.
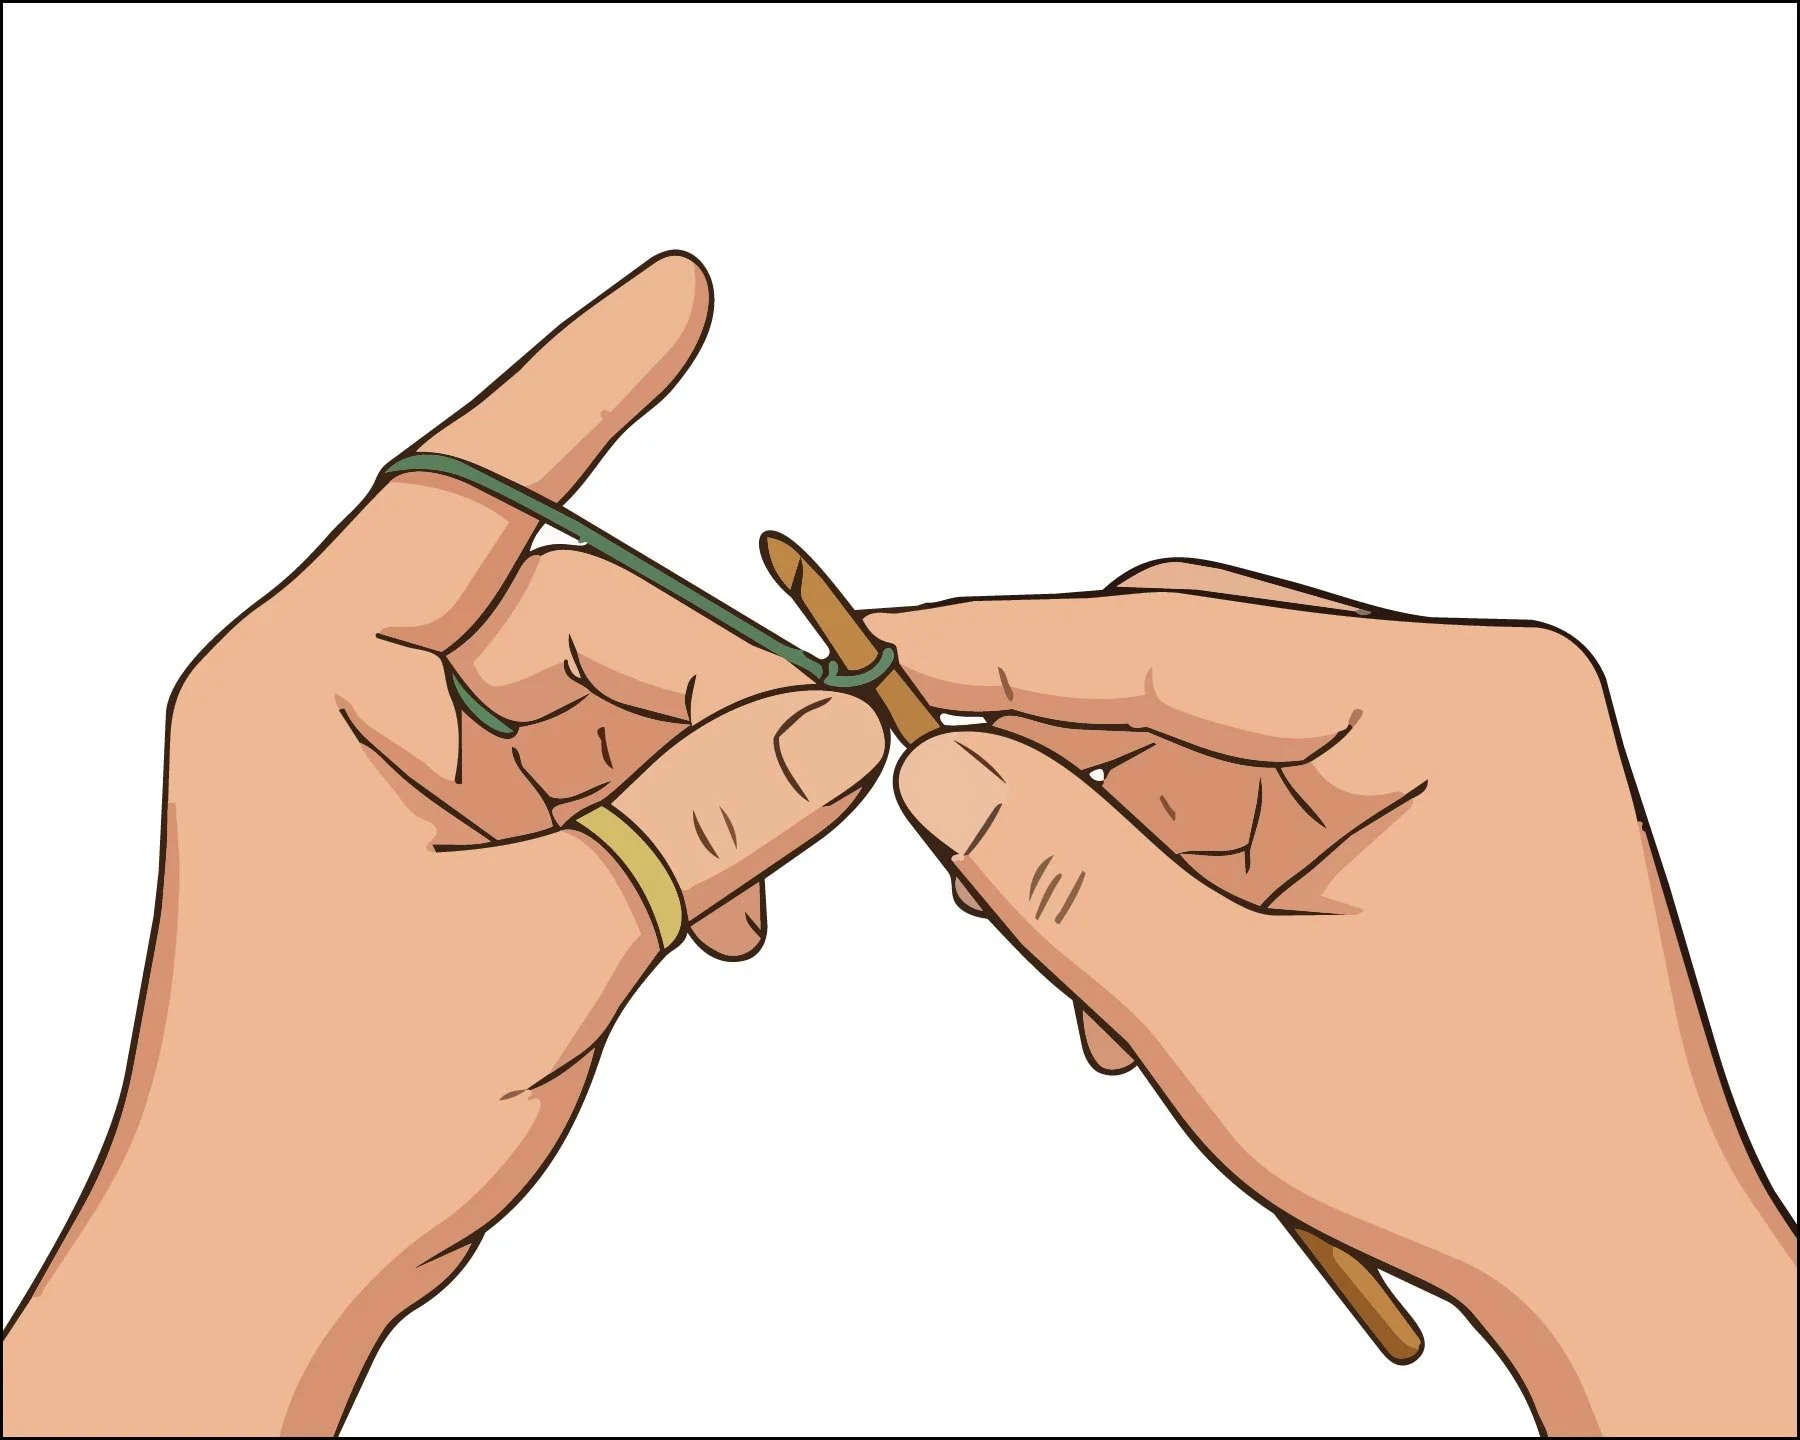
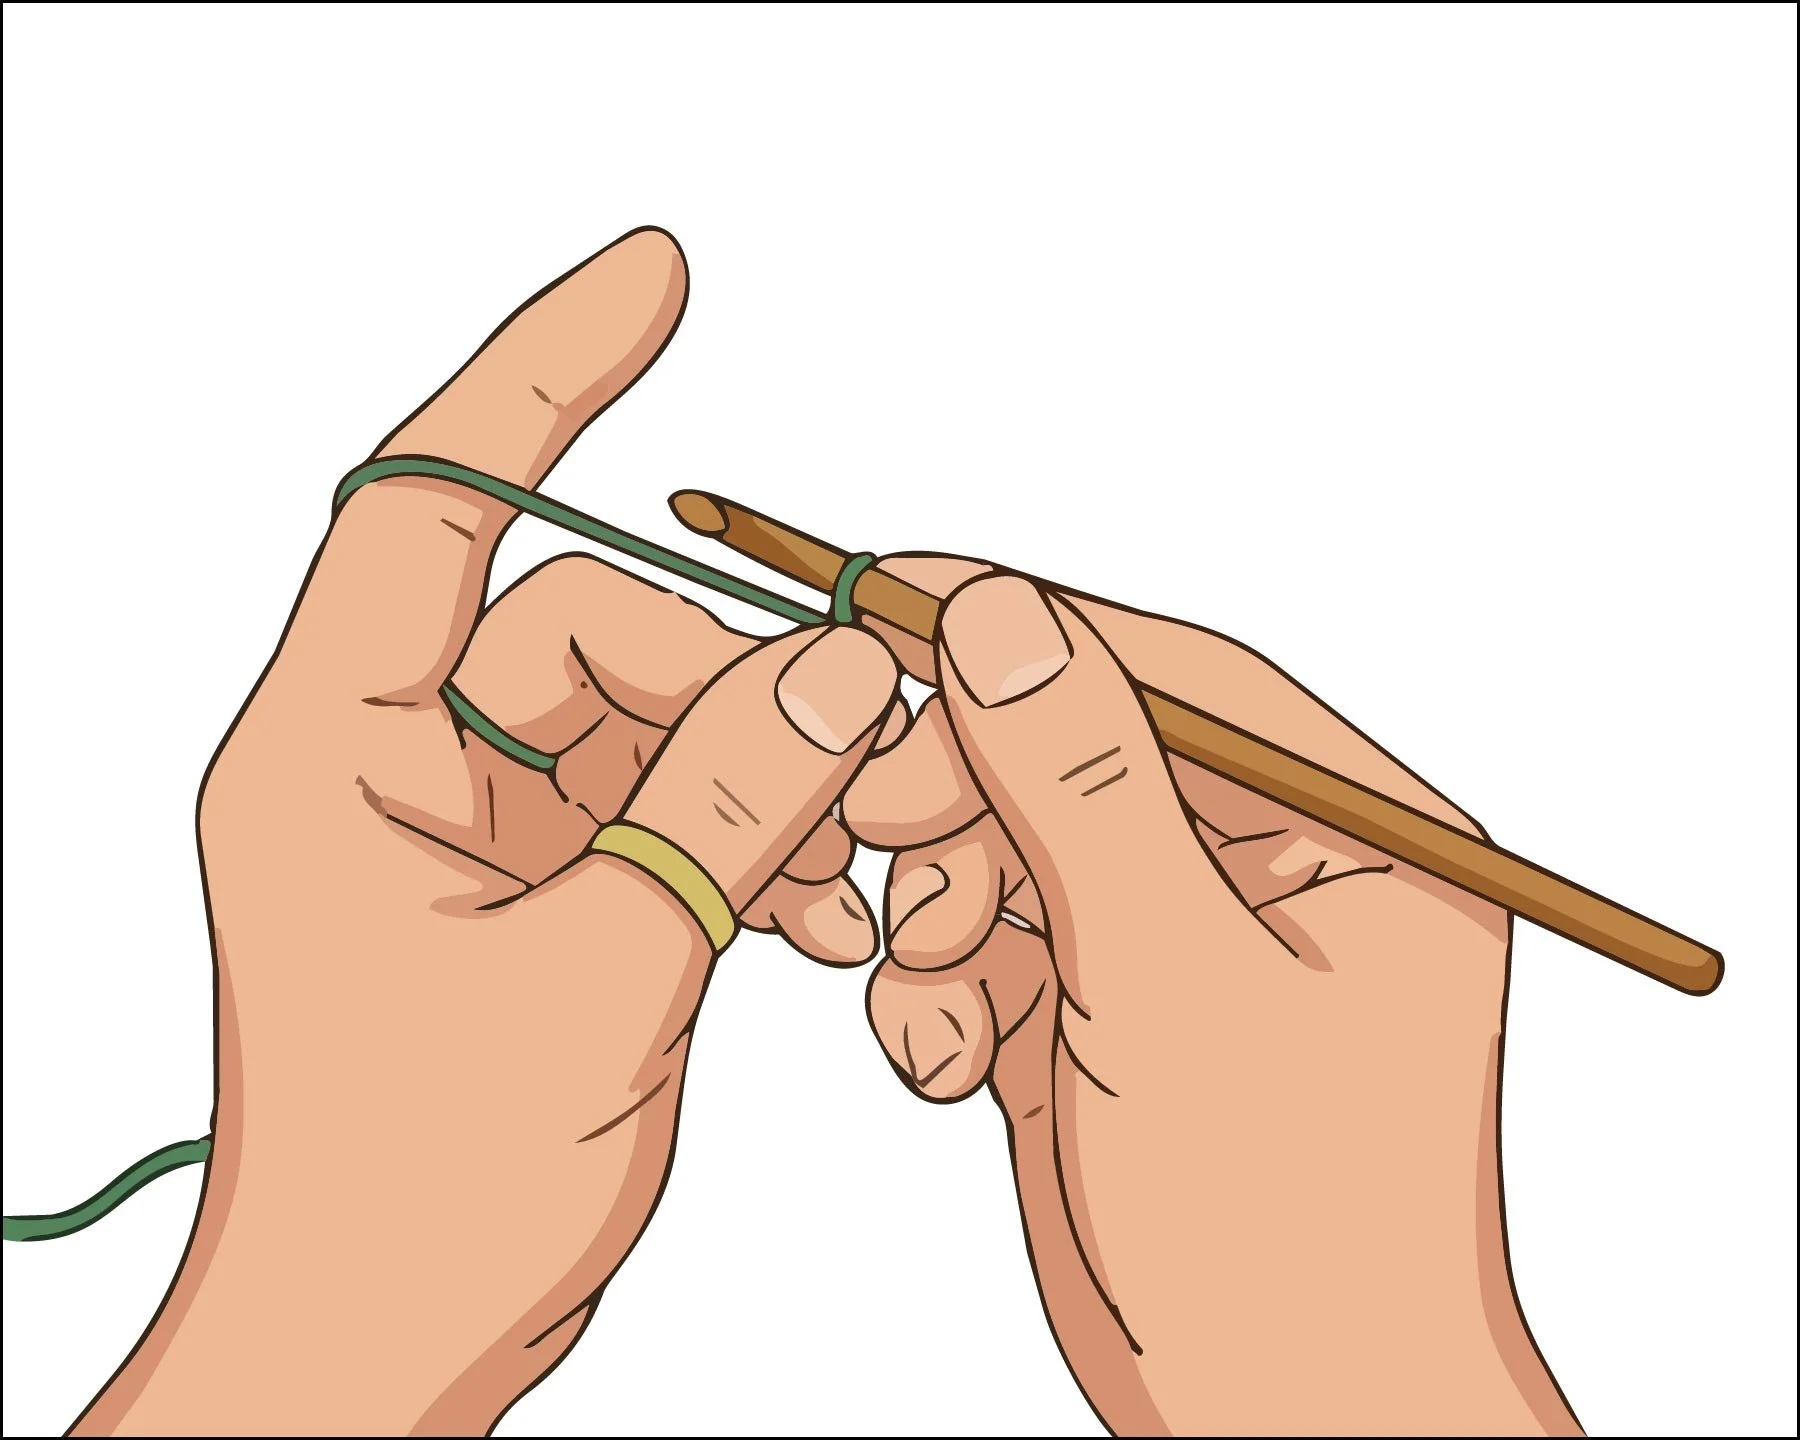
Non-Dominant Hand: Use two fingers, normally thumb with middle or index finger, to pinch just below the loop on your hook to hold your work in progress (WIP) steady. As you work adjust your pinch to keep up with your current stitch.
Dominant Hand: Below are the two most common ways to hold your hook. Test them out to decide what works best for you.
Working in Rows
Rows are working back and forth by adding a new row on top of the prior row. At the end of each row you turn your work and go back the other direction. This results in a different side facing every other row. To begin make a slip knot, then create as many chain stitches needed to complete the foundation row for your row 1 to be worked across.
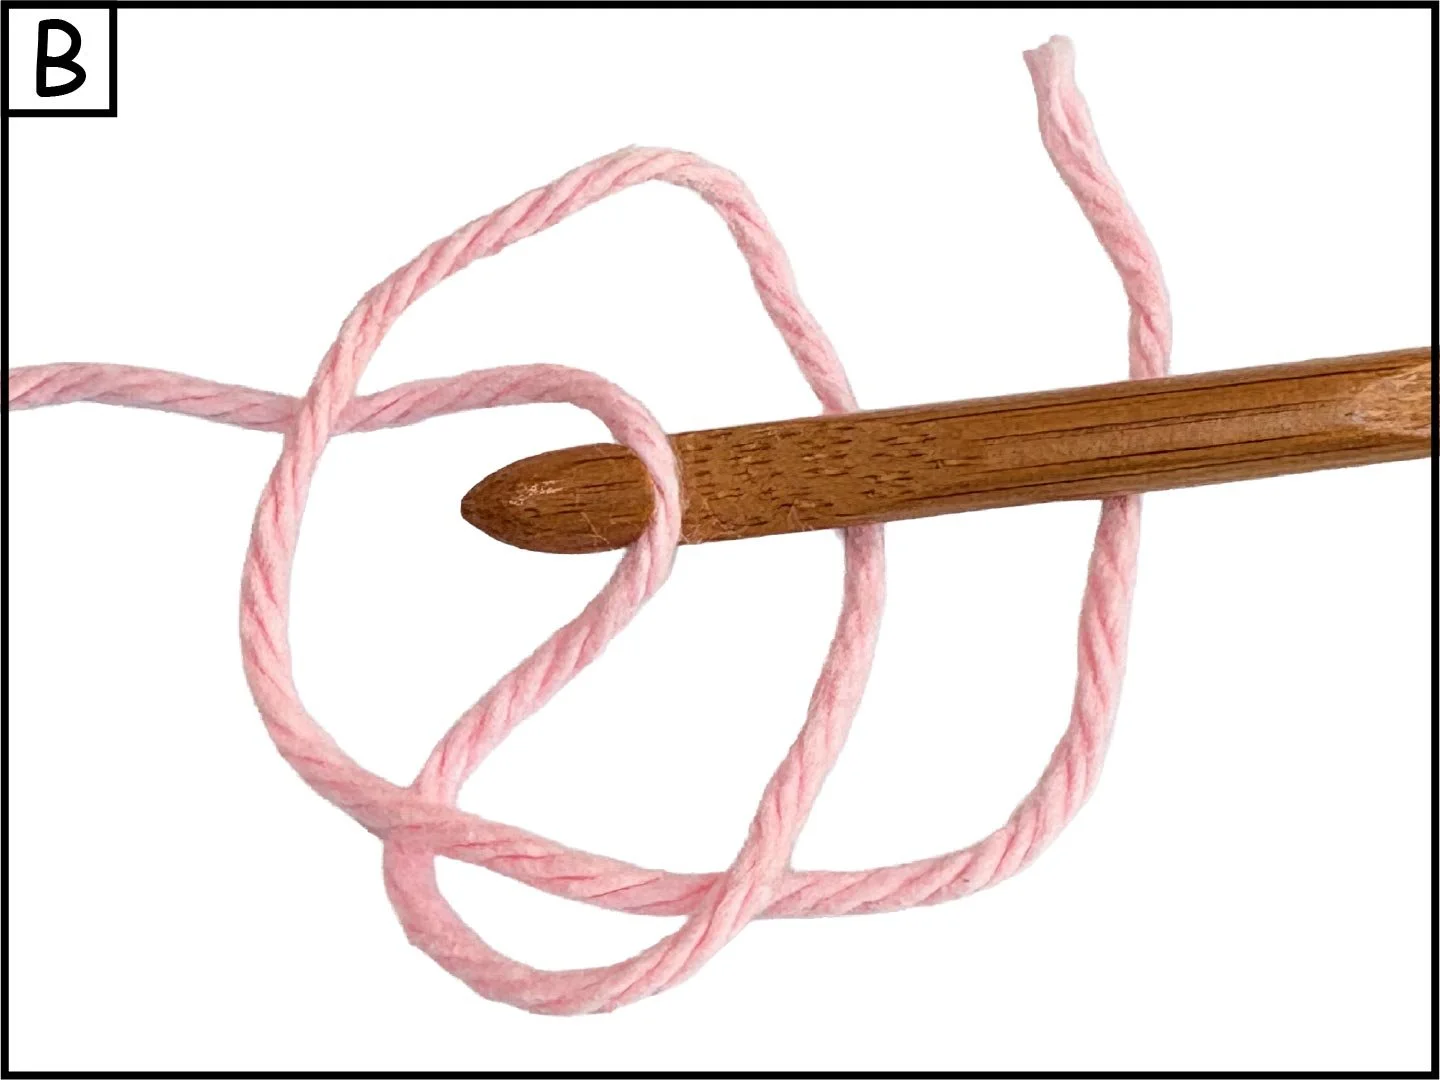
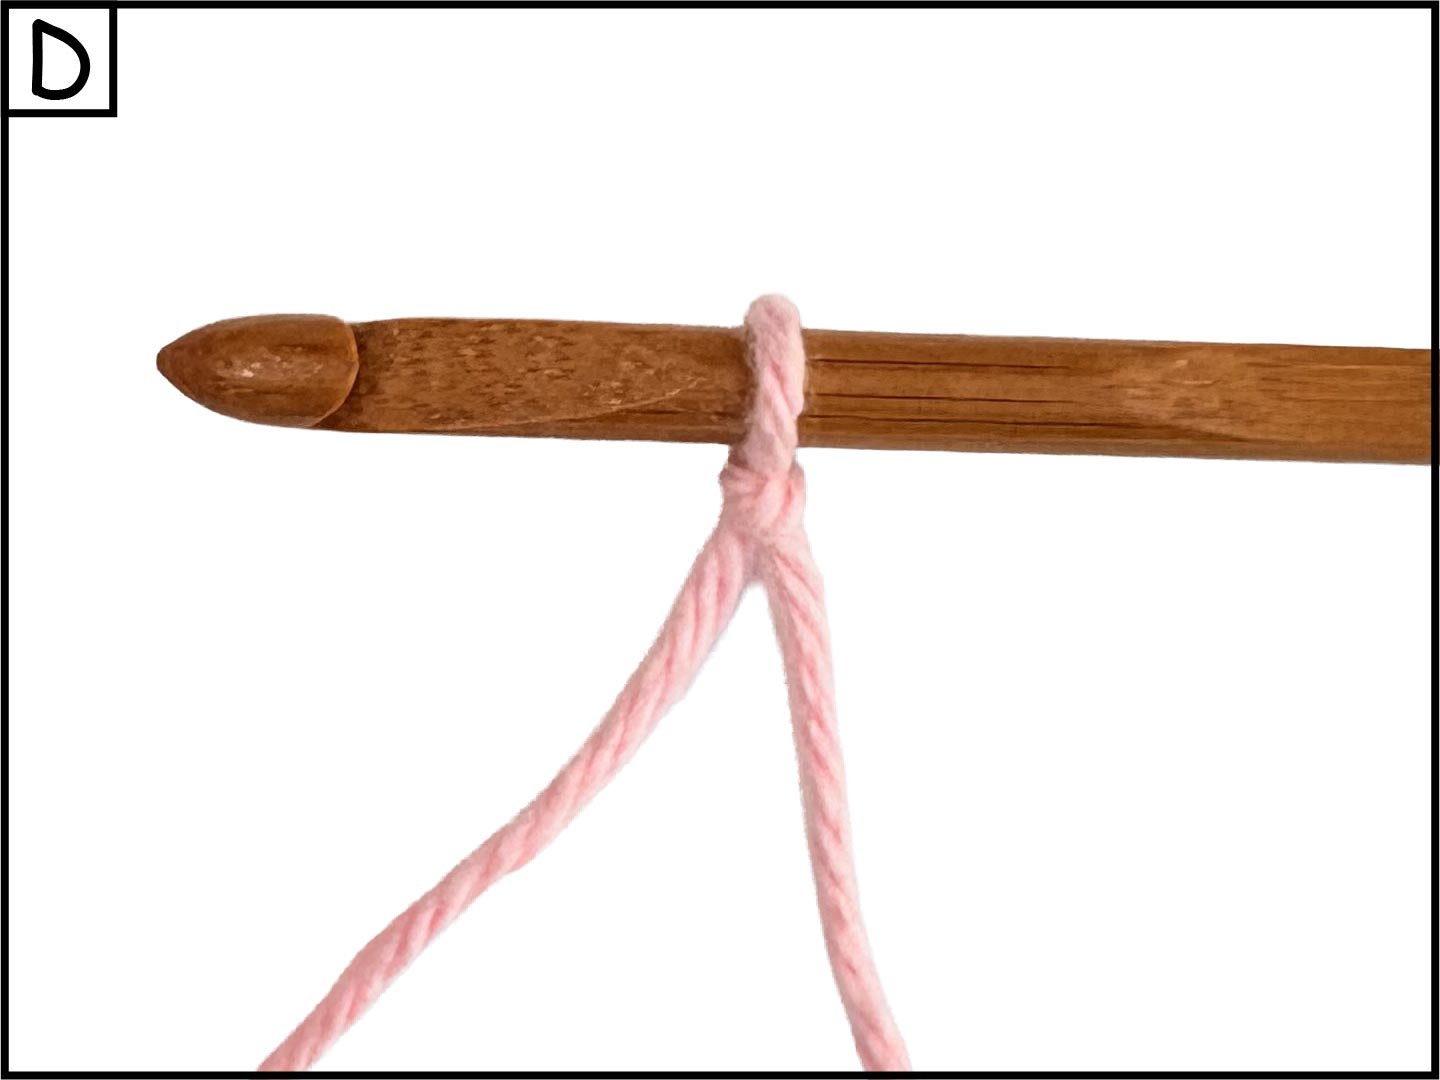
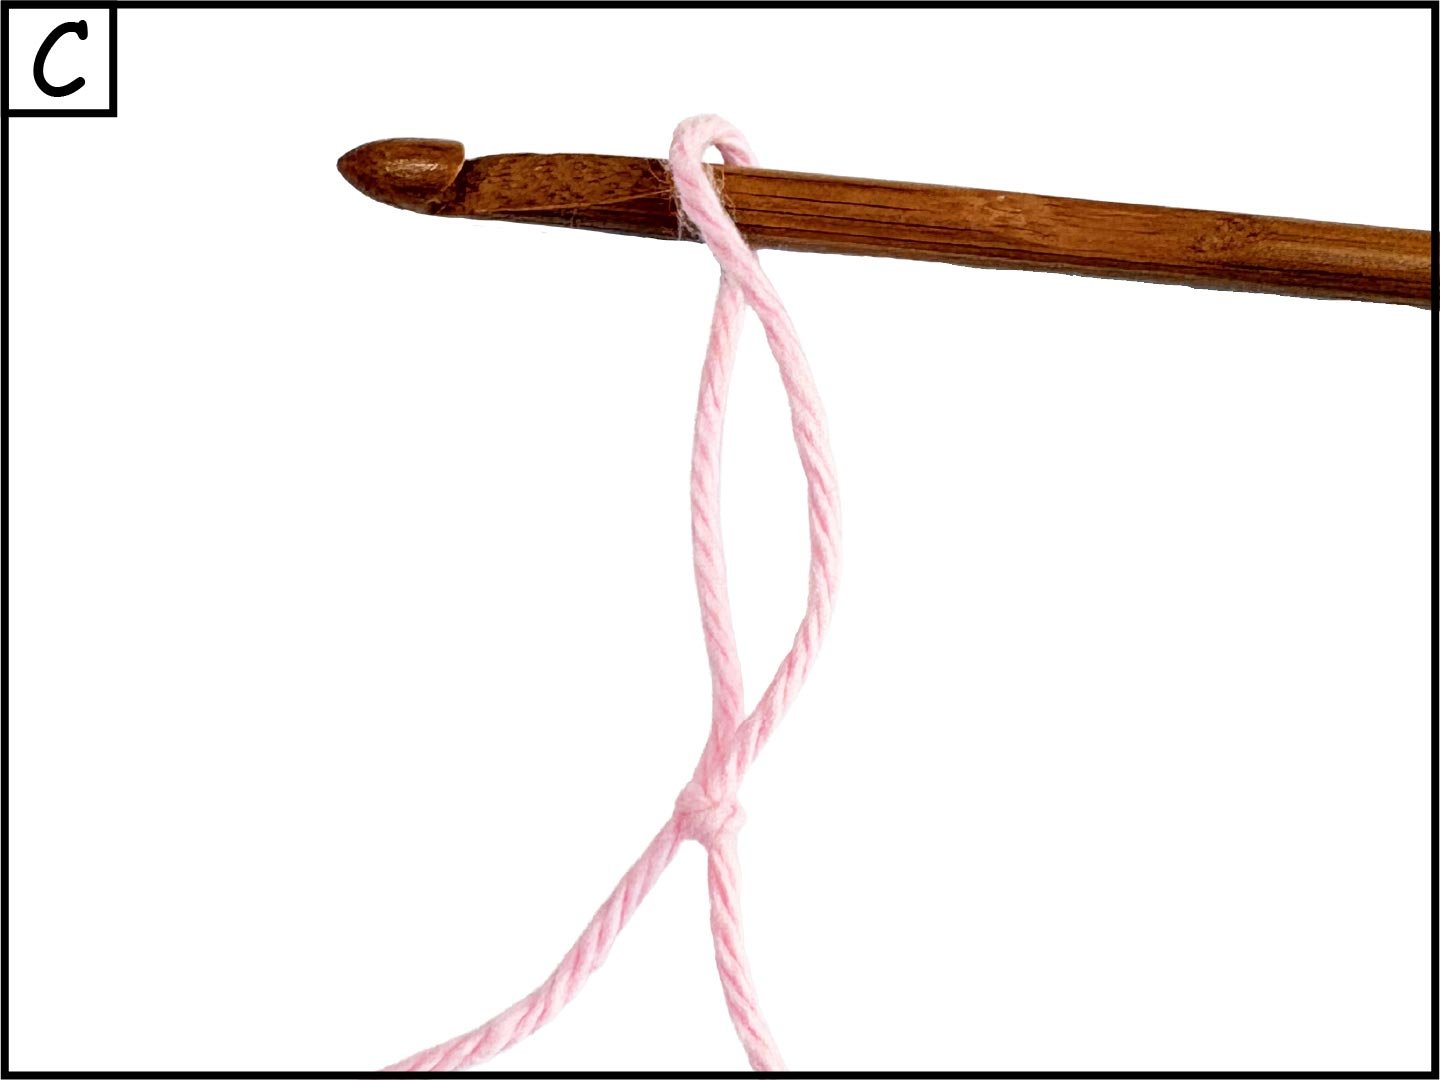
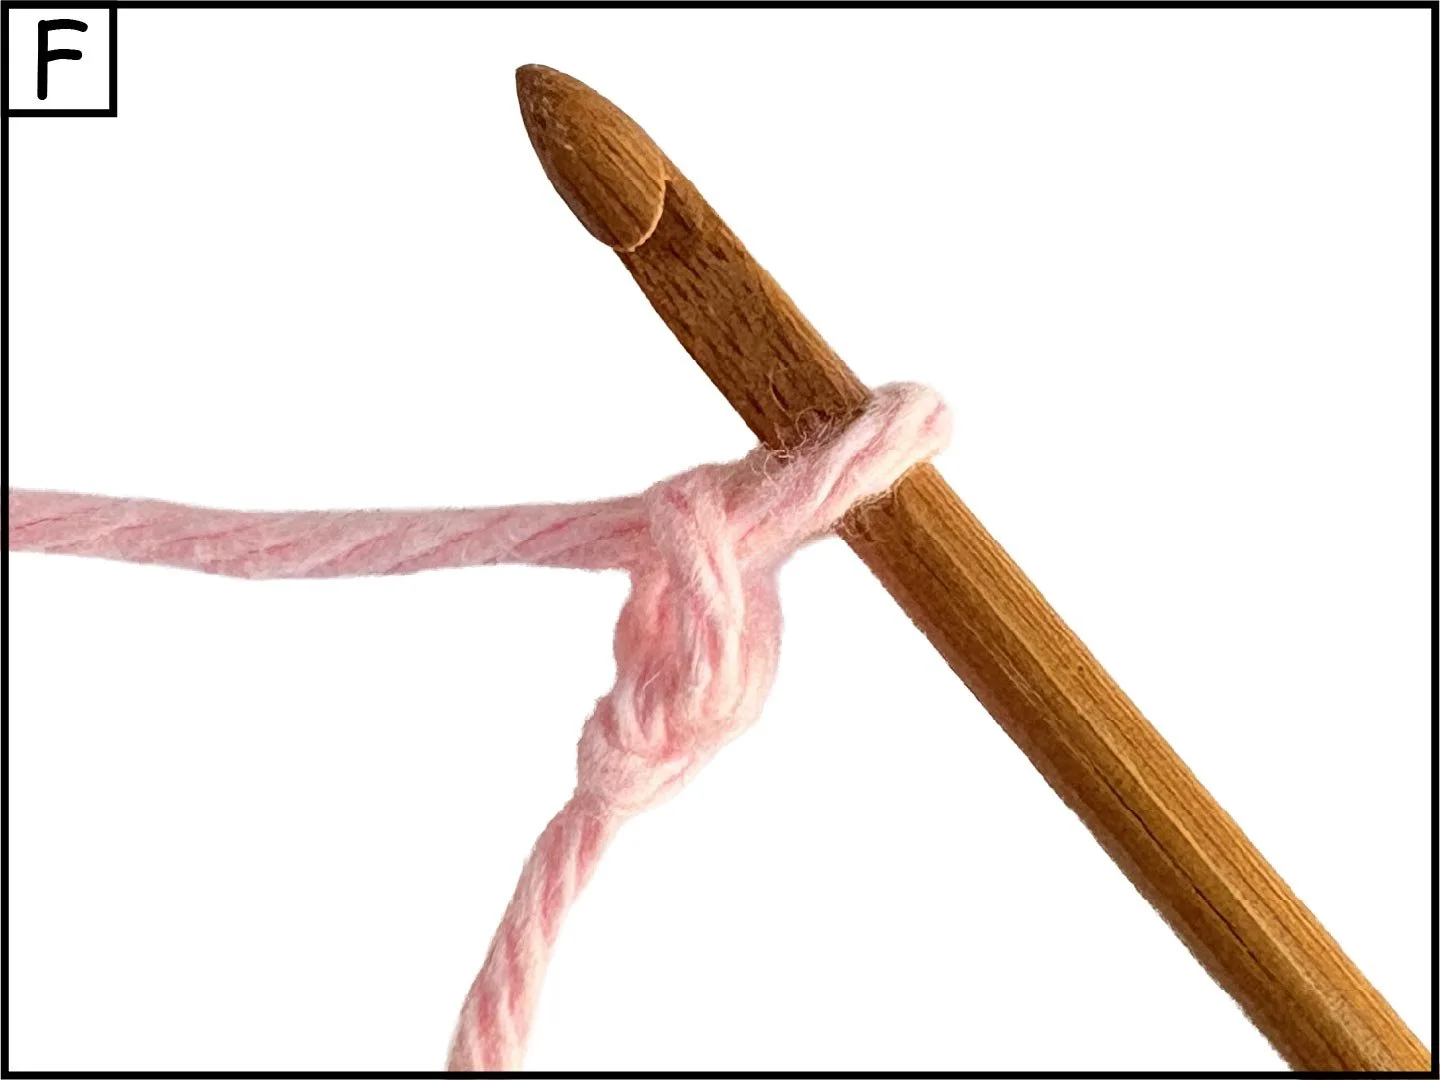
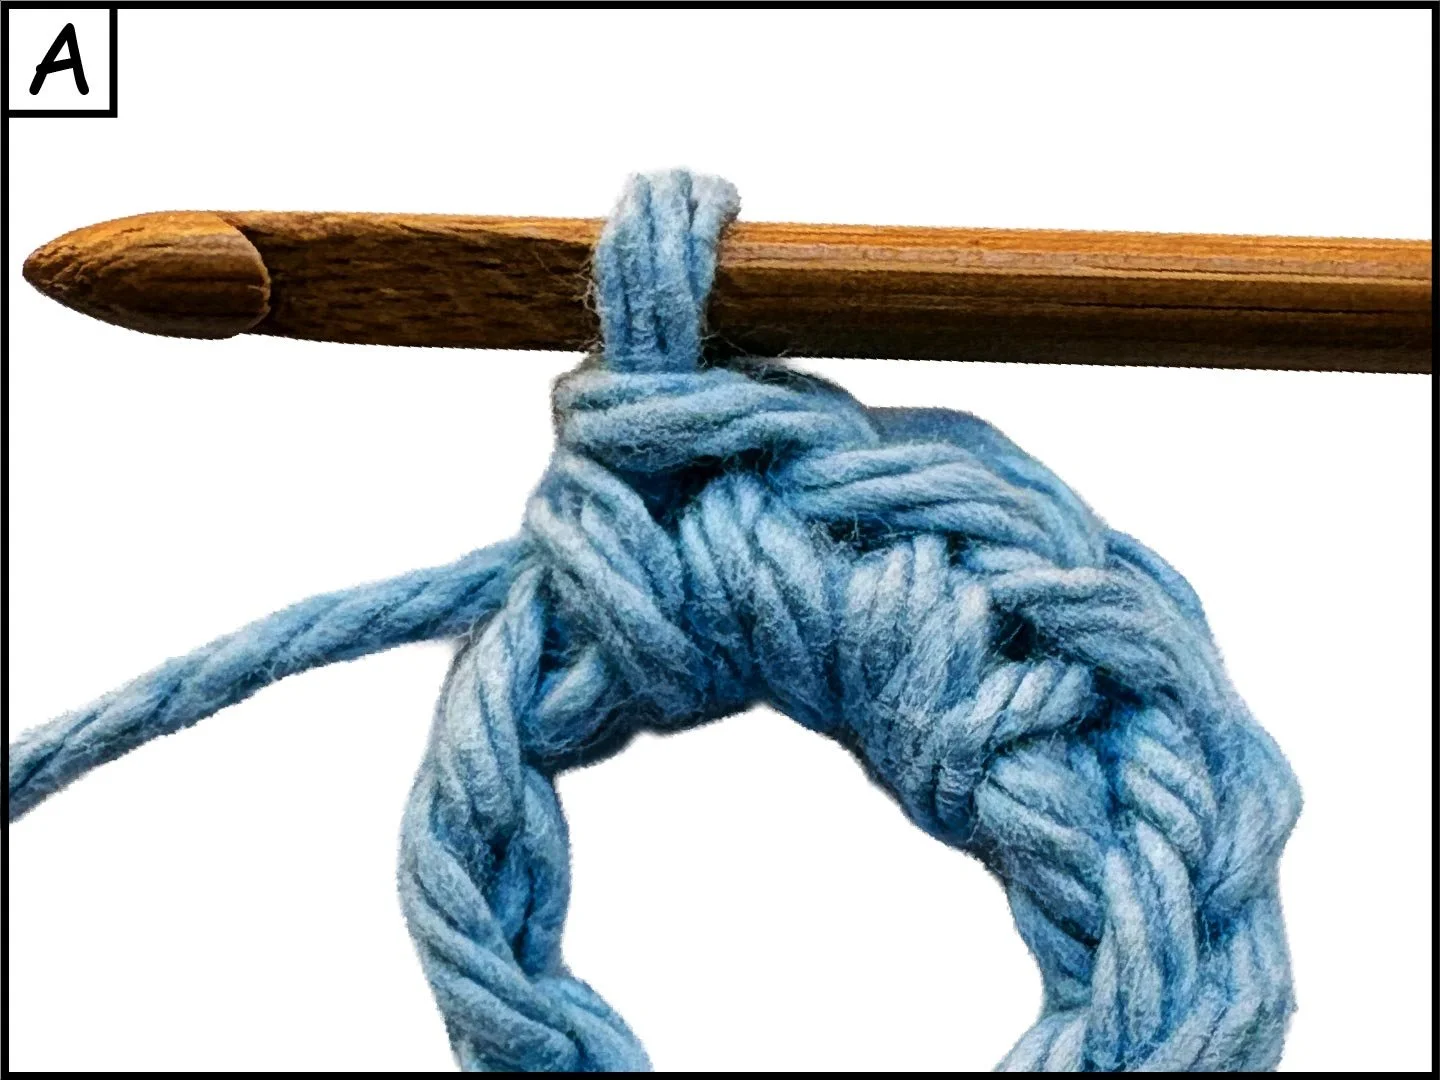
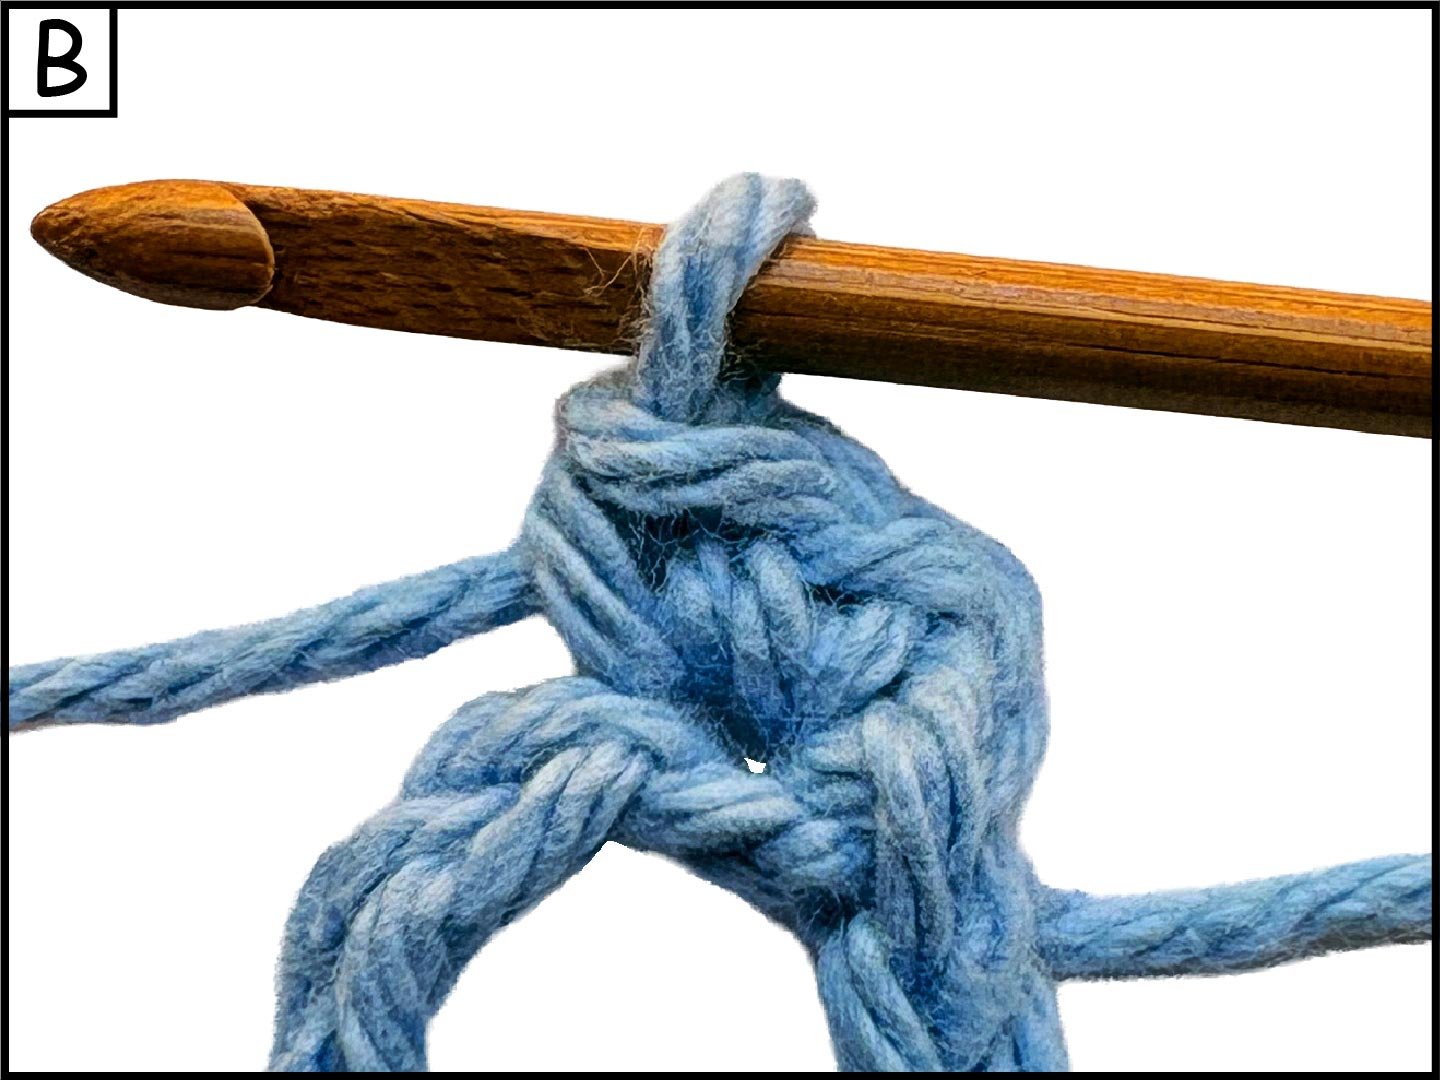
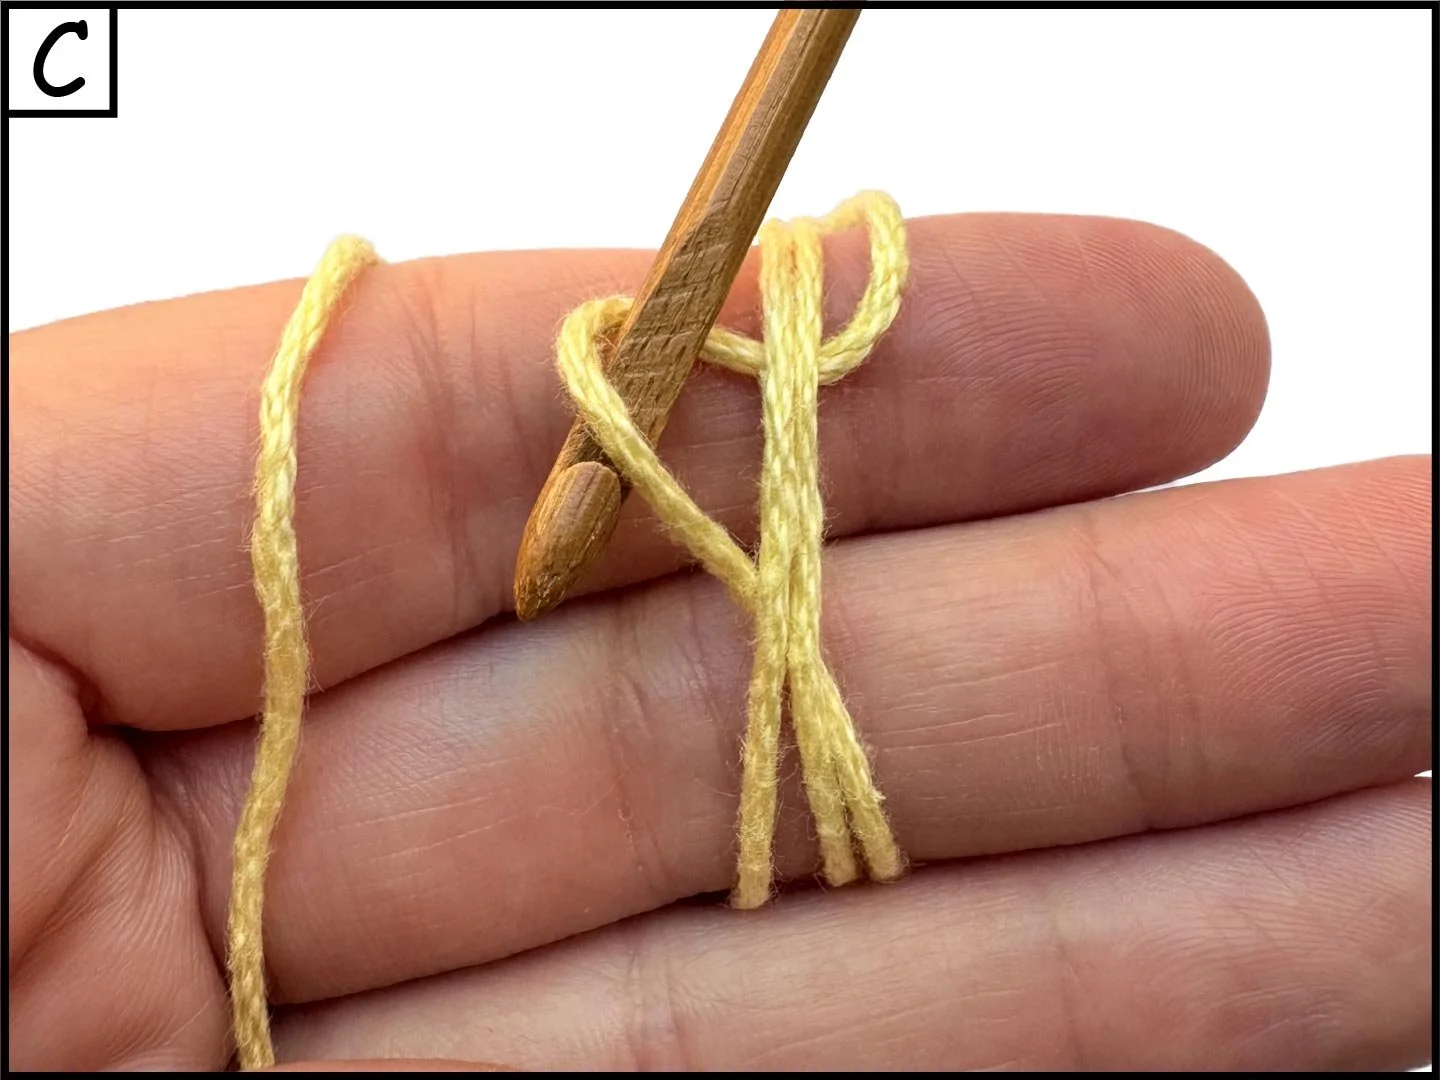
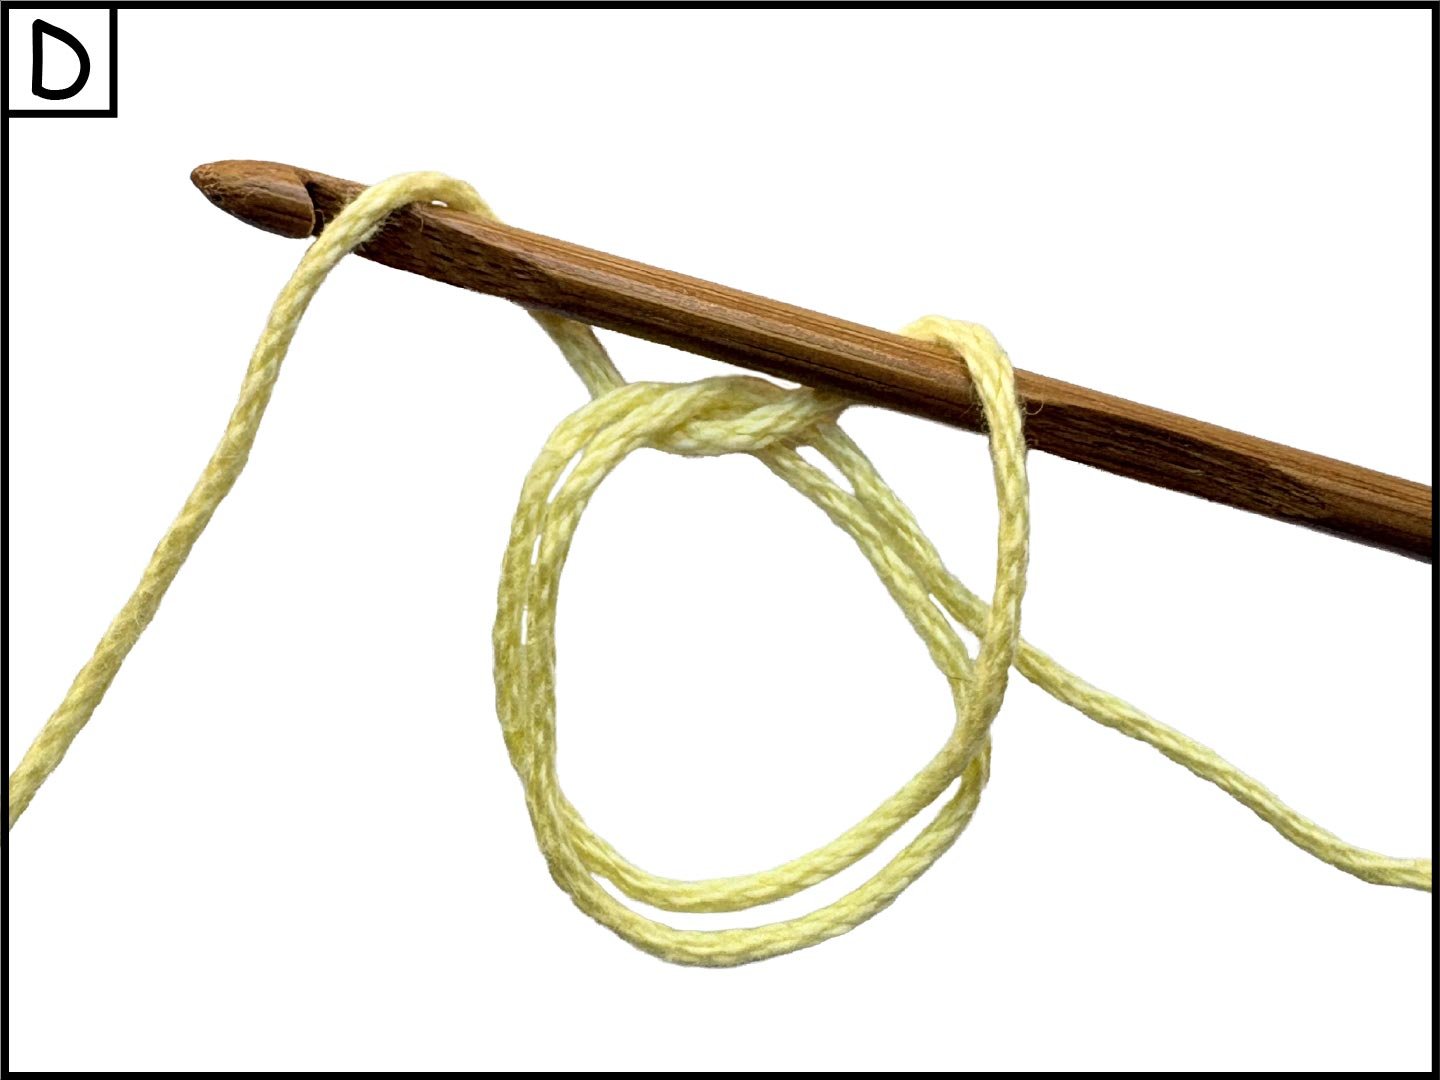
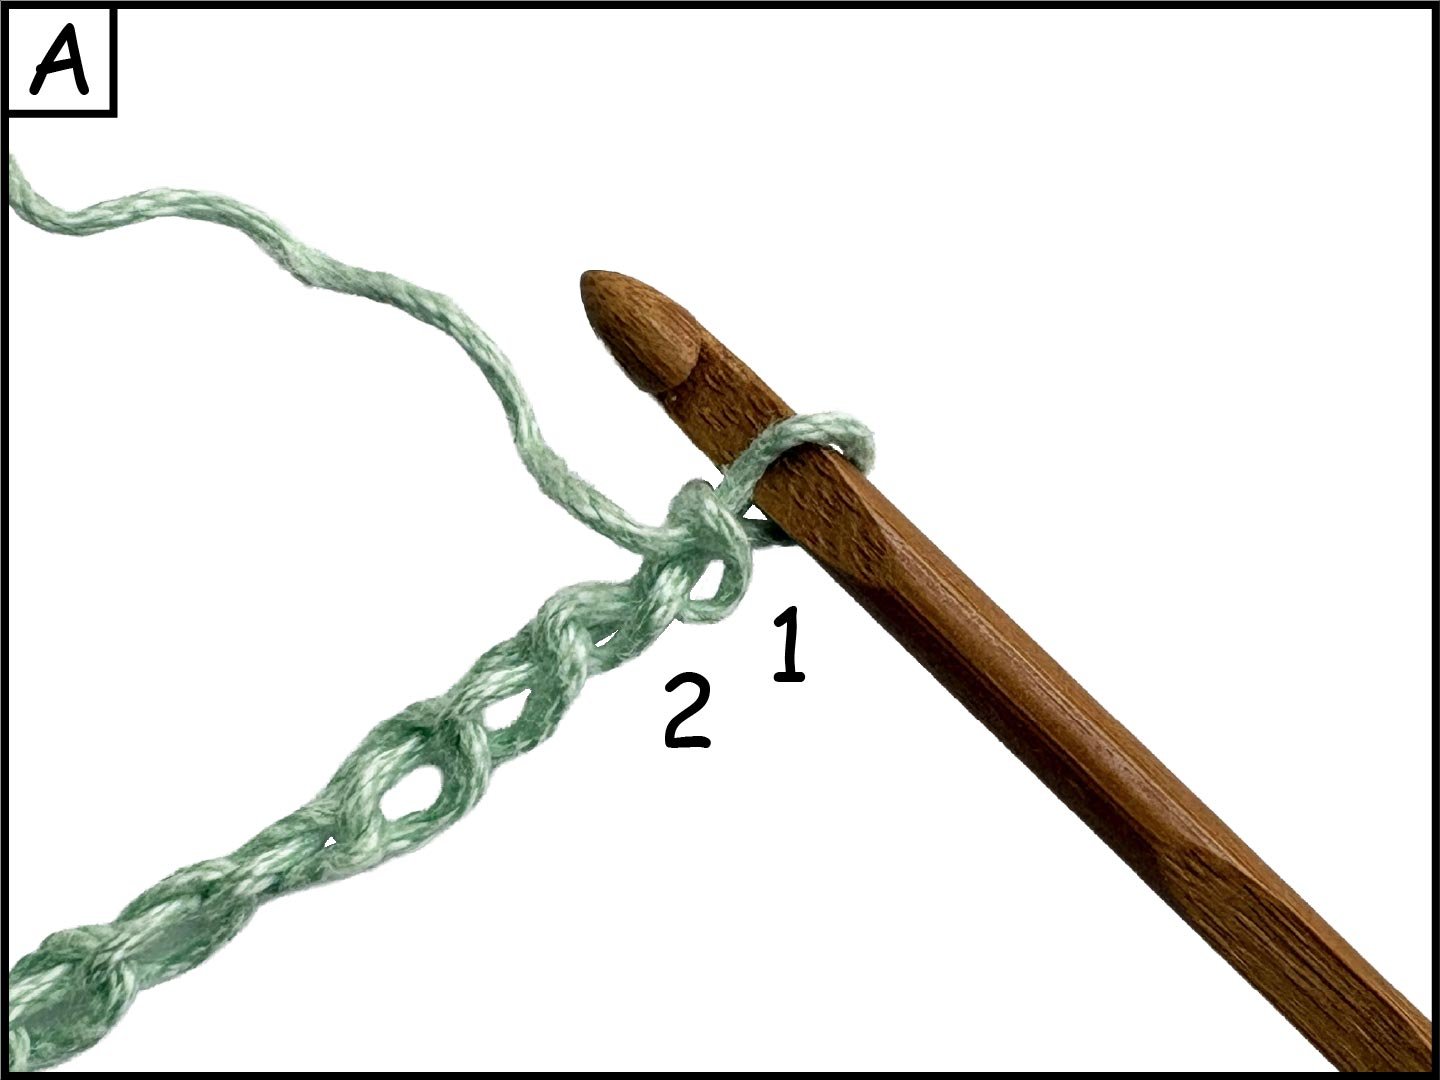
Slip Knot & Chain Stitch (ch)
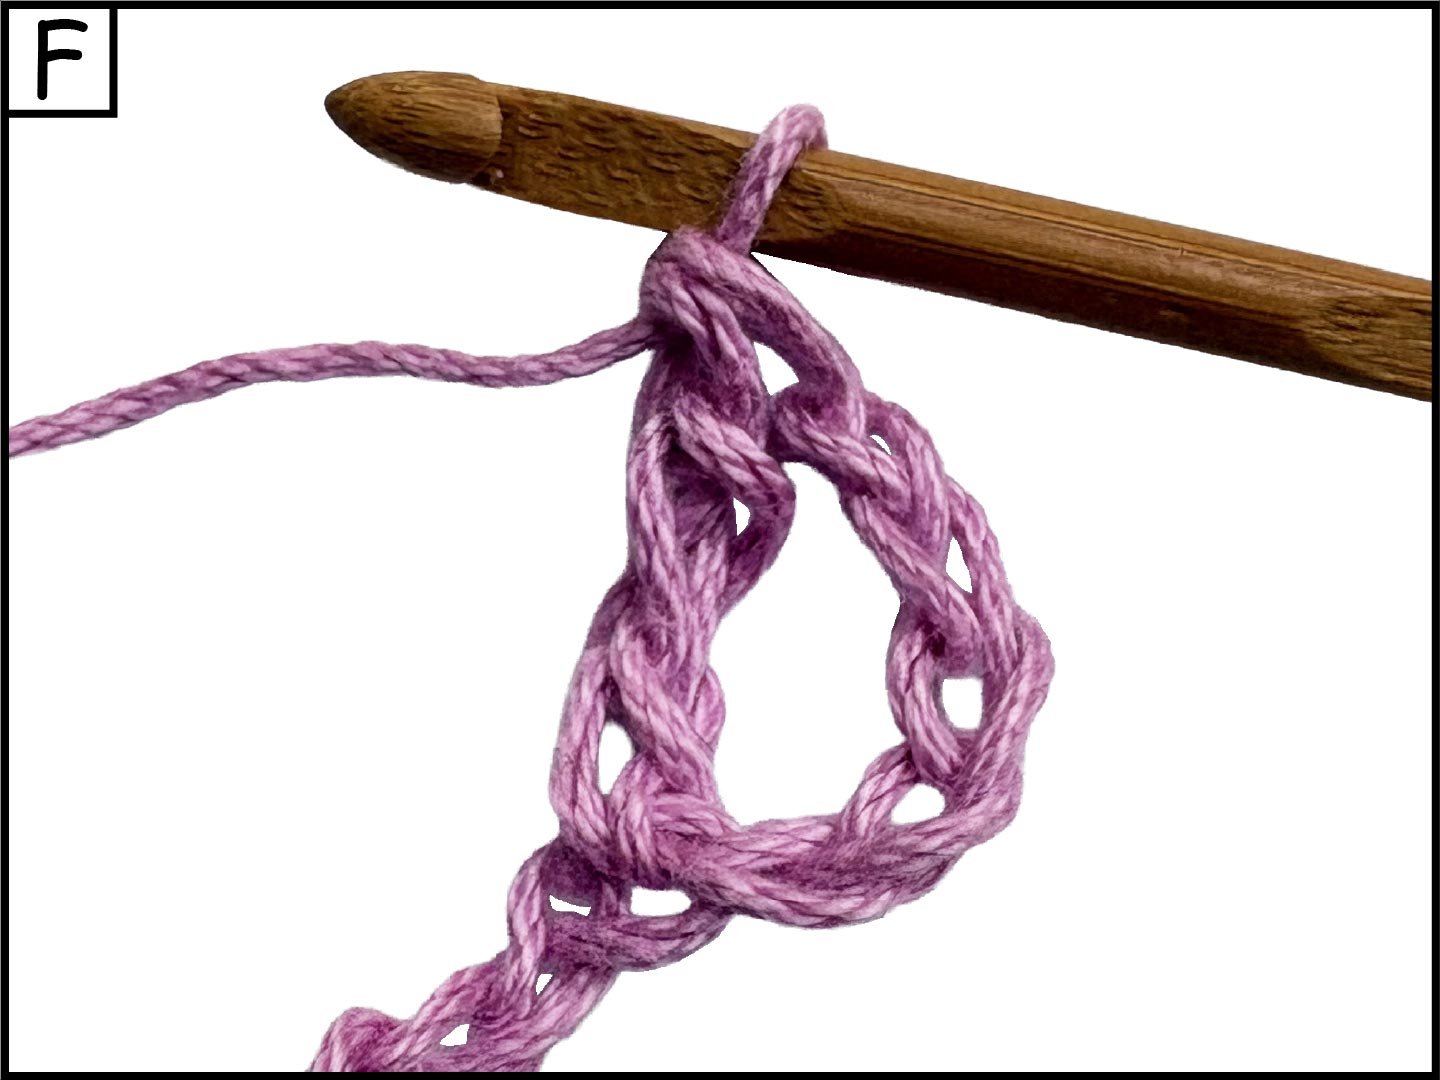
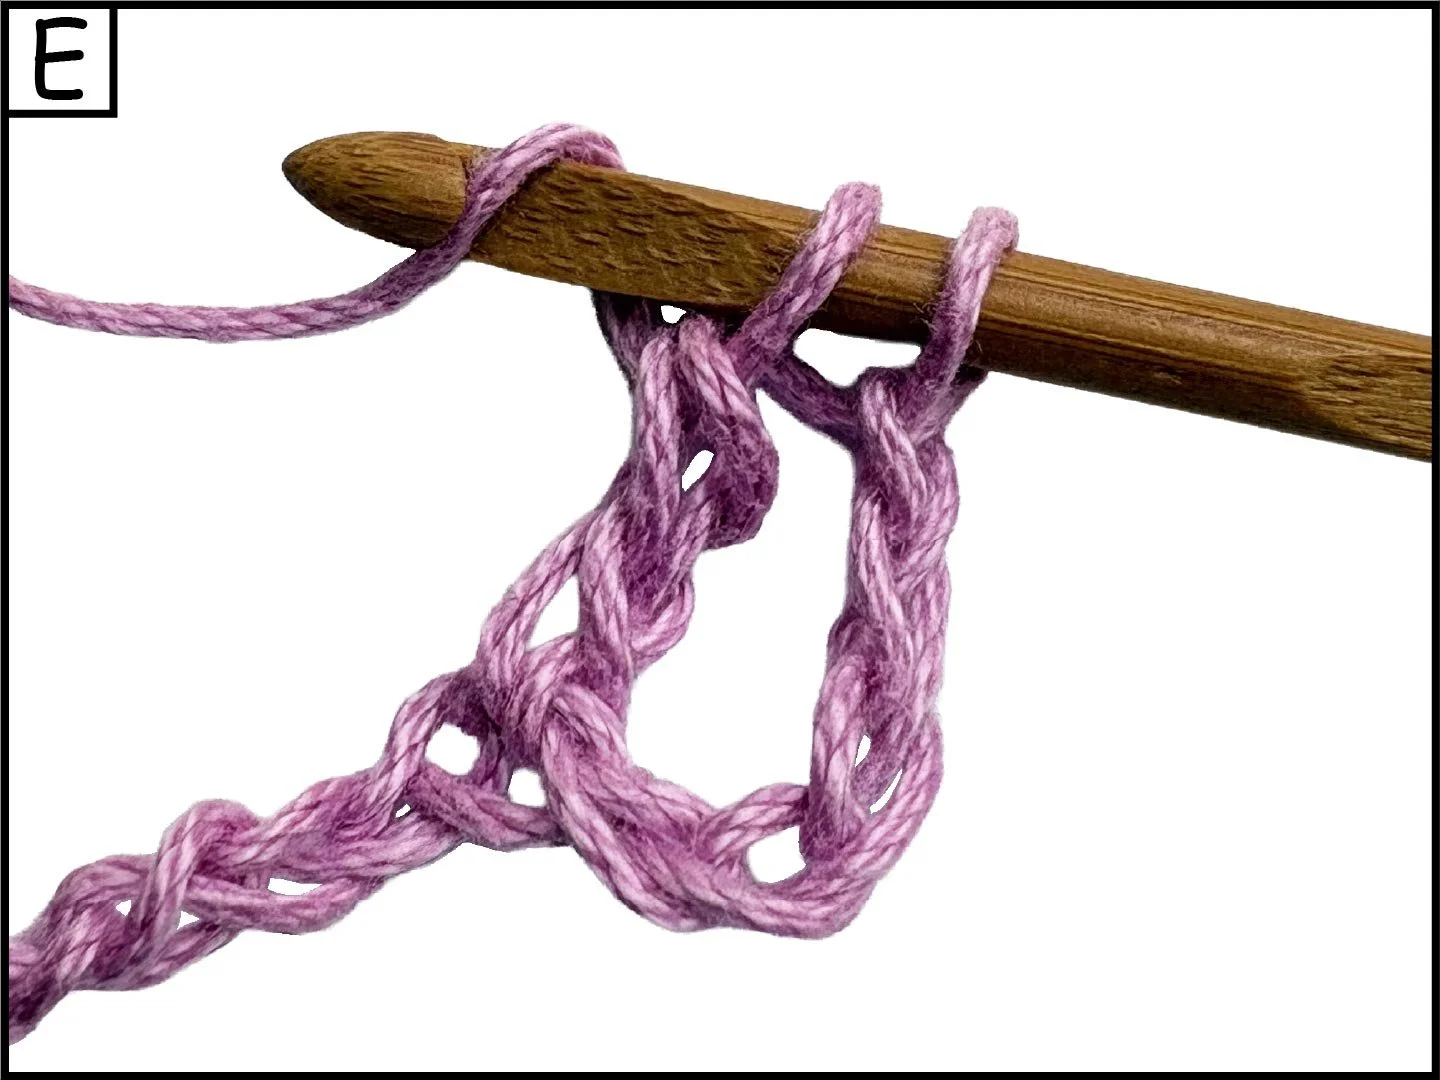
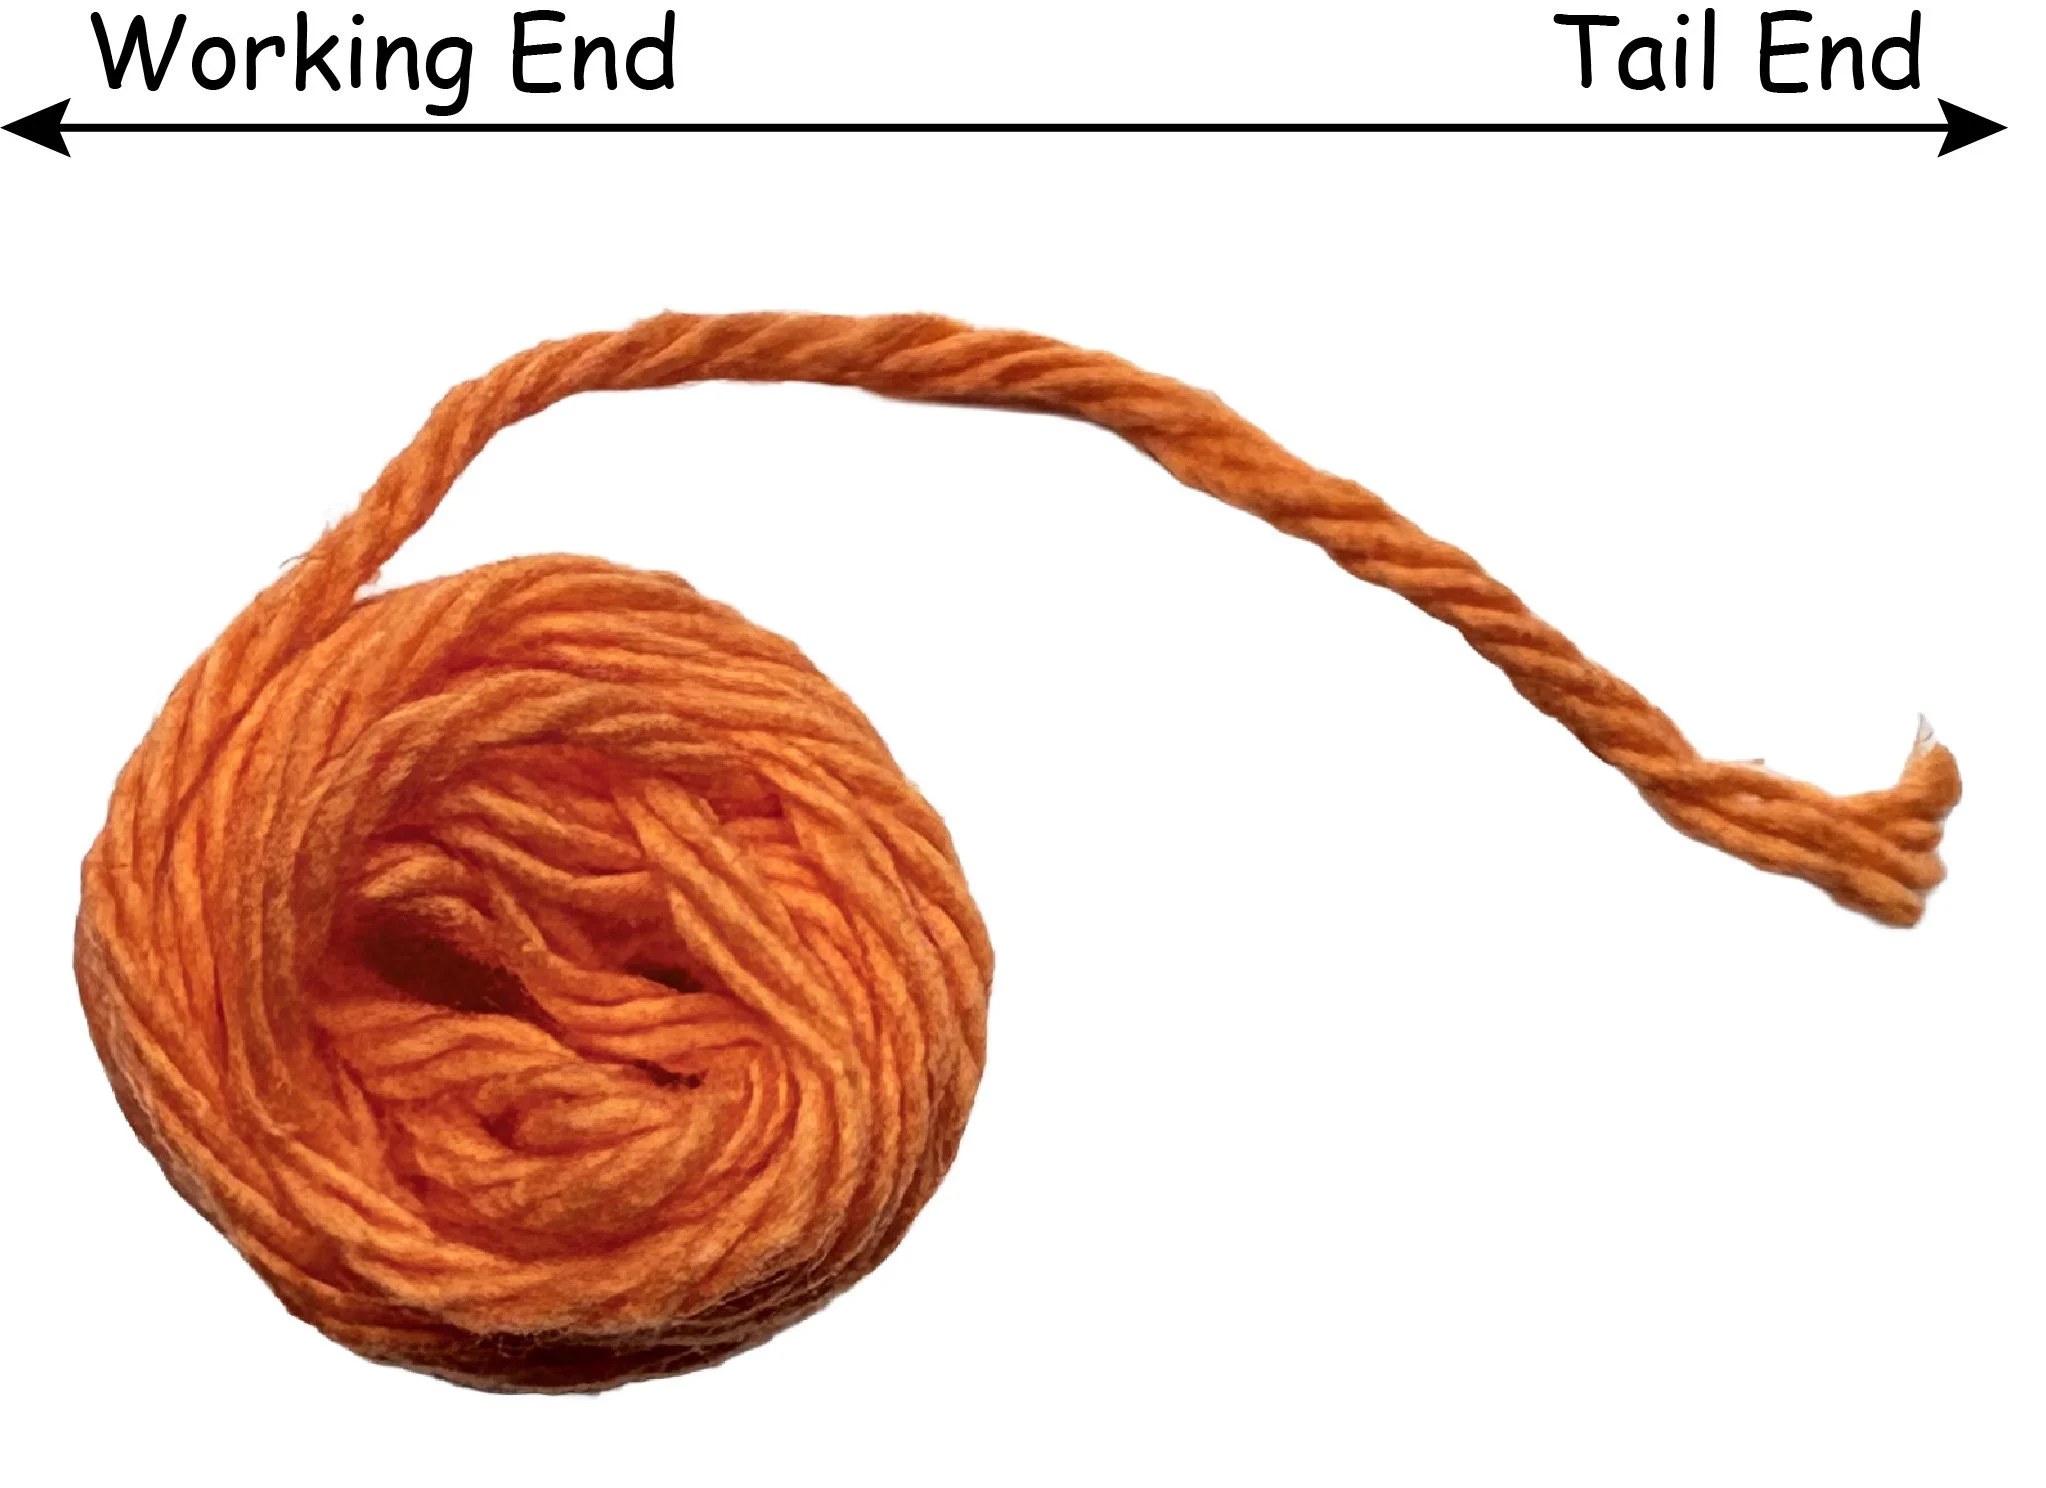
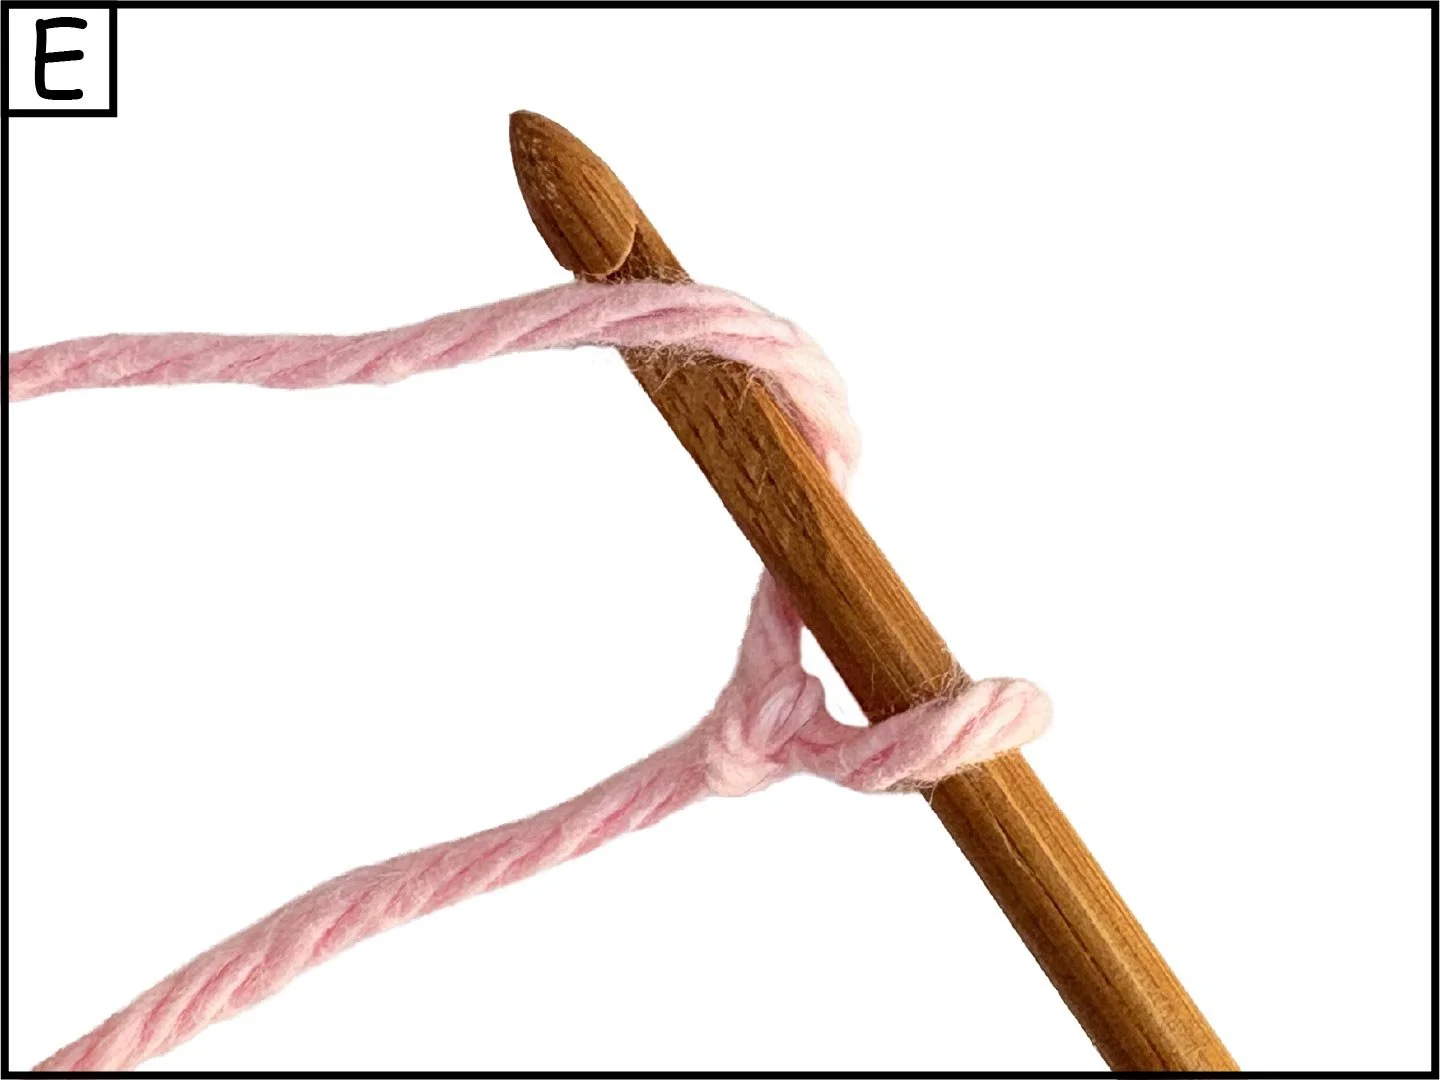
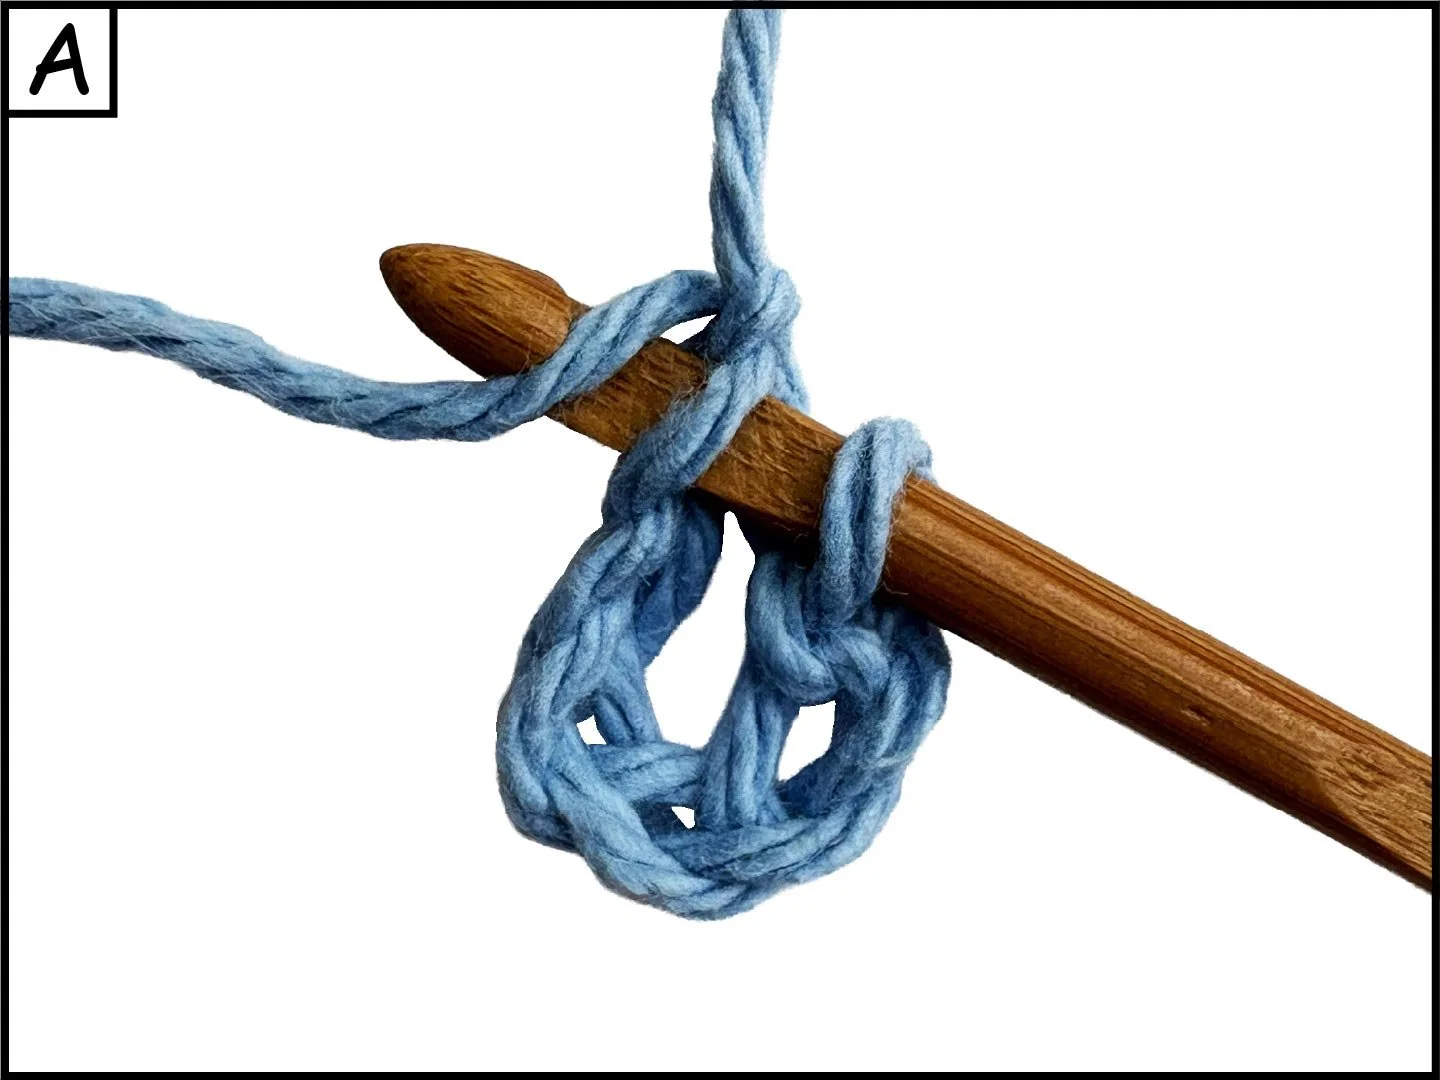
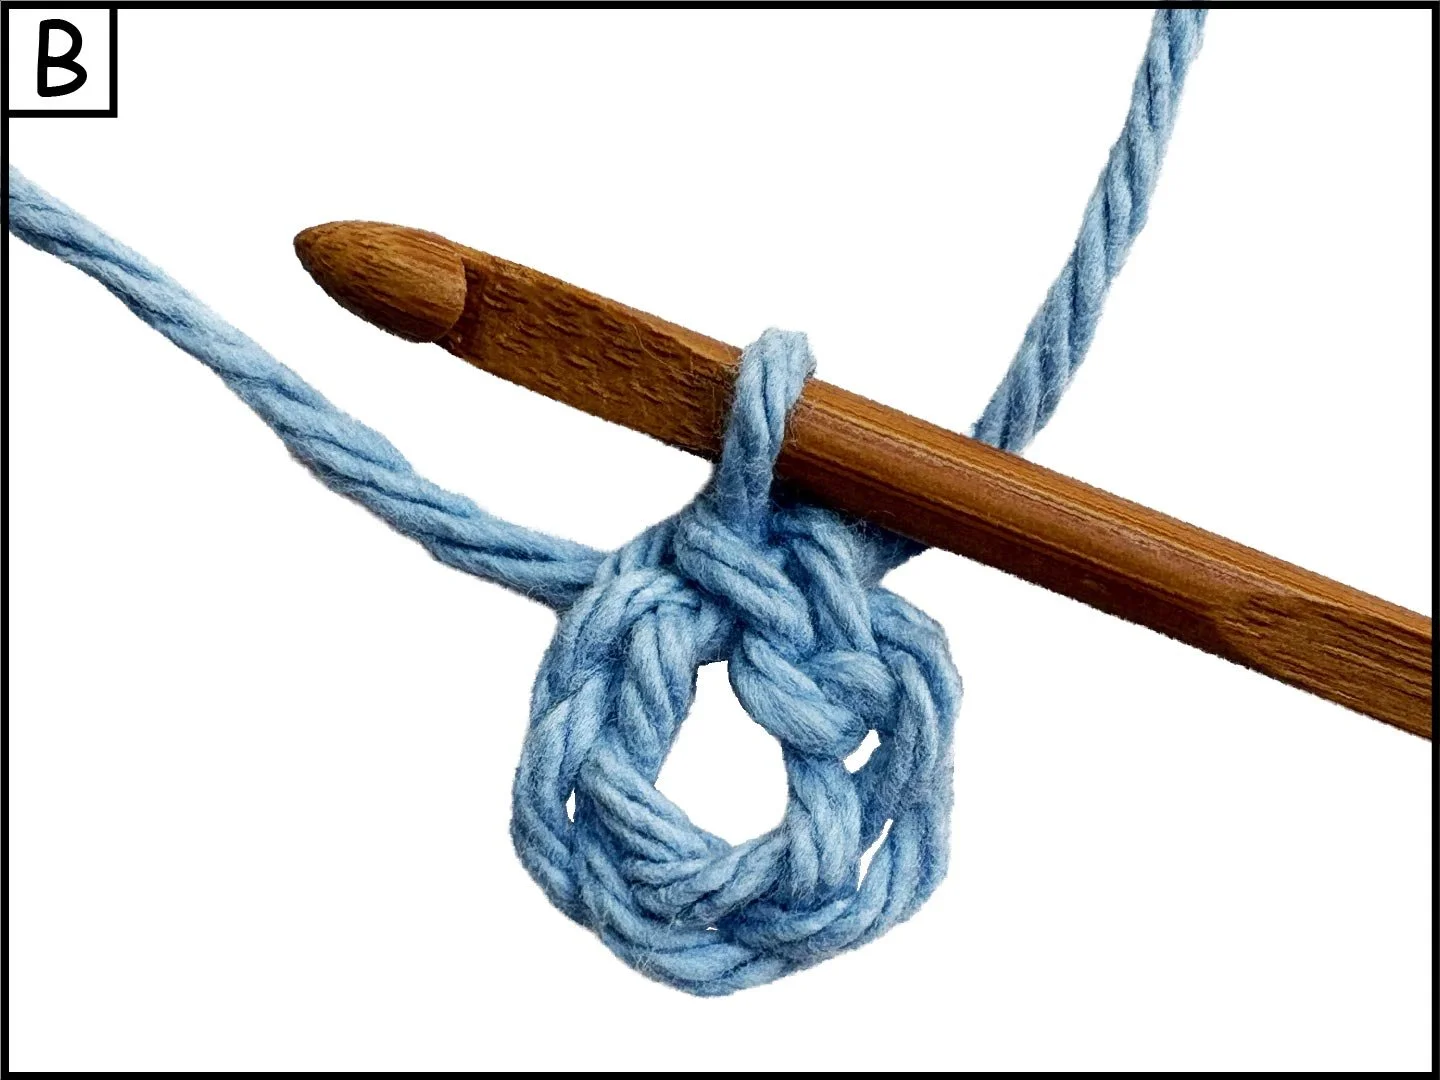
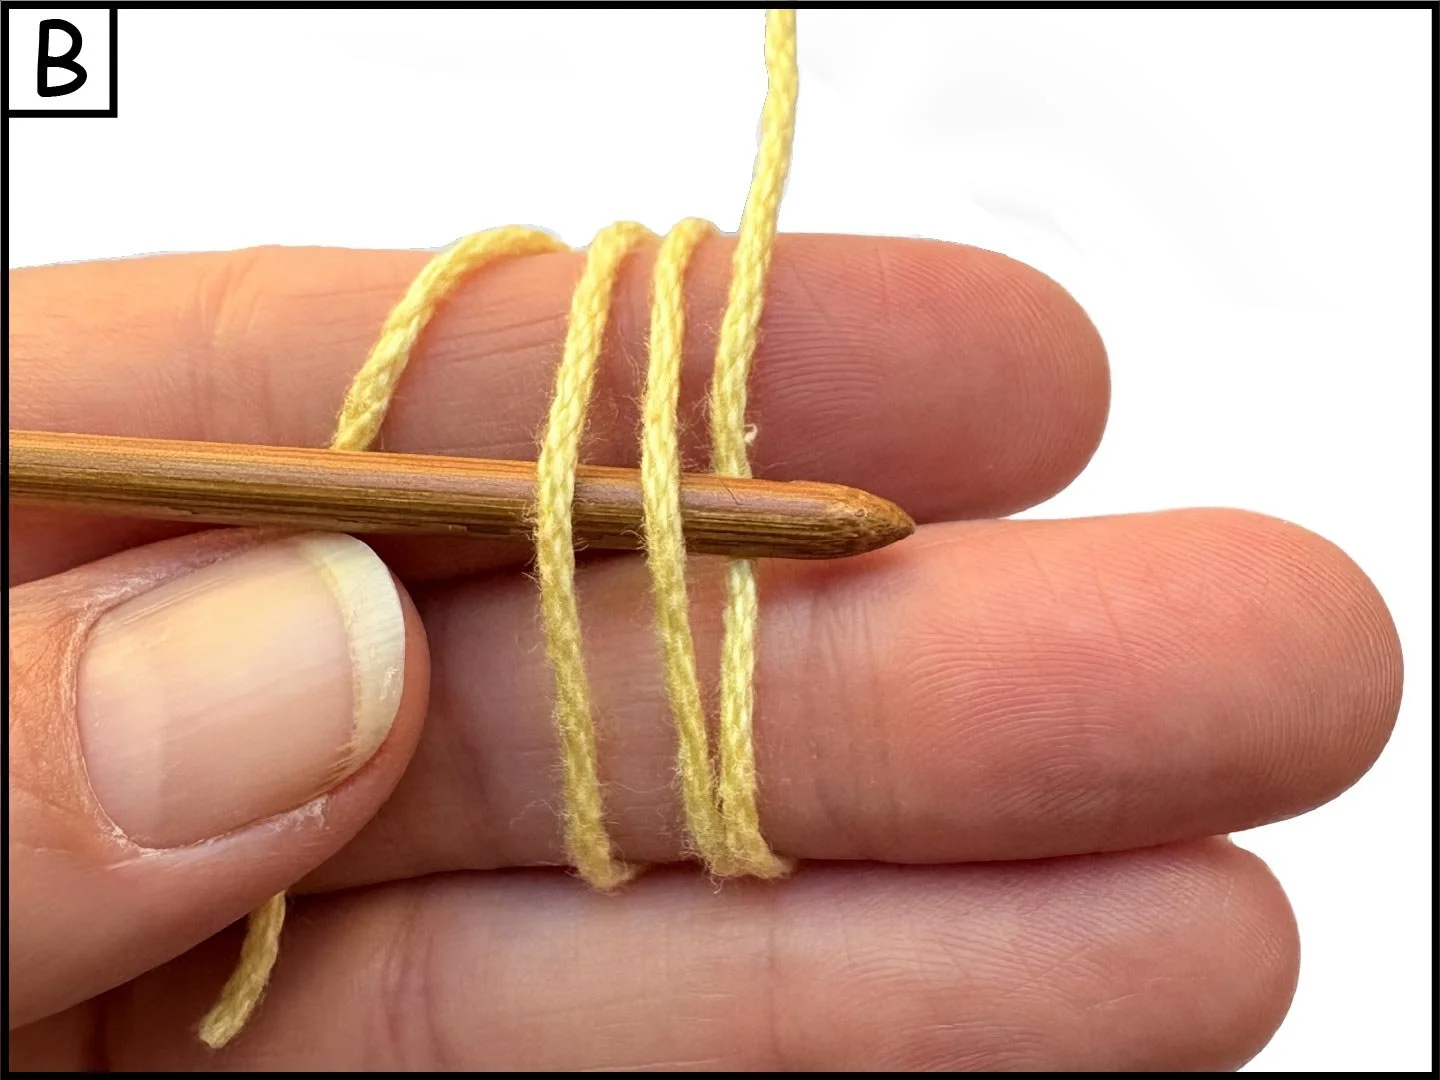
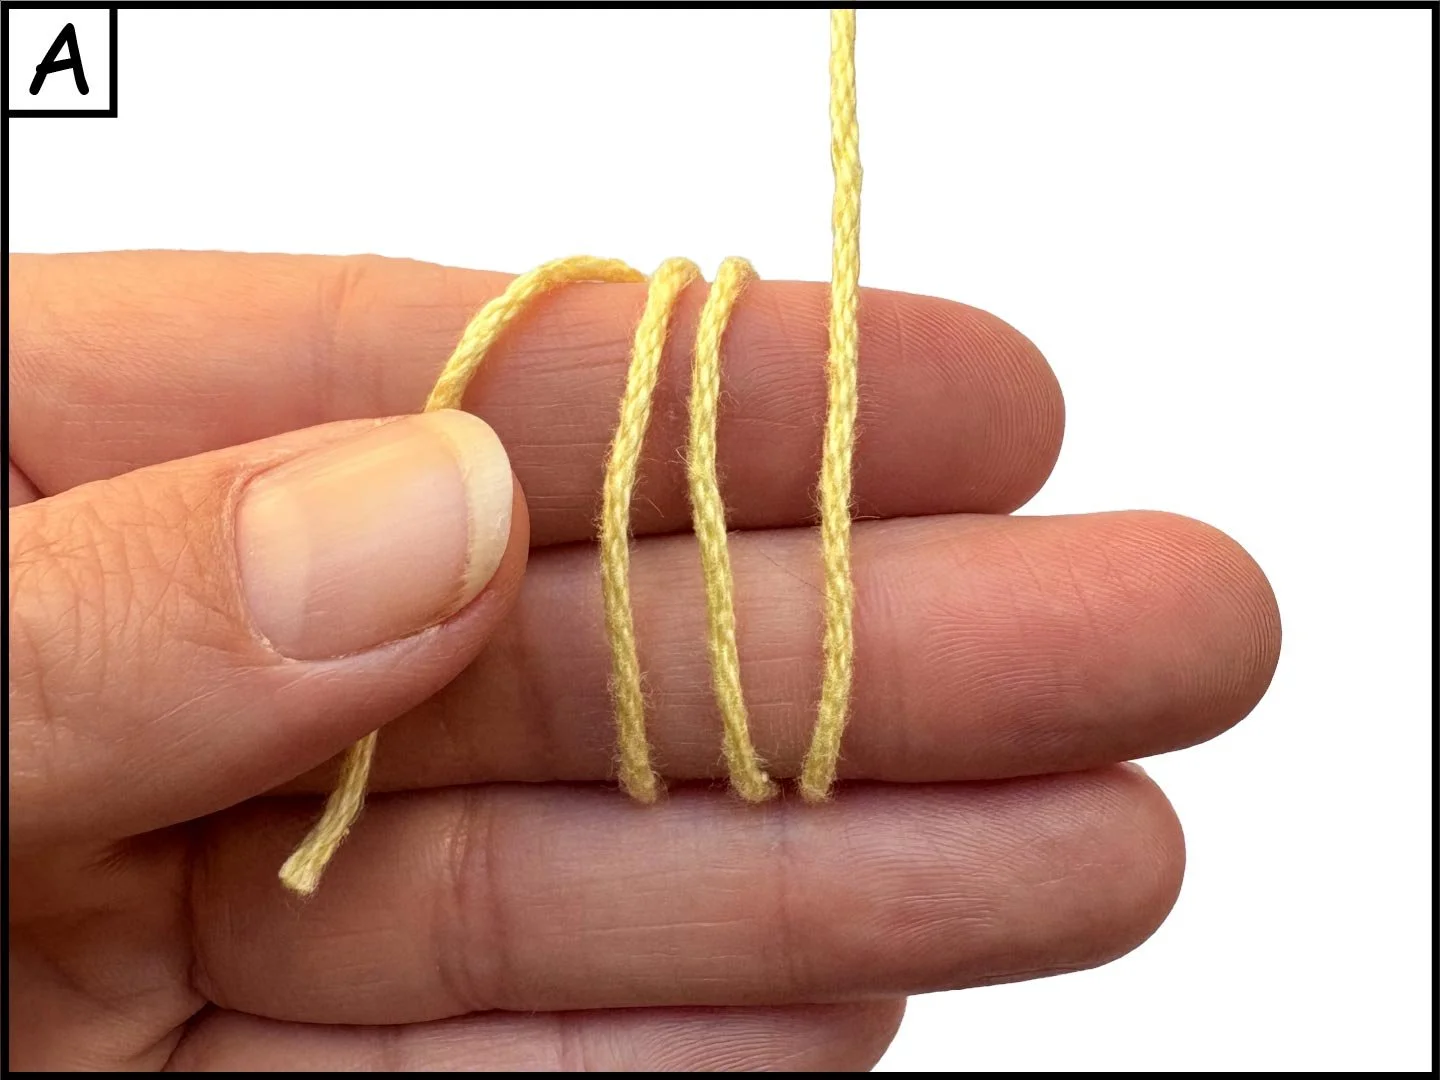
Create a loop by crossing the working end of the yarn over the tail end of the yarn, leave a long enough tail to weave in later, insert hook through loop, grab working end (A), pull through (B) and tighten knot (C). Pull working end to tighten loop (D). To make the first ch of your foundation row, *wrap the yarn from back to front over your hook, called a yarn over (yo) (E), and pull it through the loop on your hook (F). Repeat from * until your foundation row is the stitch count/length you need.

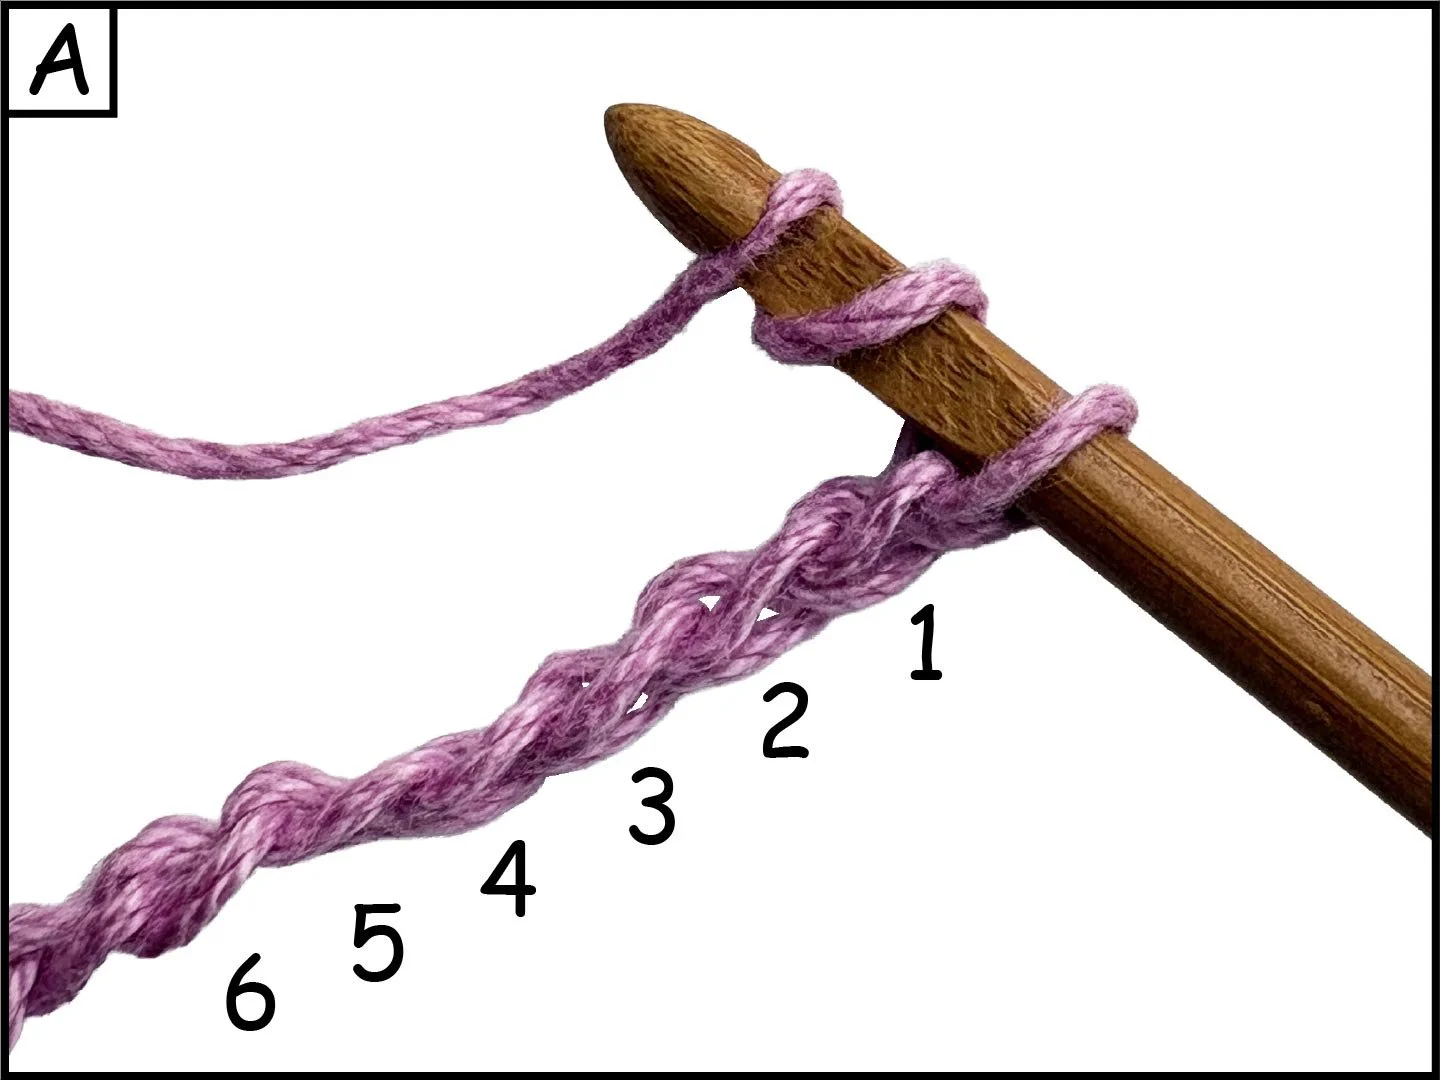
Foundation Row (FR)
A length of one or more chs linked together to use as the base or start of your project. These can be used to work in rows, freeform, or looped into a ring to work in rounds. Depending on the size of the project you may be given a specific number of chs or an equation.
Ex: Ch a multiple of 4 + 2
Working in Rounds
Working with rounds are similar to working in rows except you link the last stitch of each round to the first, typically with a slip stitch, to form a circle. This means you do not turn your WIP so it is always right side facing, unless otherwise instructed. There are two ways to begin working in rounds, with a foundation row ring or a magic ring.
Slip Stitch (Sl st)
Commonly used to join stitches together such as a group of chs into a ring or to join the first and last stitch of a round. Insert the hook into the specific stitch, yo (A) and pull through both the stitch and the loop on your hook (B).
Foundation Row Ring (FRR)
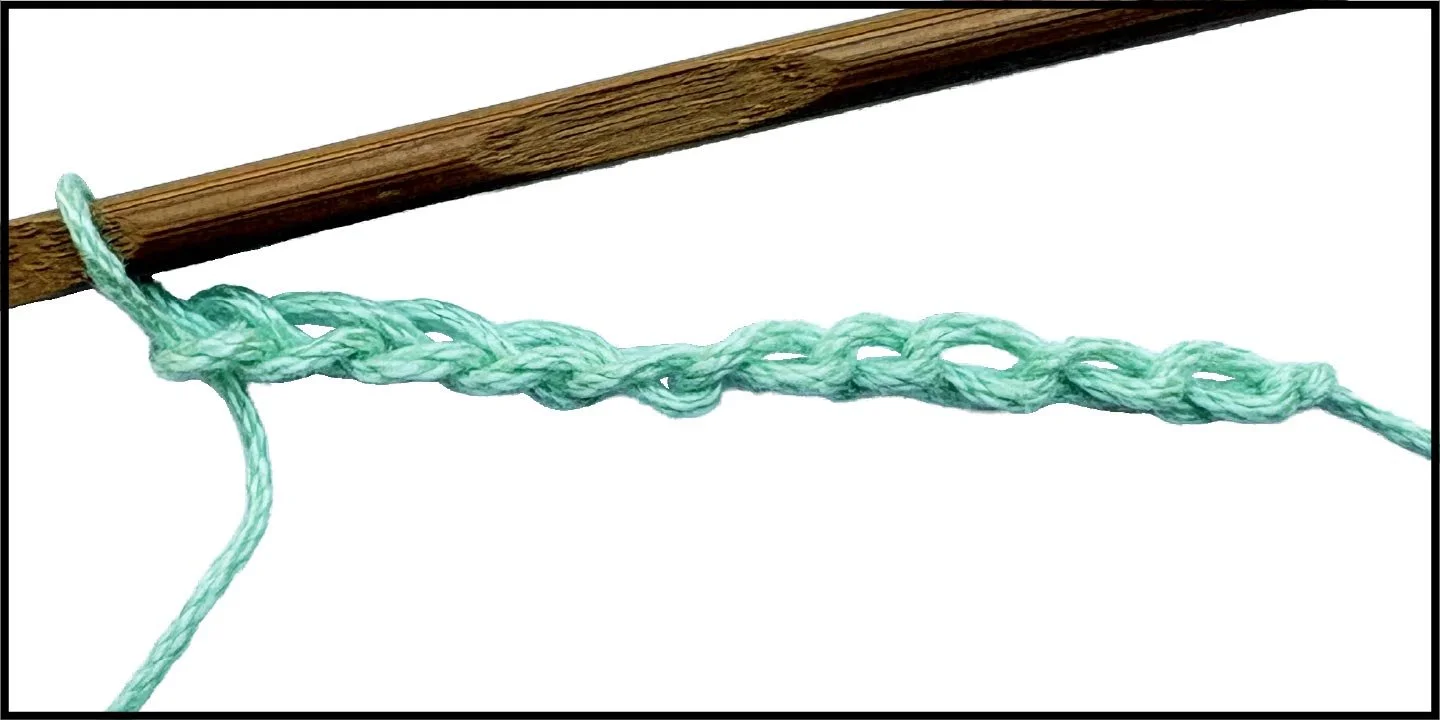
Create a foundation row of 3 or more chs, then Sl st into the ch furthest from the hook to form a ring, shown above with Sl st (A & B). Depending on what the pattern instructs for row one you will either, wrap each stitch of your first row around the whole ring (A), or work 1 - 3 stitches in each ch on the ring (B).
If you want your WIP to start with an opening in the middle this is the ring to start with. Use a FRR to create tube shapes or start with a neckline for a top.
Magic Ring (MR)
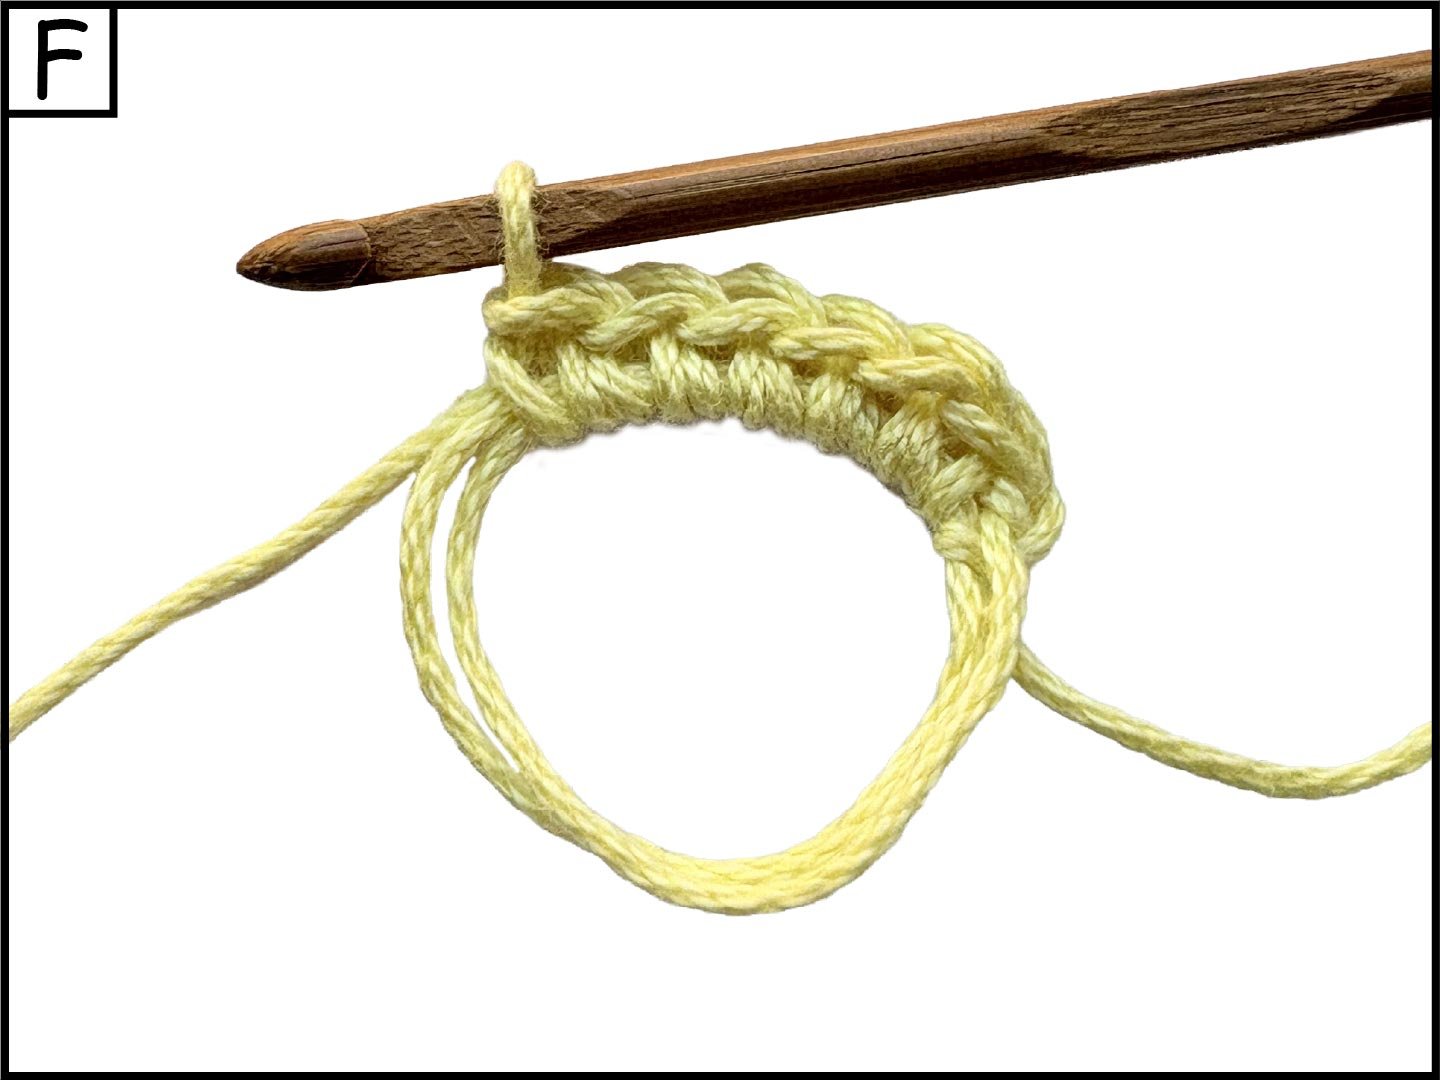
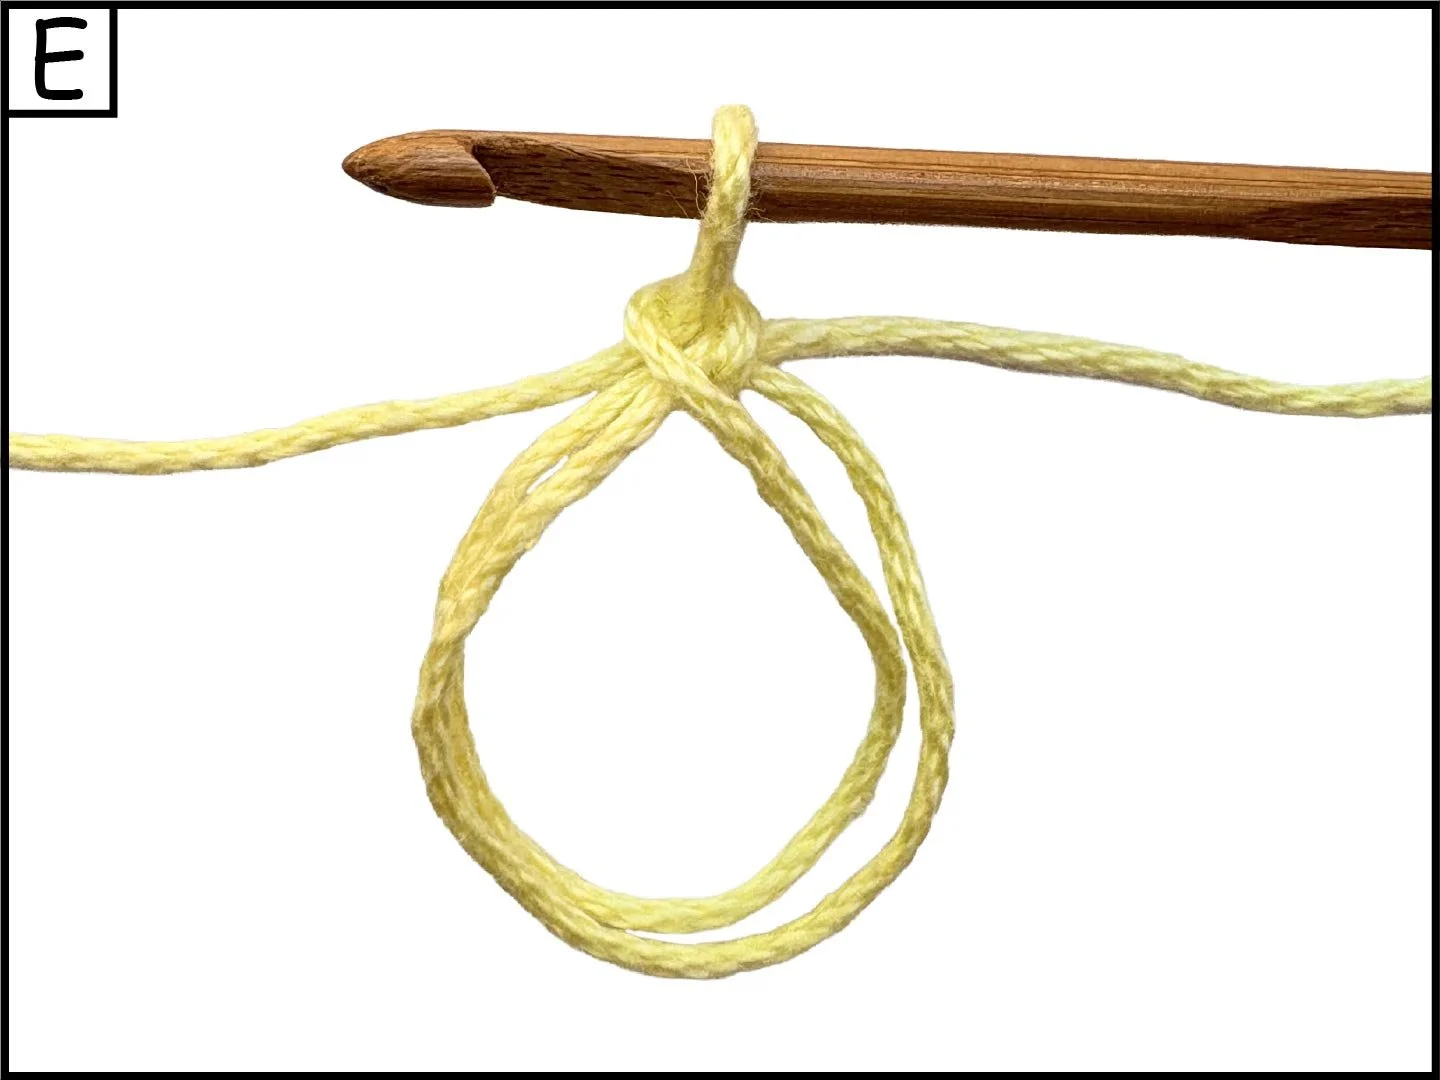
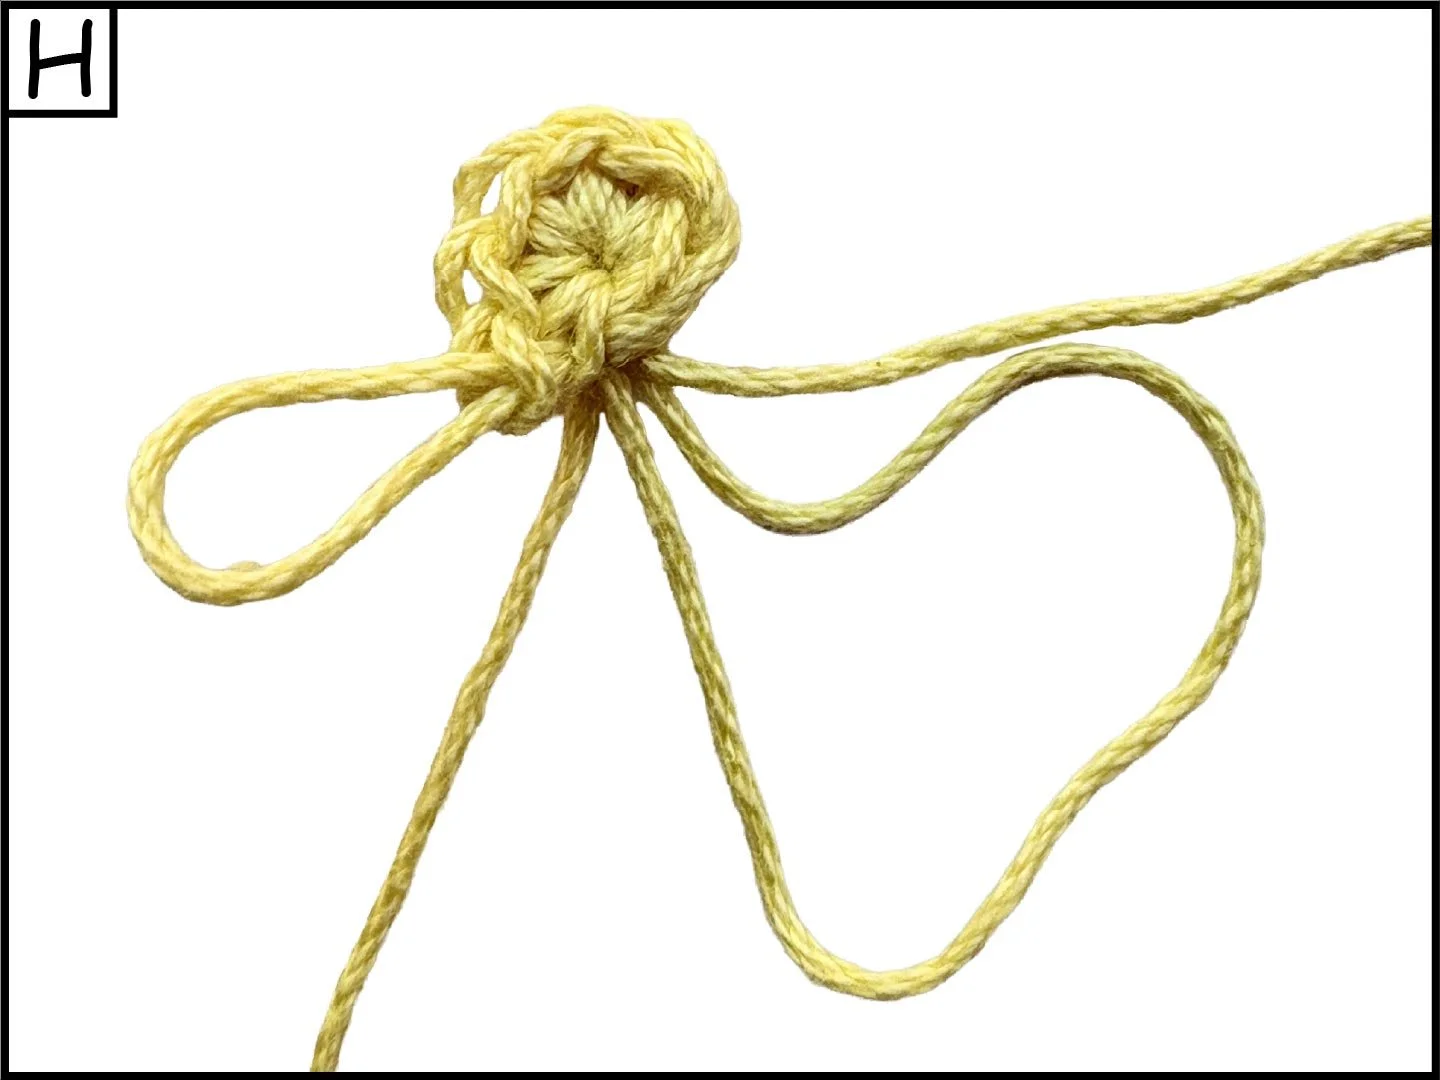
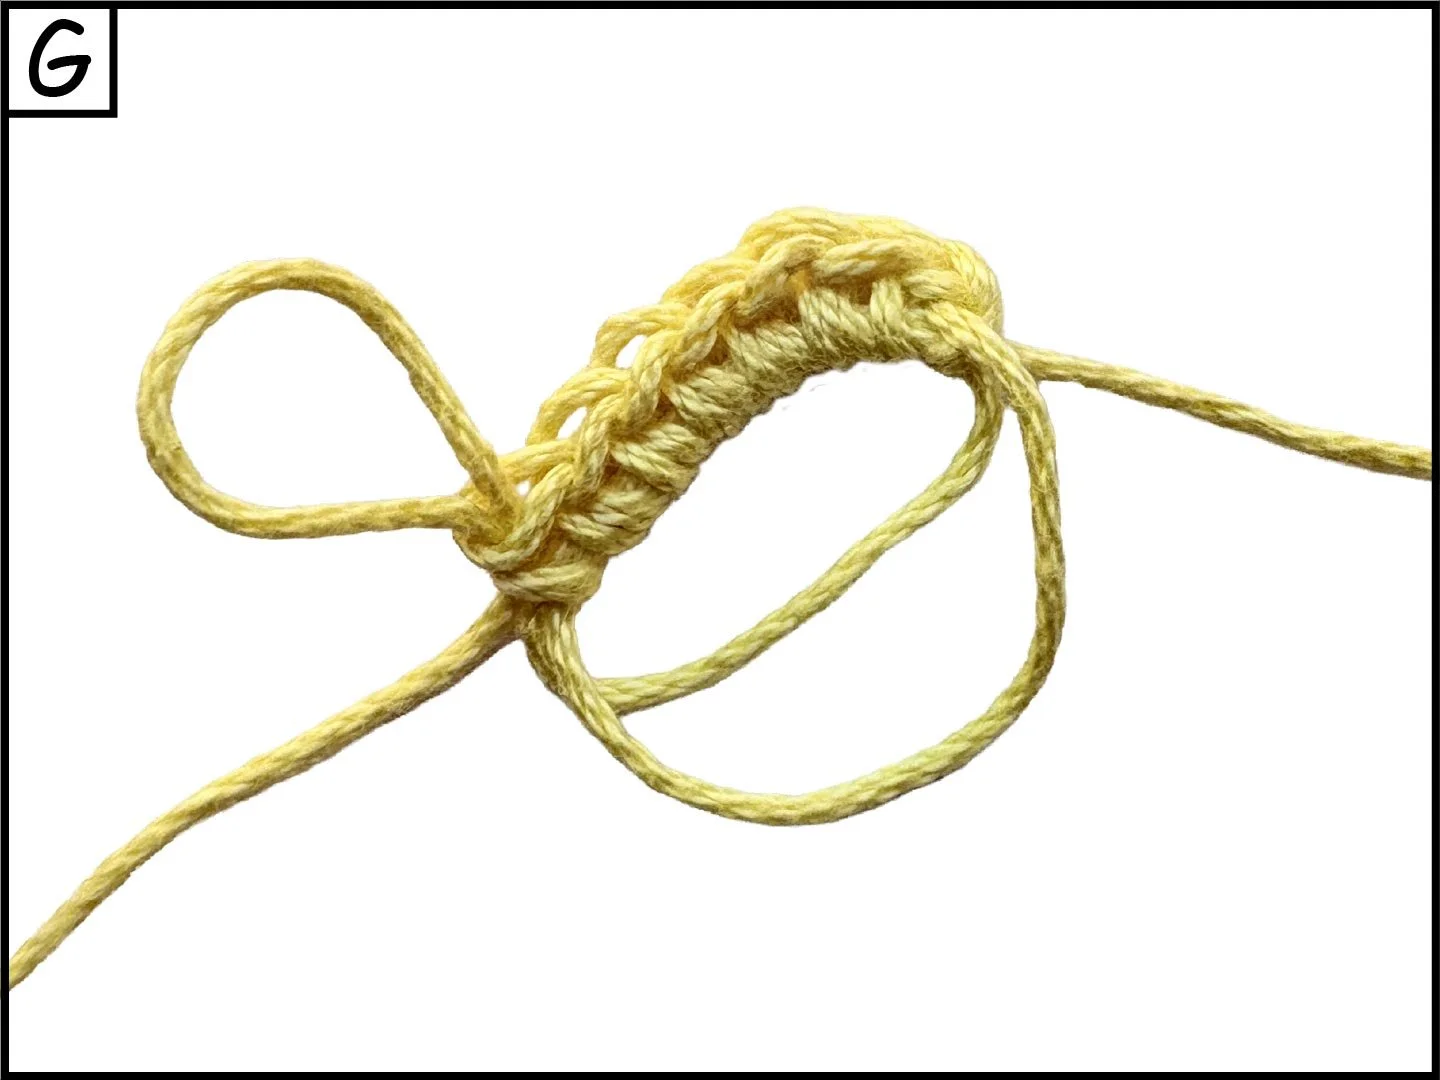
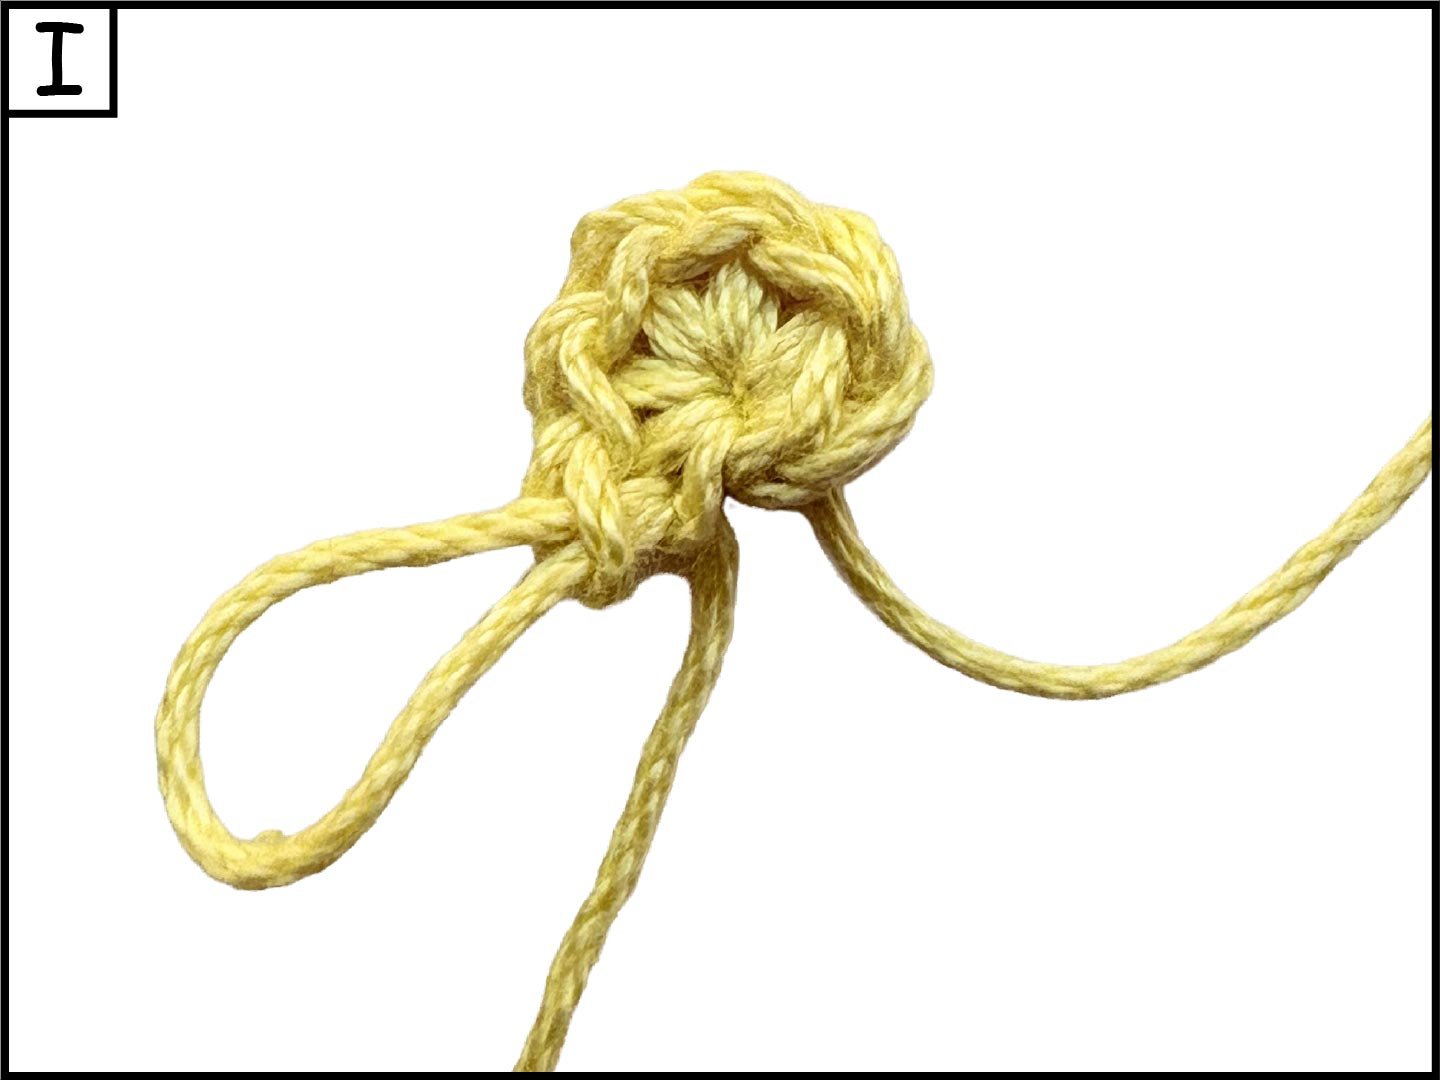
Hold the tail end of the yarn down with your thumb at the base of your index and middle fingers, wrap the working end of the yarn around your index and middle fingers back to front 3 times (A), insert your hook under the first then second wrap, grab the third (B) and pull through making a loop on your hook (C), keeping them together, carefully remove remaining 2 wraps from your fingers, yo (D), pull through and tighten (E), work first round as normal minus any slip stitches to close (F), pull tail end of yarn slowly until one of the wraps starts to shrink (G), release tail end and grab the shrinking wrap, pull so the remaining wrap (not the tail end) tightens completely (H), then pull the tail end to tighten the last wrap completely (I), Sl st to first stitch of round to close if instructed.
This ring is best to use if you want a tight center with no hole. However if you work too many stitches on the ring you will end up with a hole.
Basic Stitches
Turning Chains
To start a row/round you need to make a turning chain which is one or more chs worked together. Turning chains are used to add the height for your next row/round. In some cases these count as a stitch and others they do not. If they count as a stitch make sure you work a stitch in them on the next row/round. Although they are called turning chains you will not always turn your project after making them, such as when working in rounds.
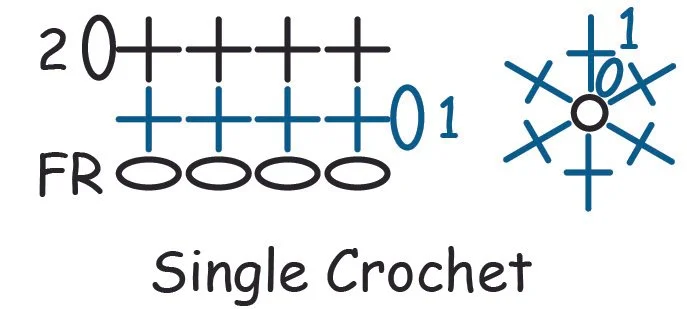
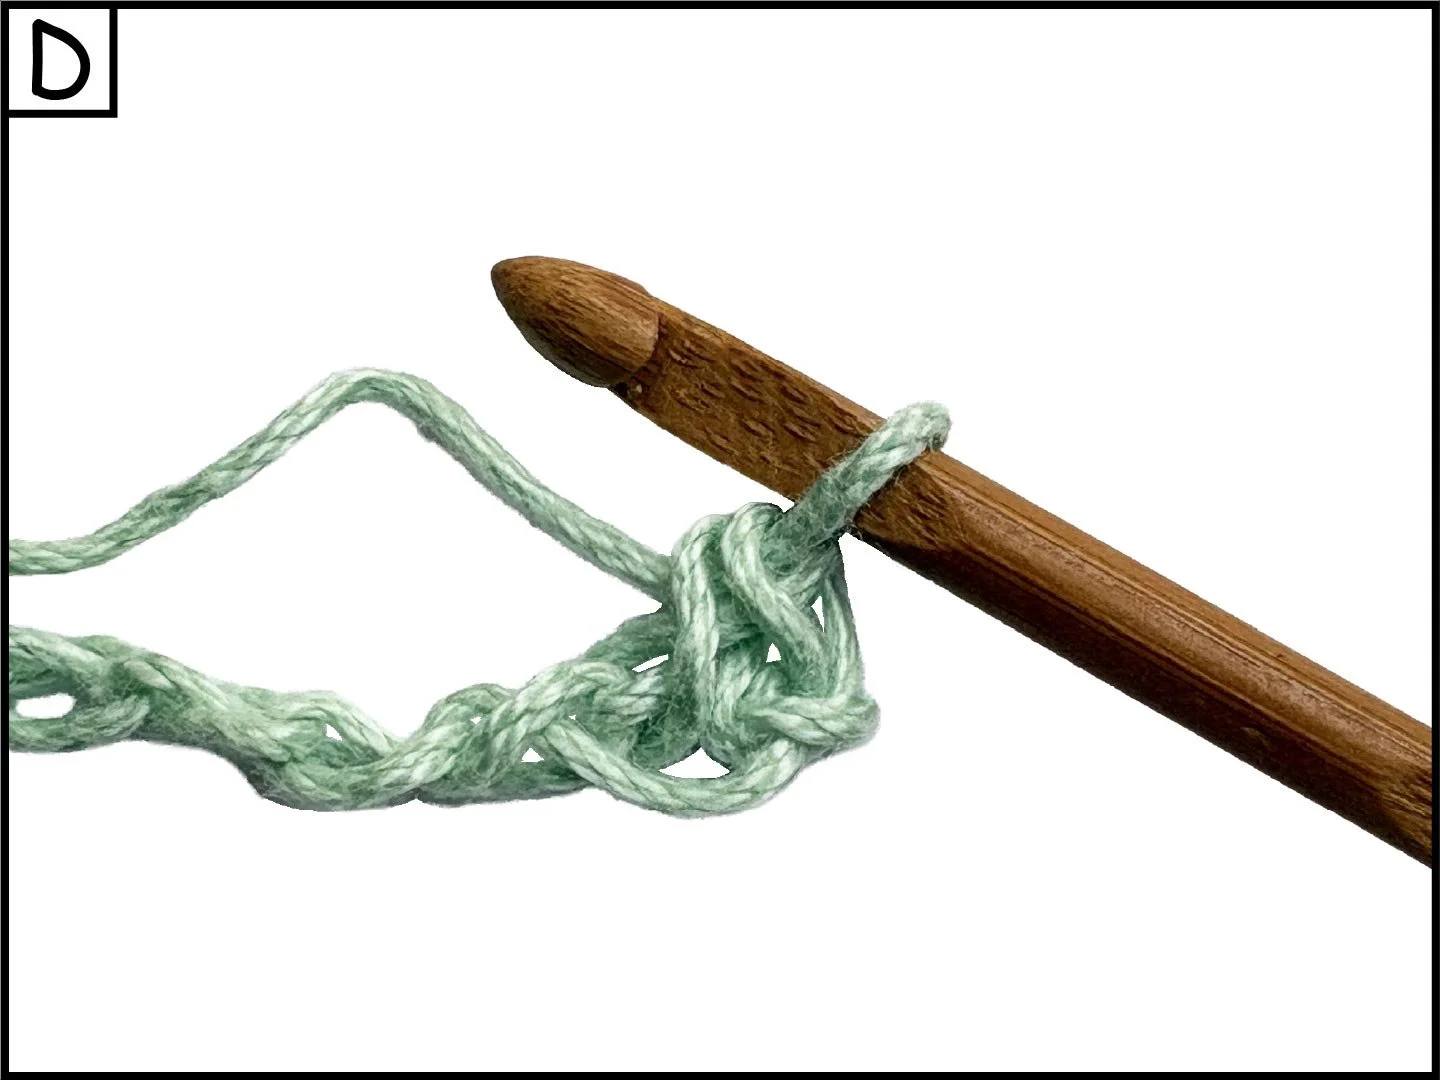
Single Crochet (sc)
Ch 1 (does not count as a stitch), insert hook into 2nd ch from hook, or first st, yo (A,B) and pull through making 2 loops on your hook, yo (C) and pull through both loops to complete 1 sc (D), work 1 sc in each st across row, turn.
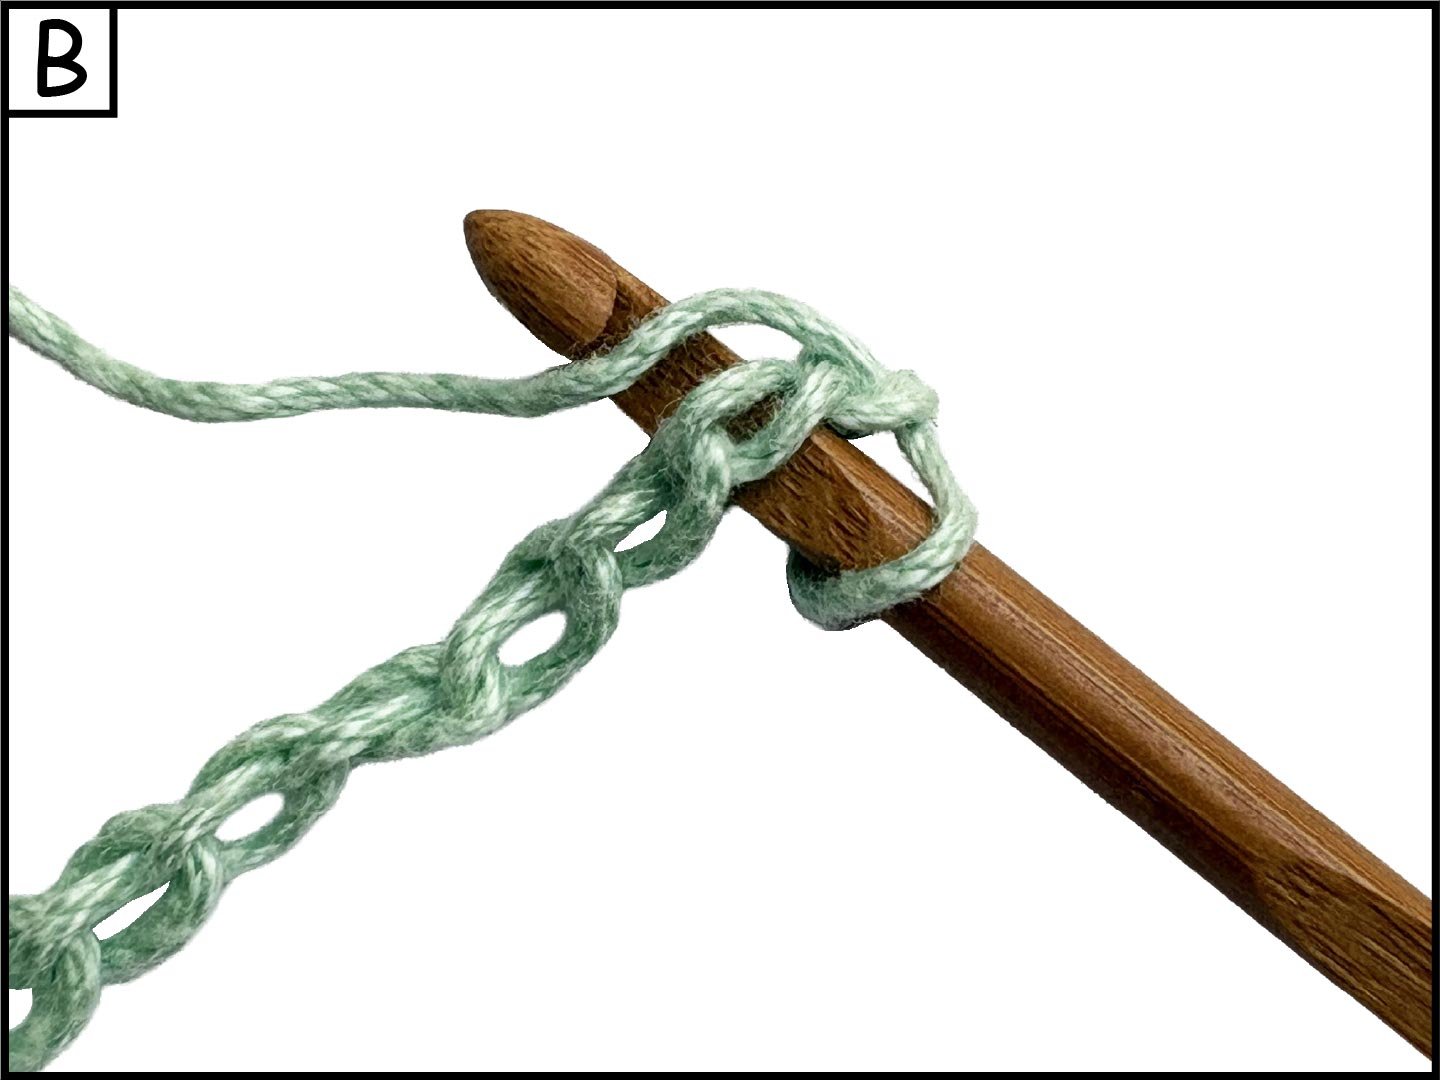
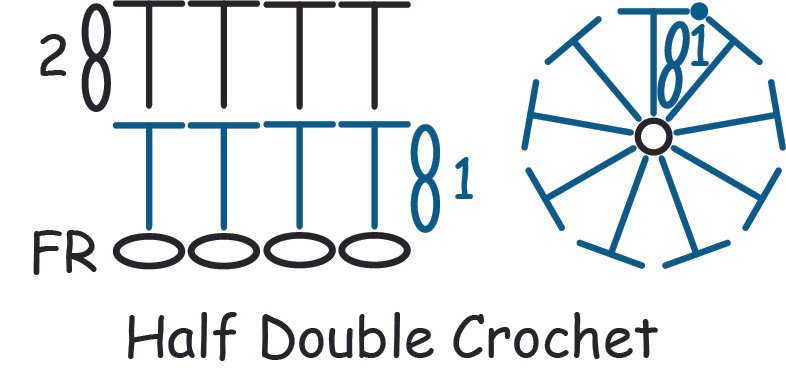
Half Double Crochet (hdc)
Ch 2 (does not counts as a stitch), yo, insert hook into 3rd ch from hook, or first st, yo (A,B) and pull through making 3 loops on your hook, yo (C) and pull through all 3 loops to complete 1 hdc (D), work 1 hdc in each st across row, turn.
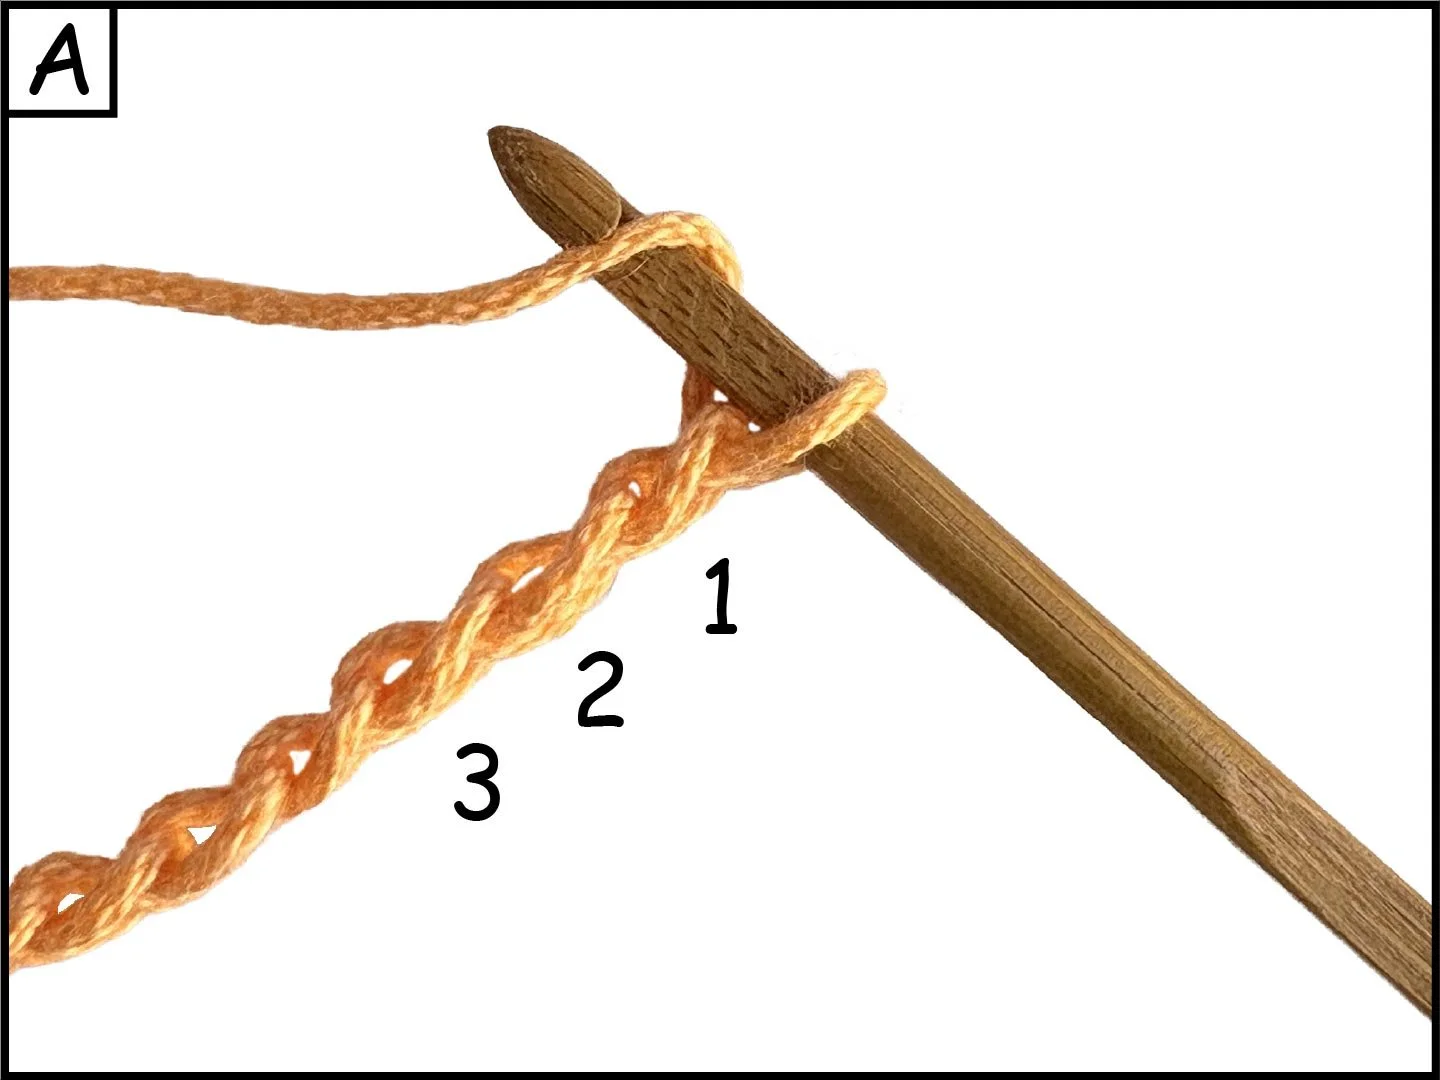
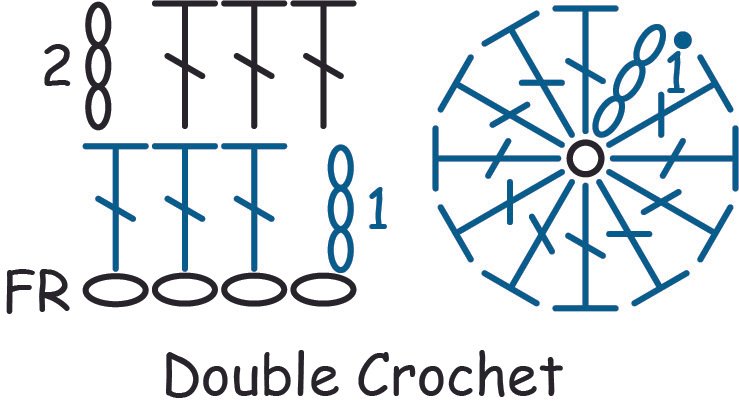
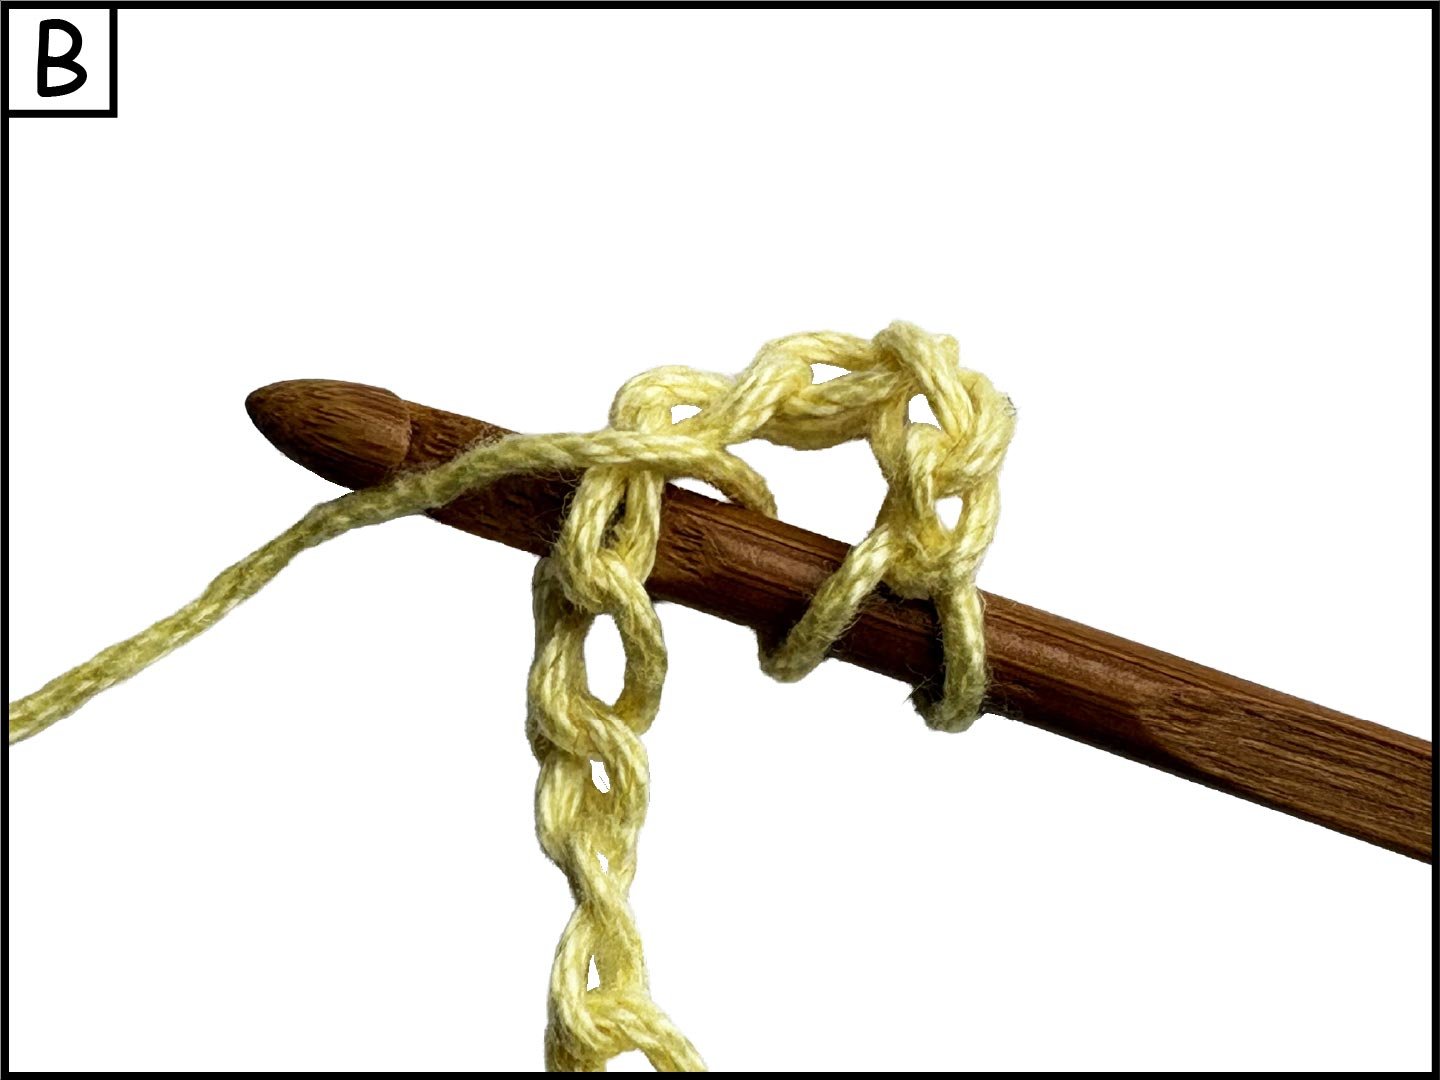
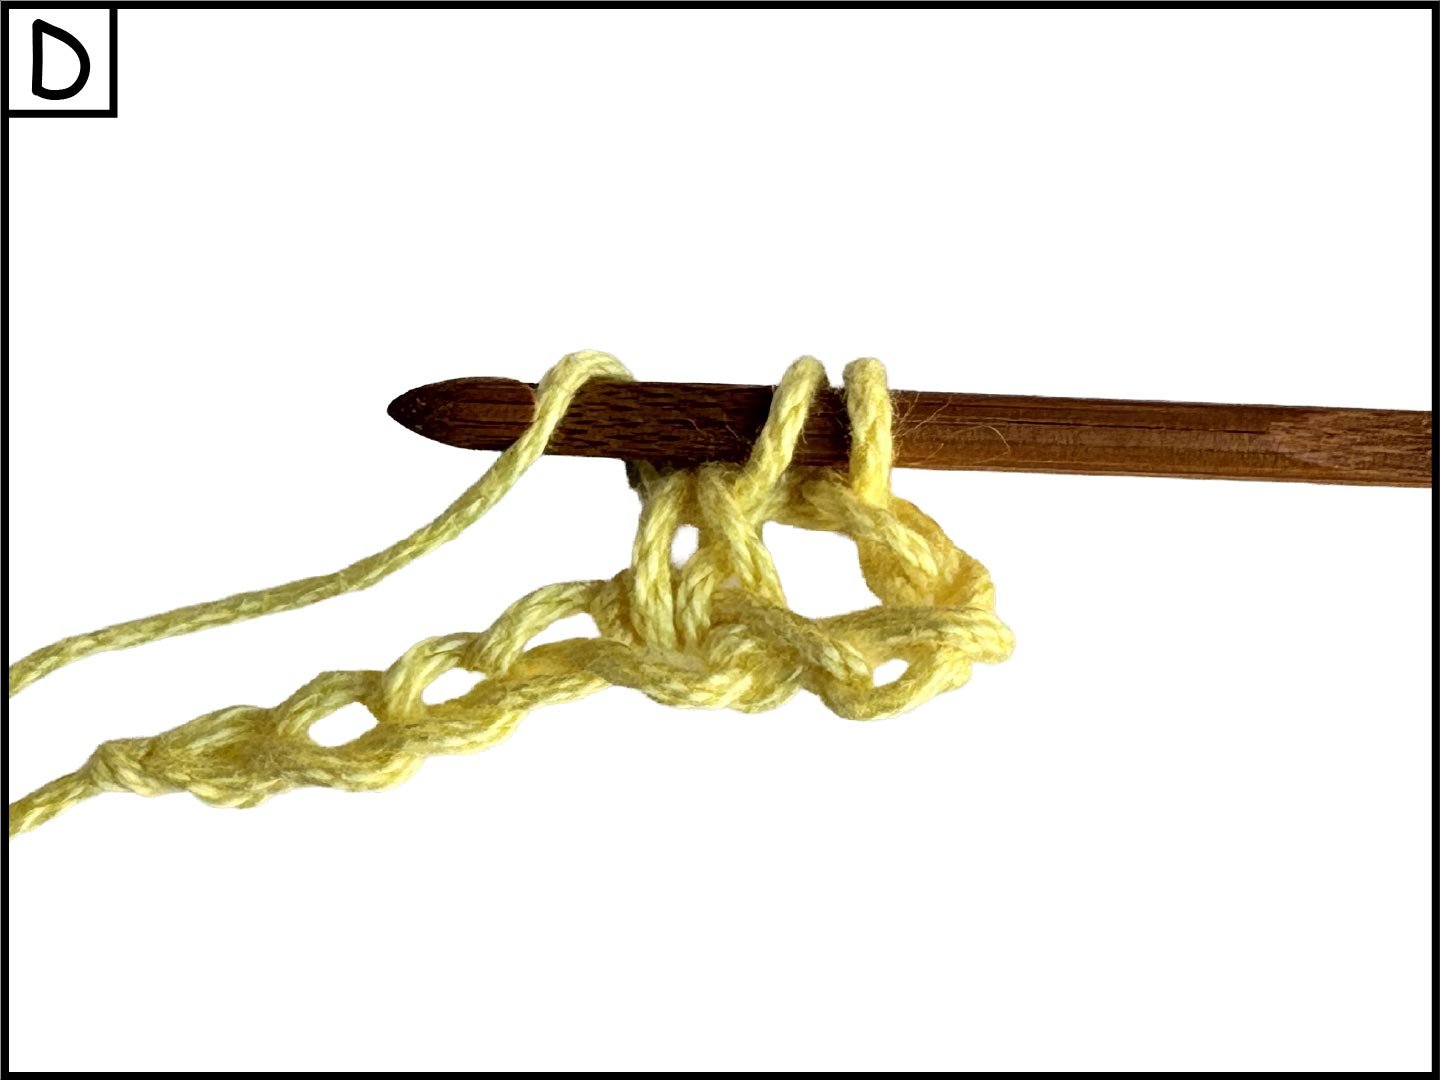
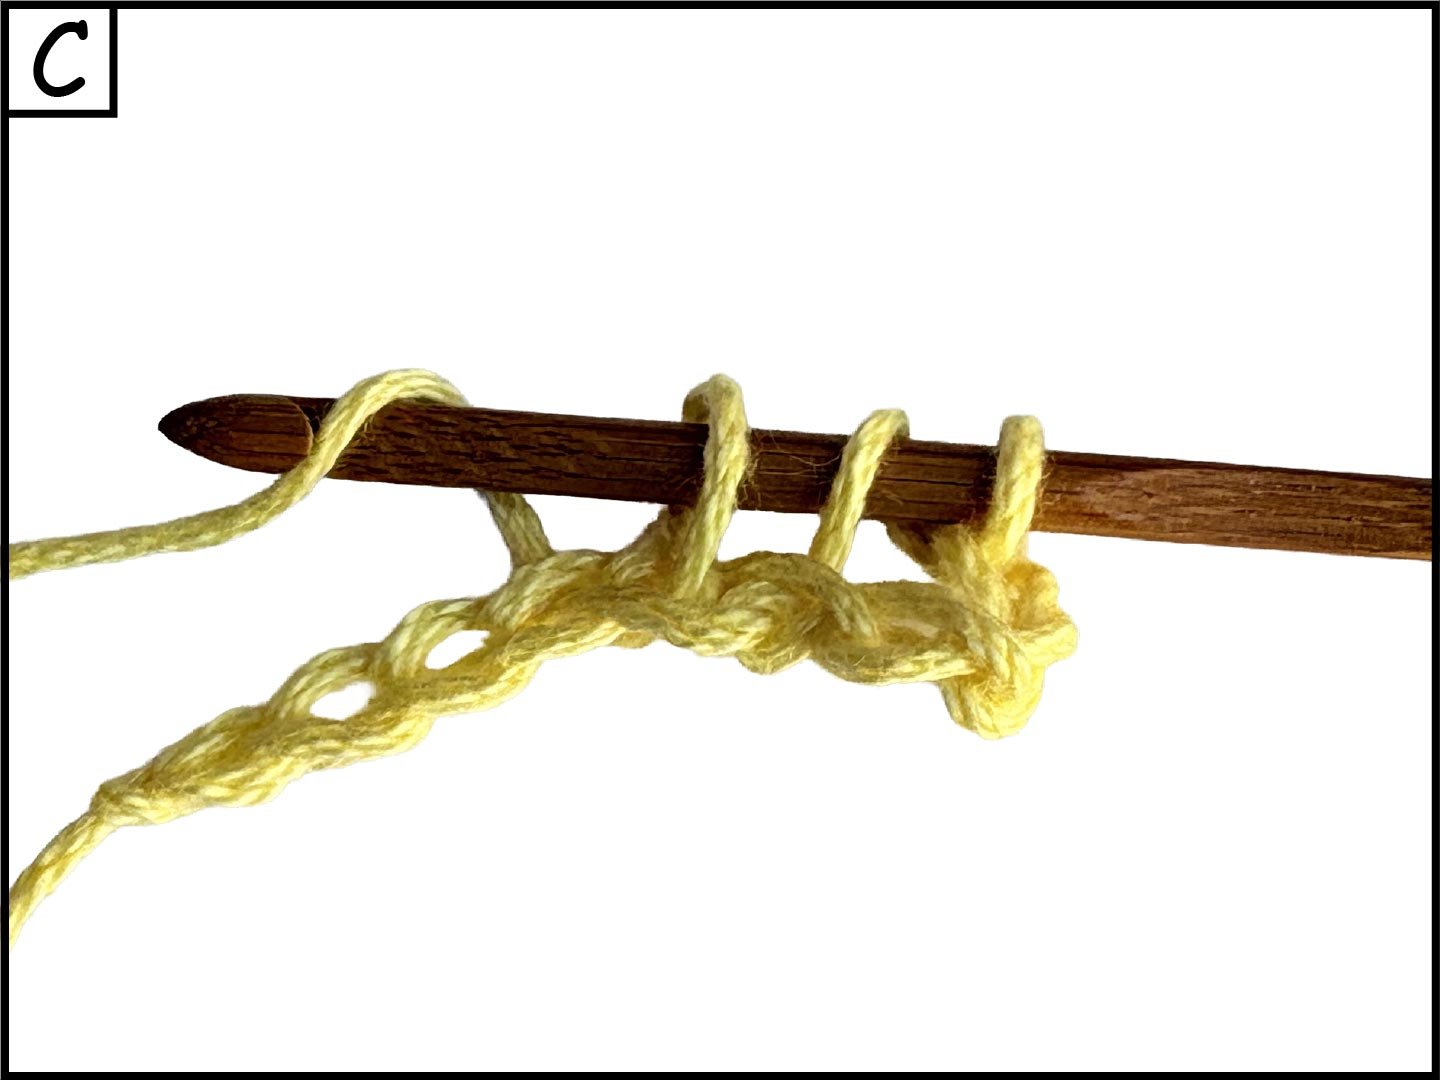
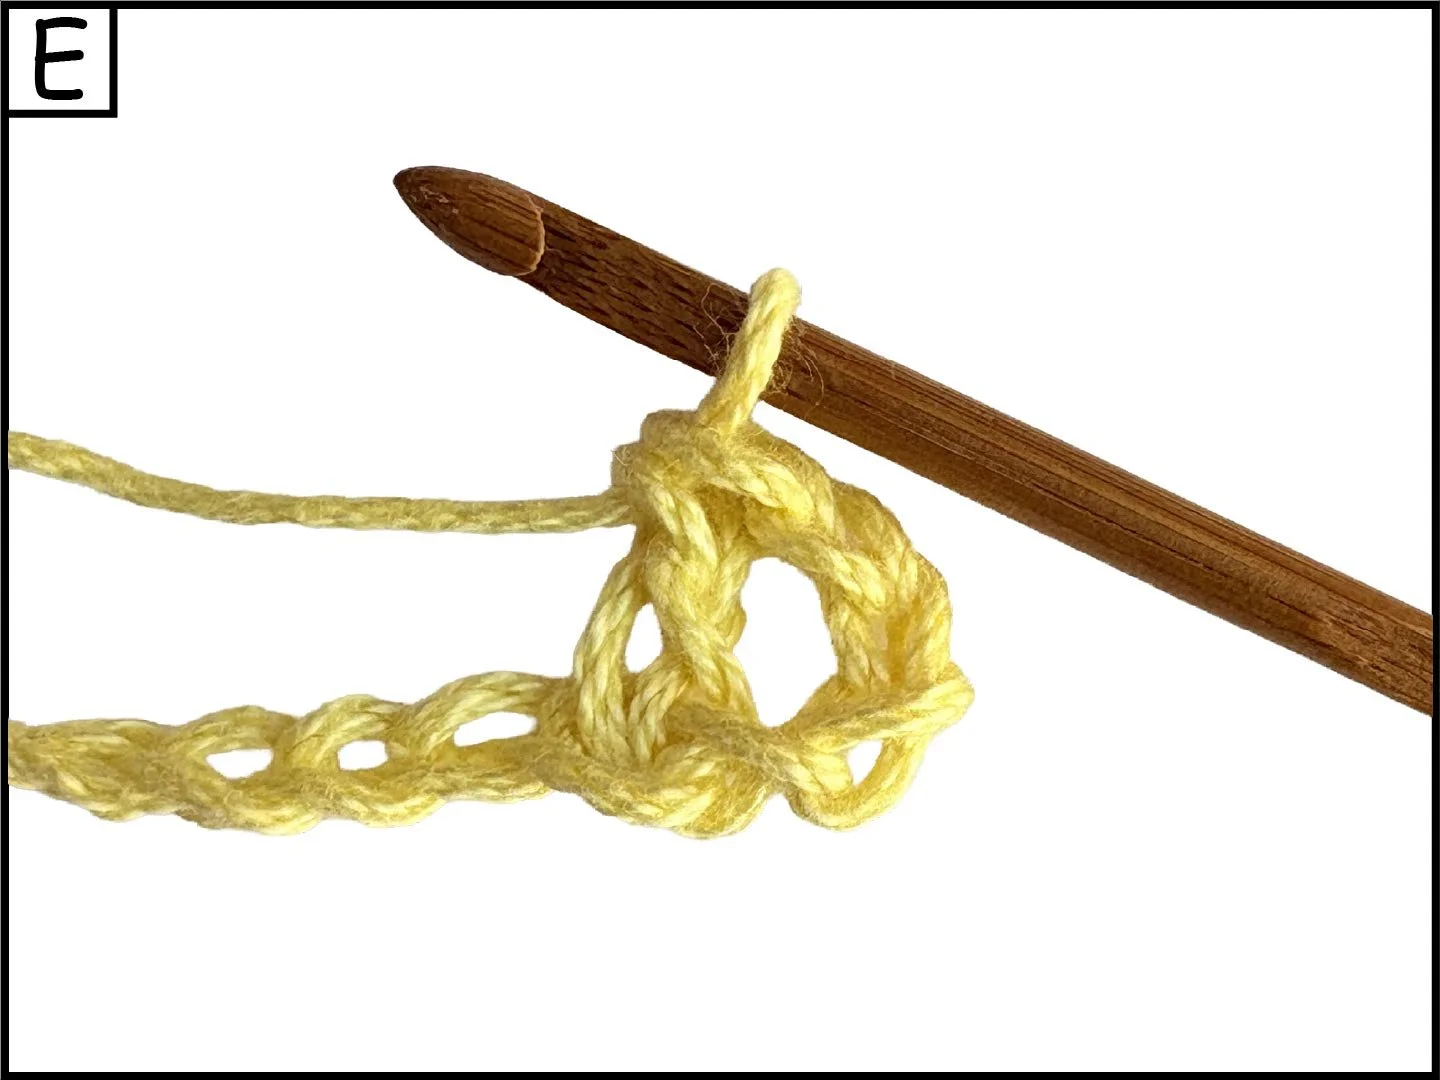
Double Crochet (dc)
Ch 3 (counts as a dc), yo, insert hook into 5th ch from hook, or second st, yo (A,B) and pull through making 3 loops on your hook, yo (C) and pull through first 2 loops leaving 2 loops, yo (D) and pull through last 2 loops to complete 2 sts (E), work 1 dc in each st and turning chain across row, turn.
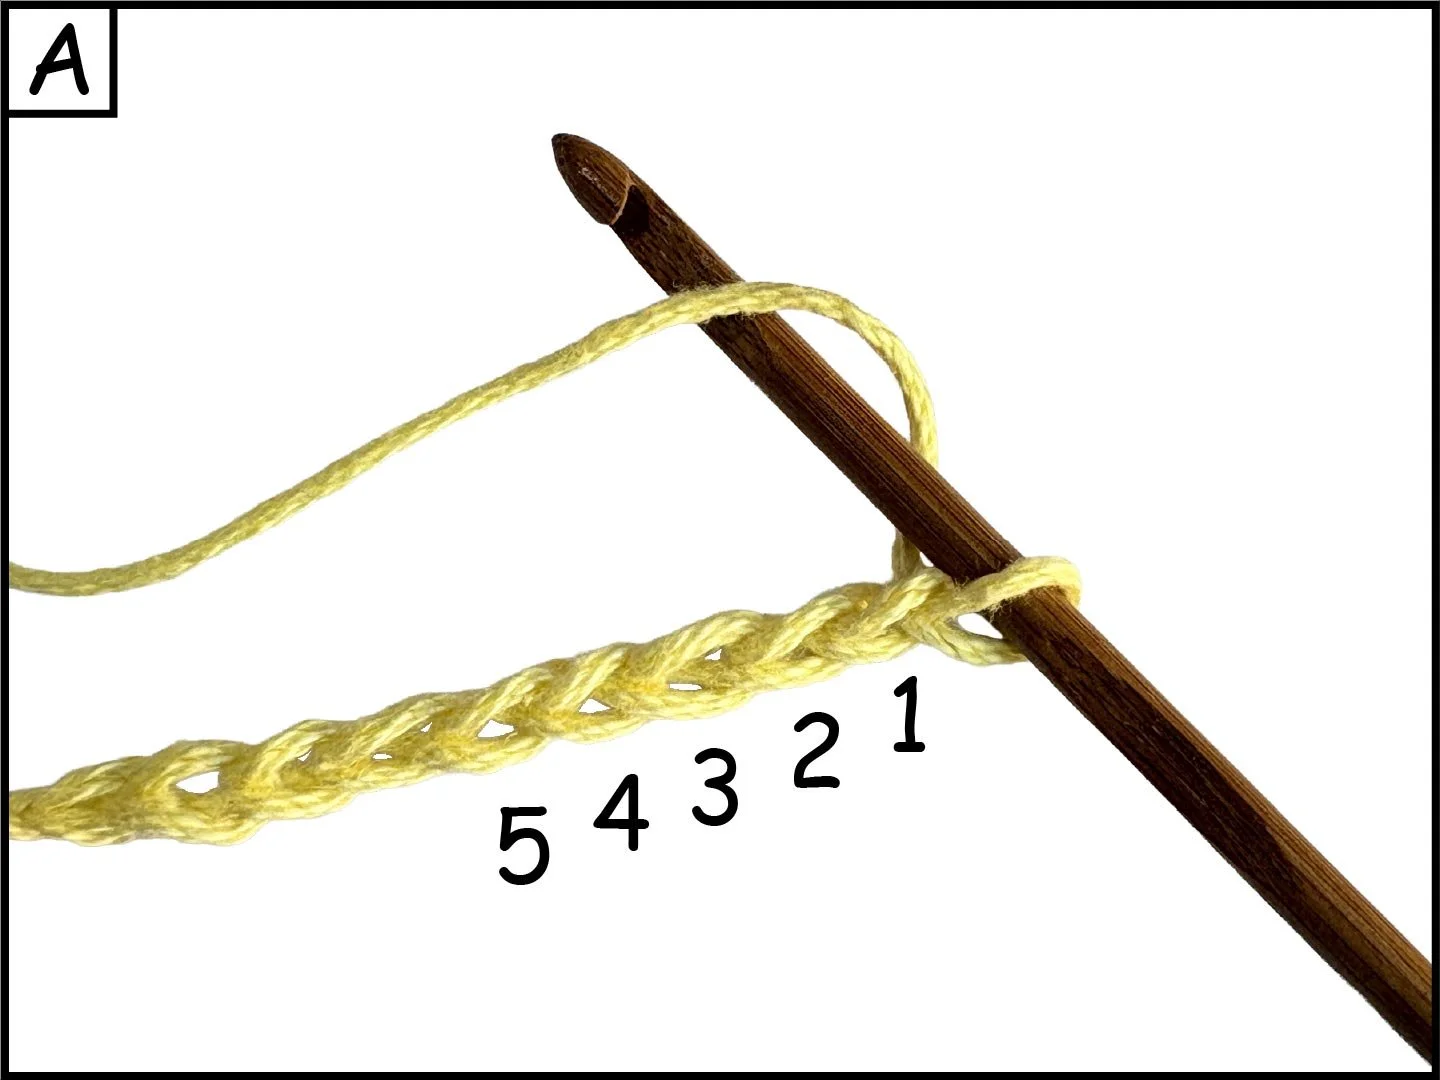
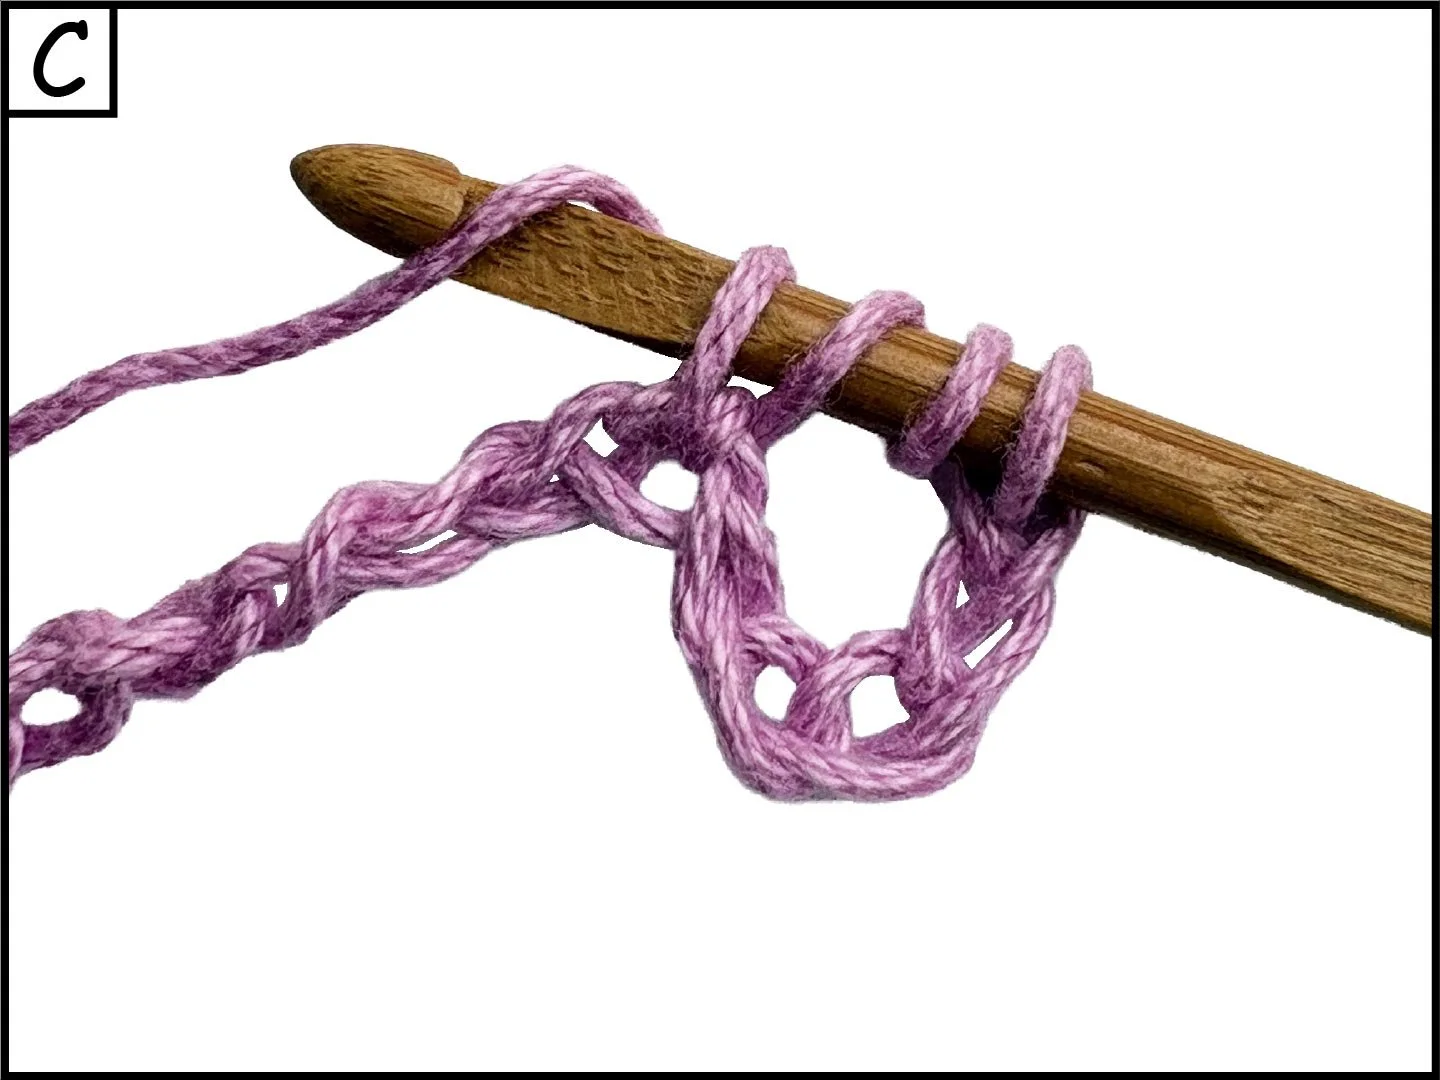
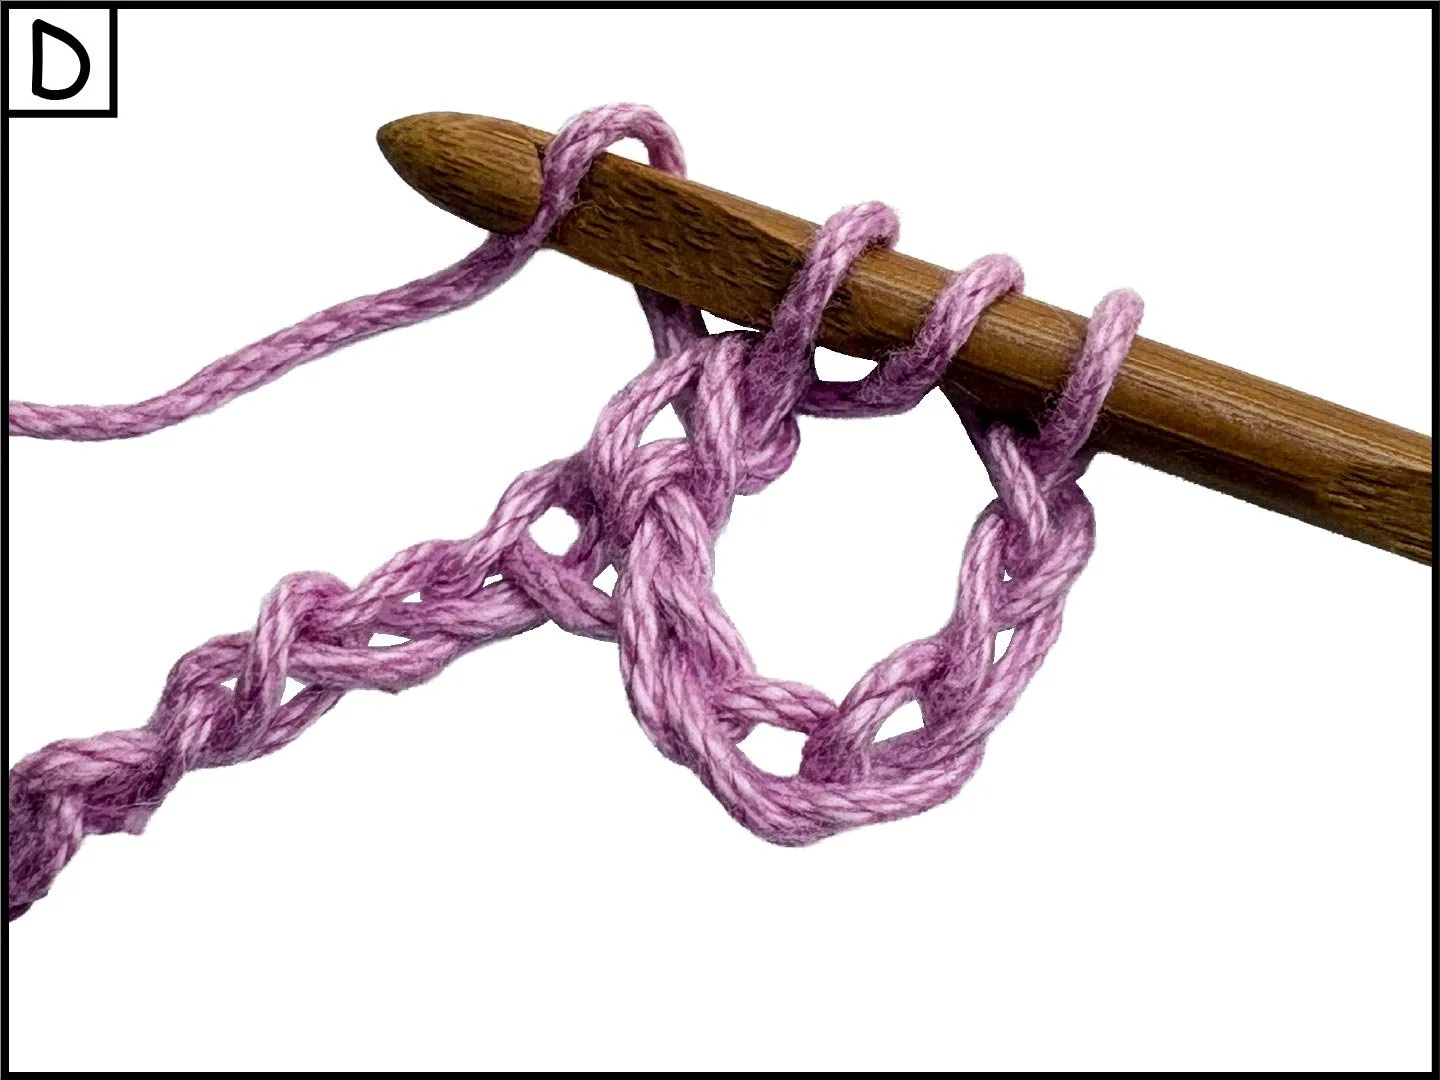
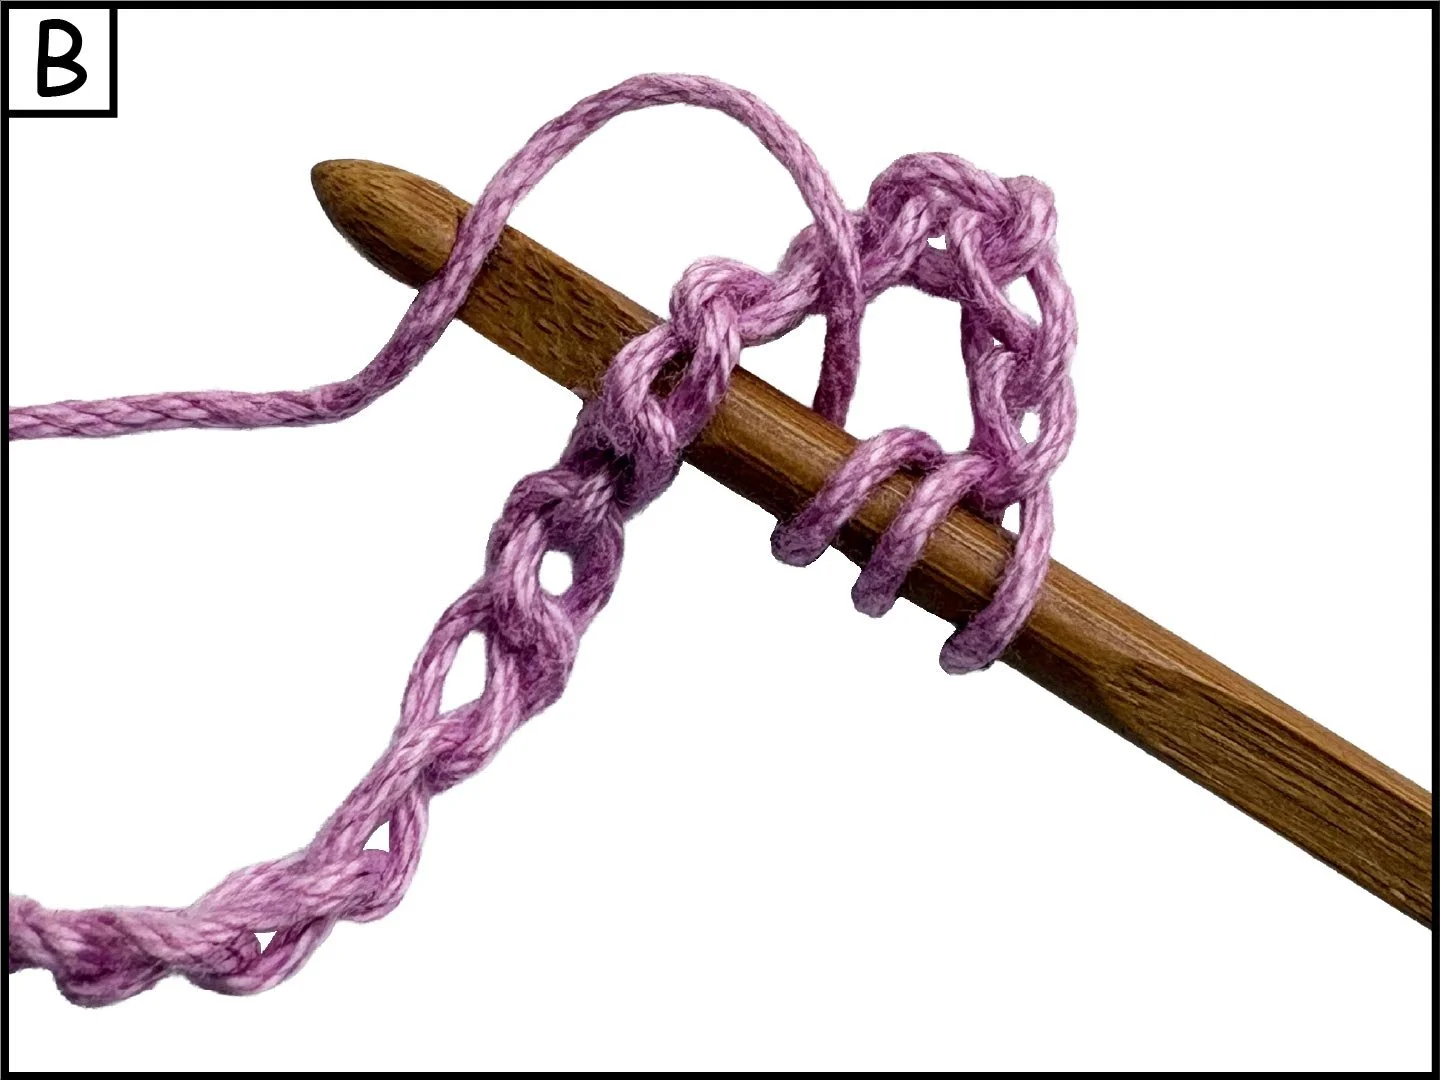
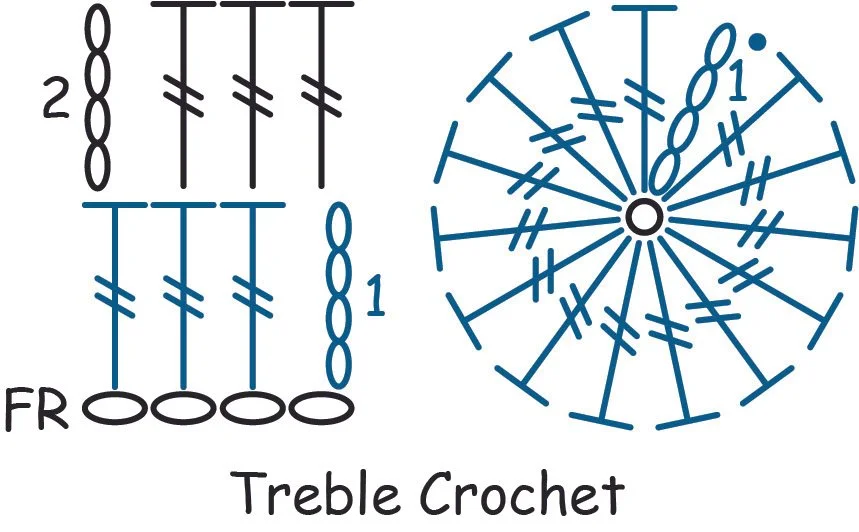
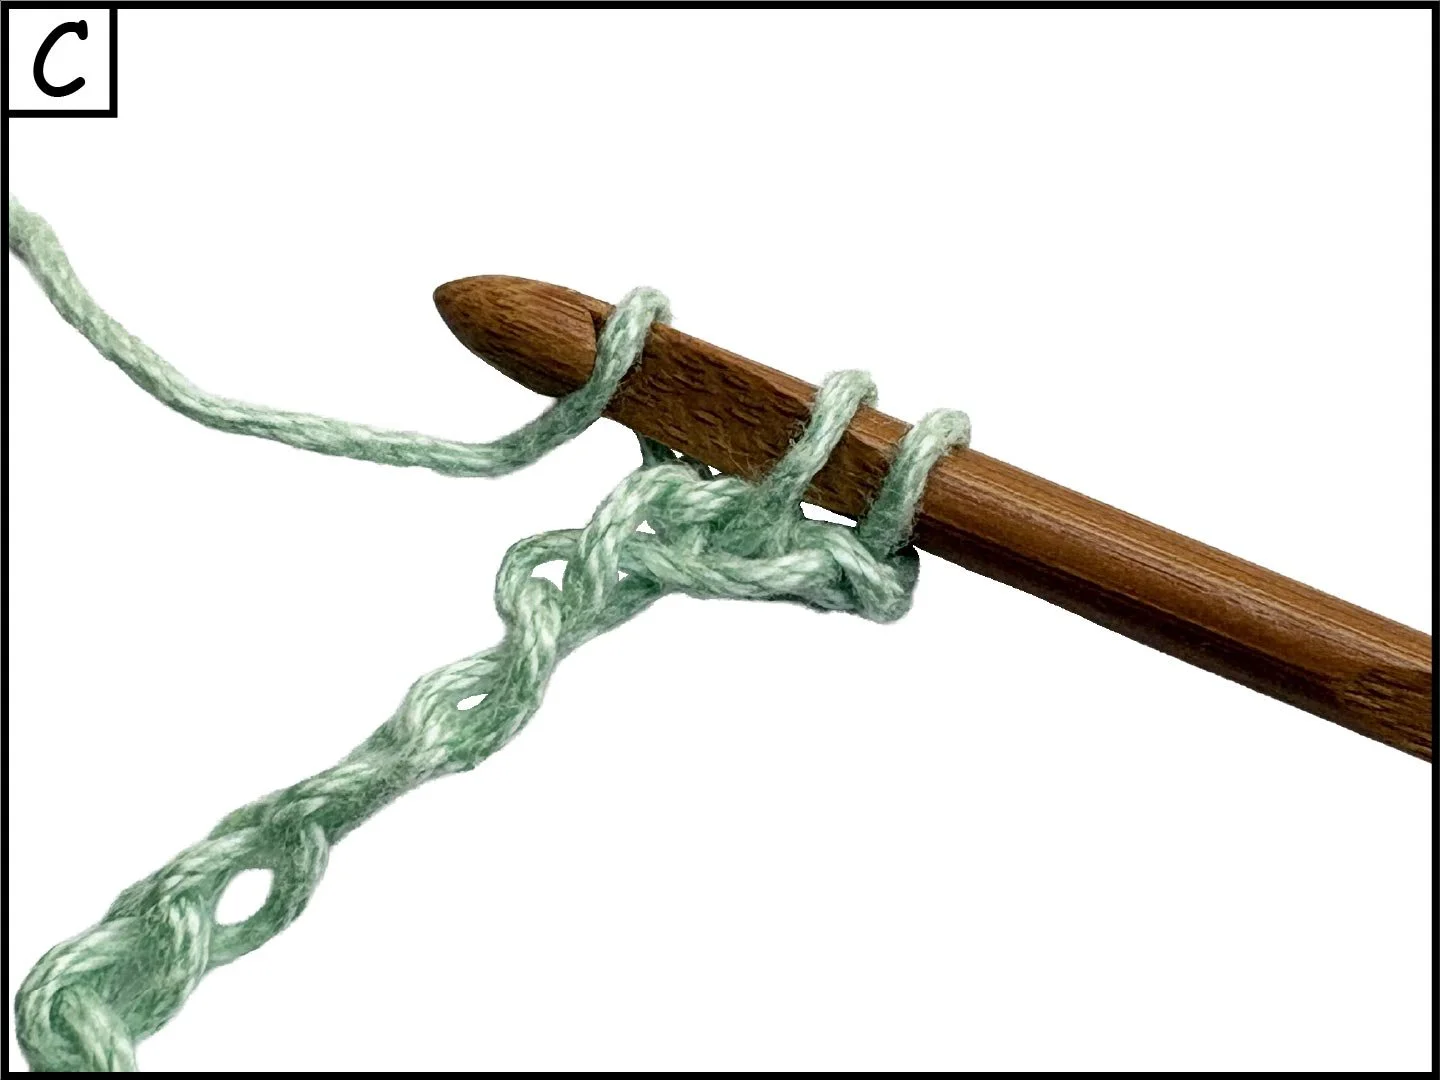
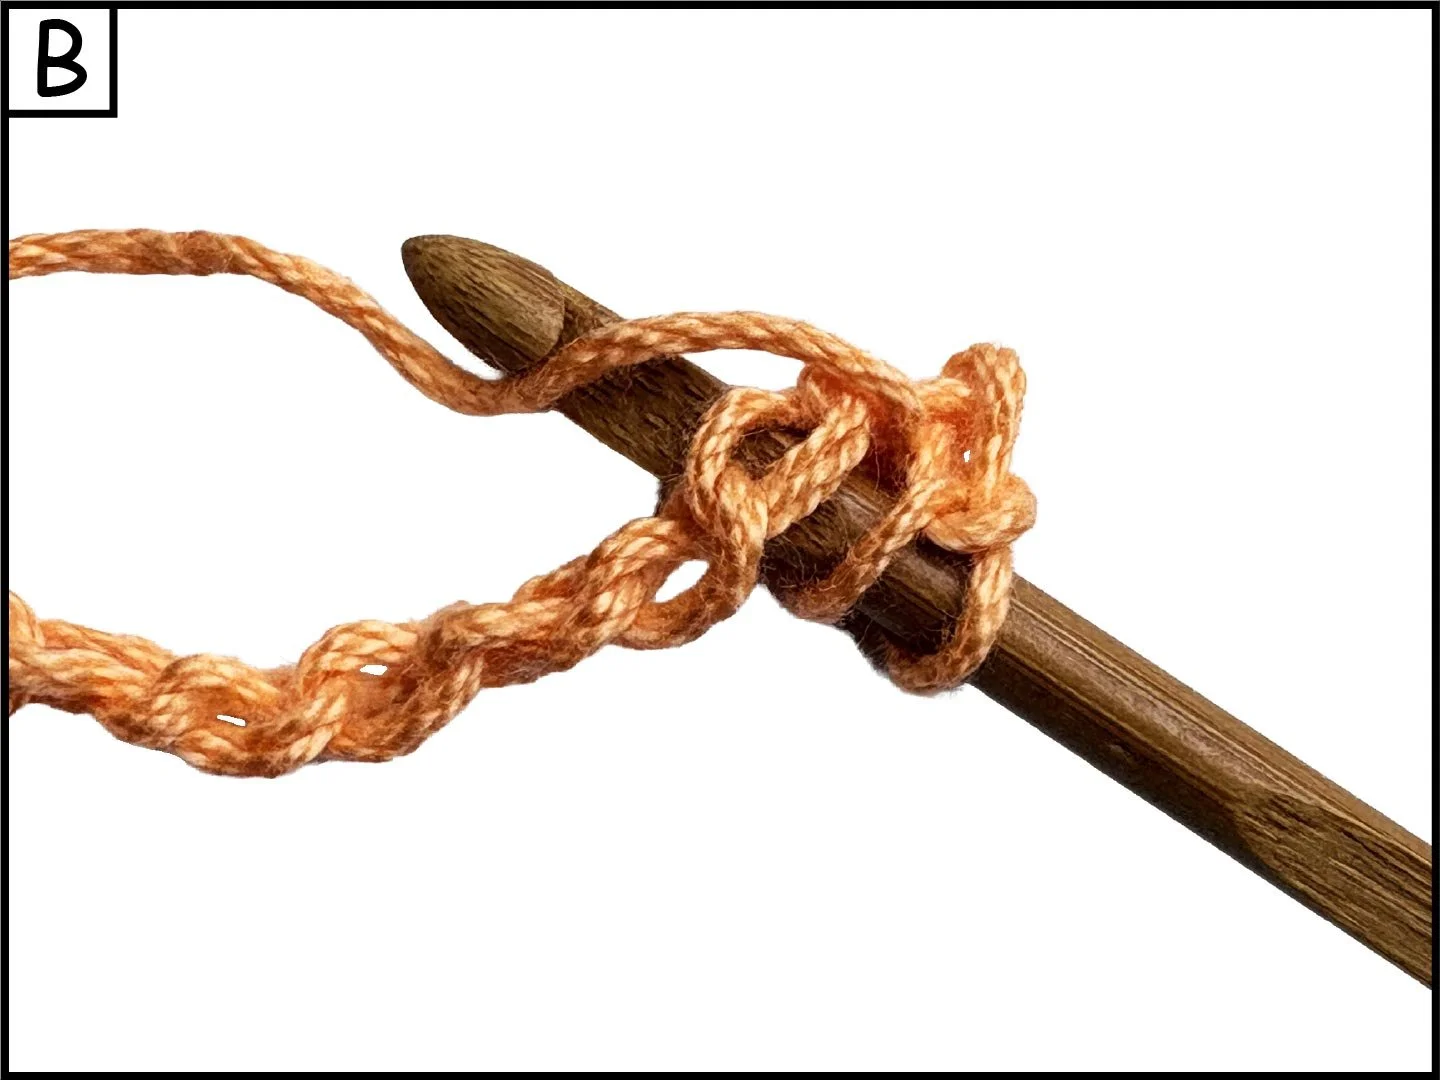
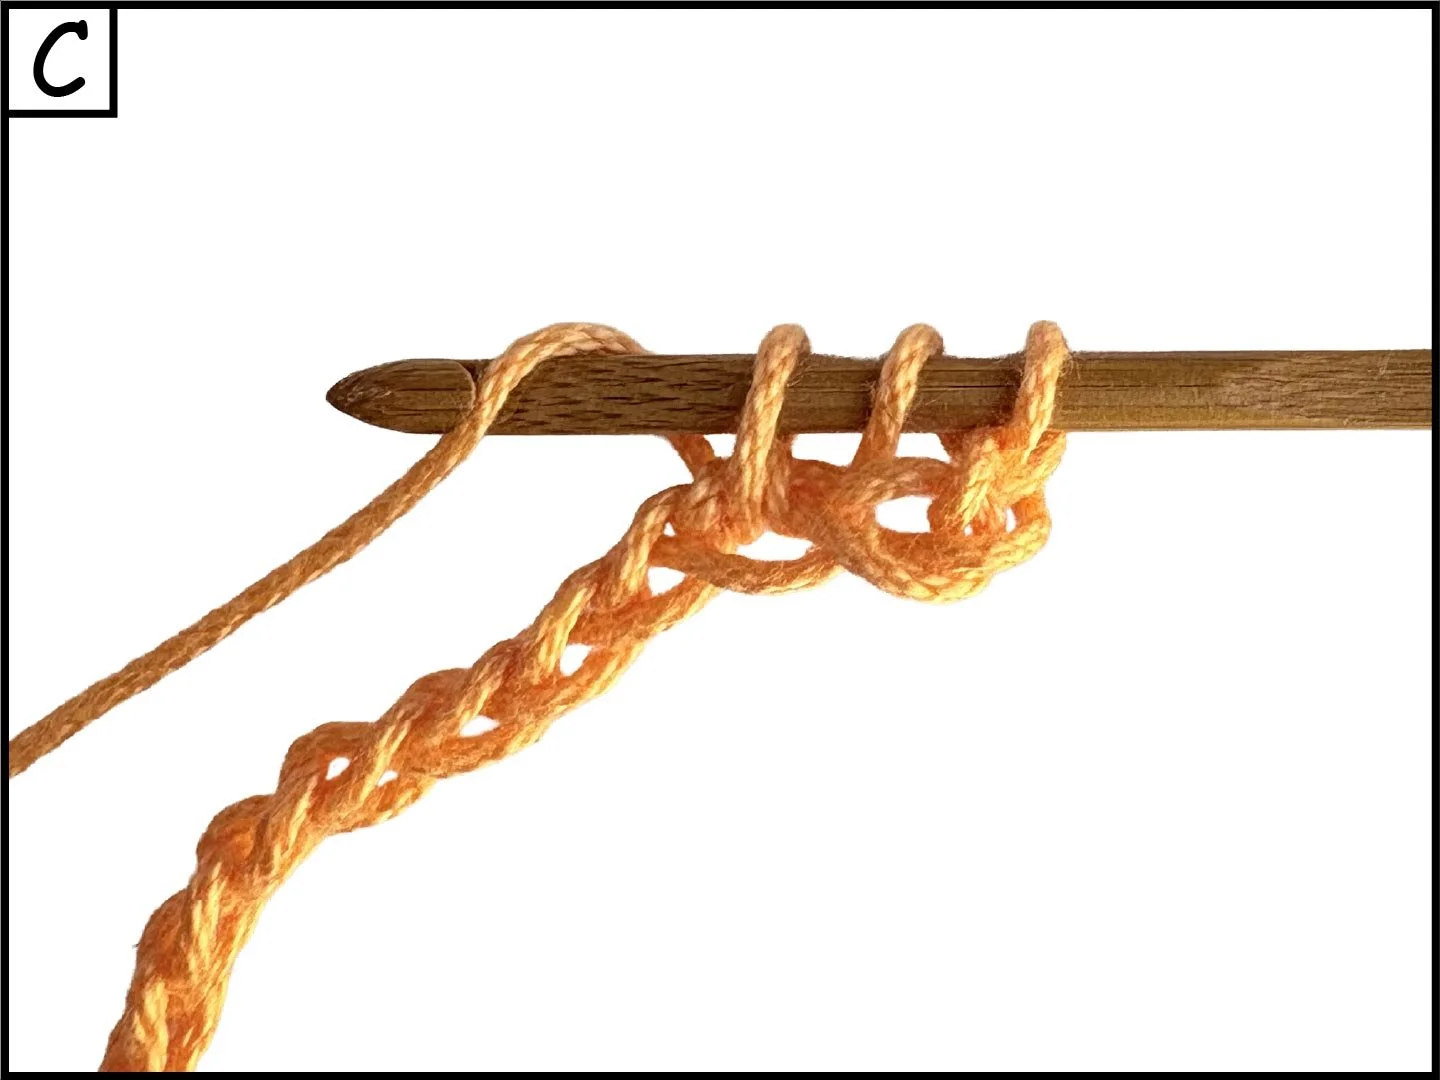
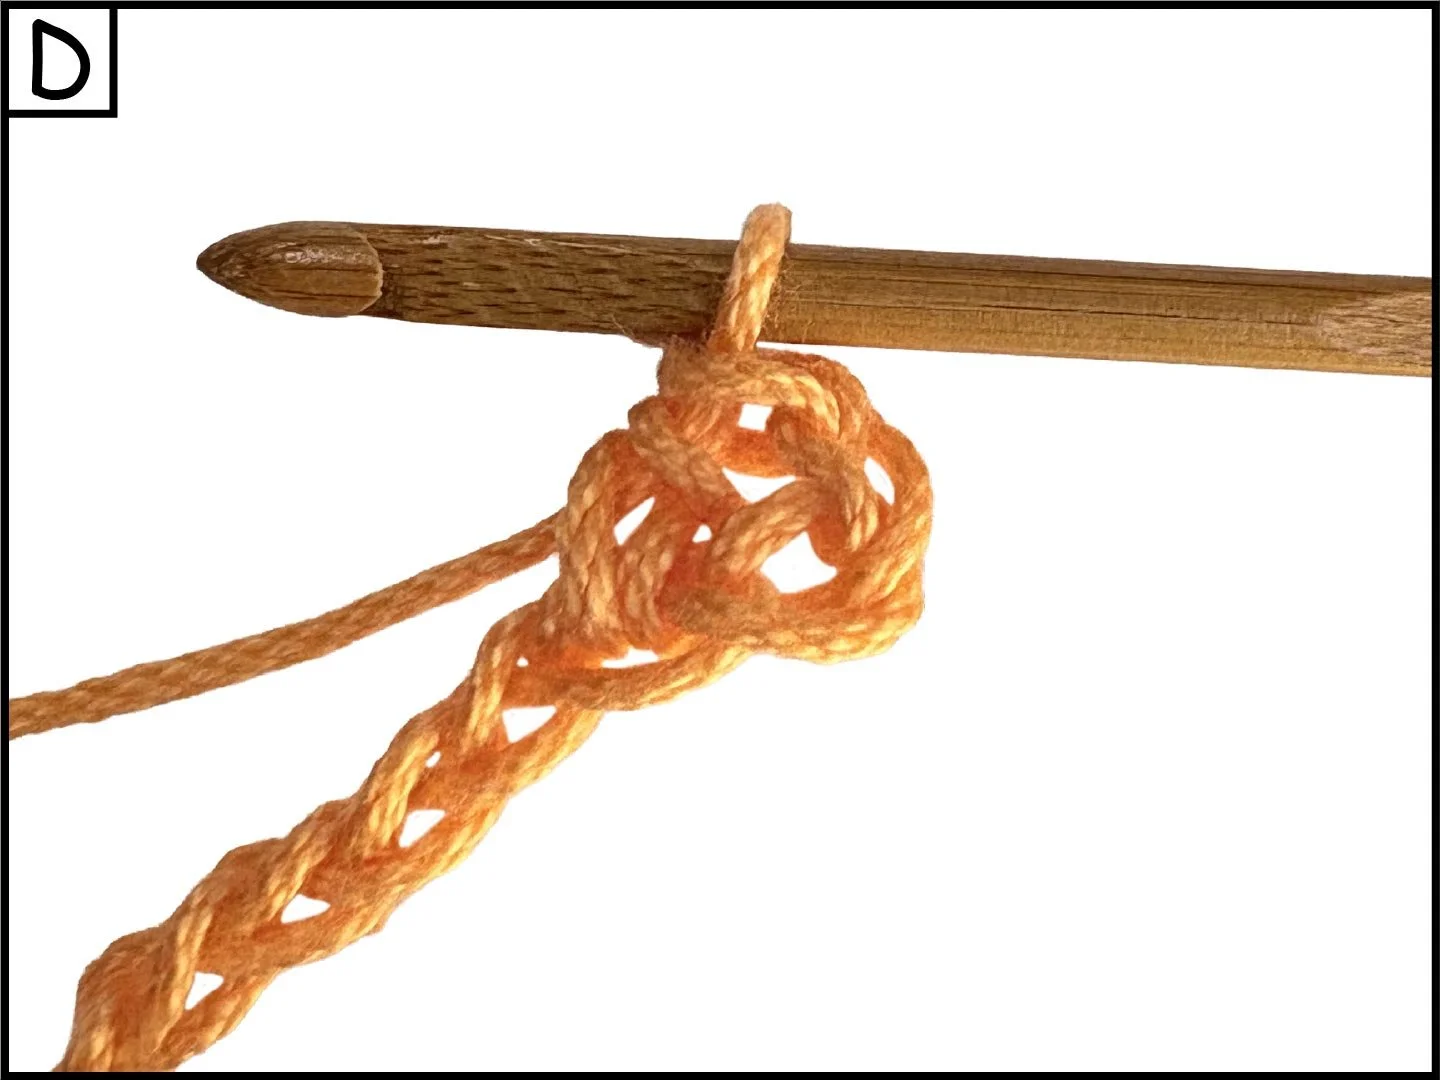
Treble/Triple Crochet (tr)
Ch 4 (counts as a tr), yo twice, insert hook into 6th ch from hook, or second st, yo (A,B) and pull through making 4 loops on your hook, yo (C) and pull through first 2 loops leaving 3 loops, yo (D) and pull through next 2 loops leaving 2 loops, yo (E) and pull through last 2 loops to complete 1 tr (F), work 1 tr in each st across the row, turn.