
Design a Custom Crochet Top
It always feels great when someone compliments your clothes, especially when you made them yourself. They mean more than store bought because you put in the work to create them. Even better, they fit your measurements and style.
Use this guide to create your own custom crochet top using only rectangular shapes. Great for beginner to advanced crocheters. Use any crochet stitch or repeat pattern you like.
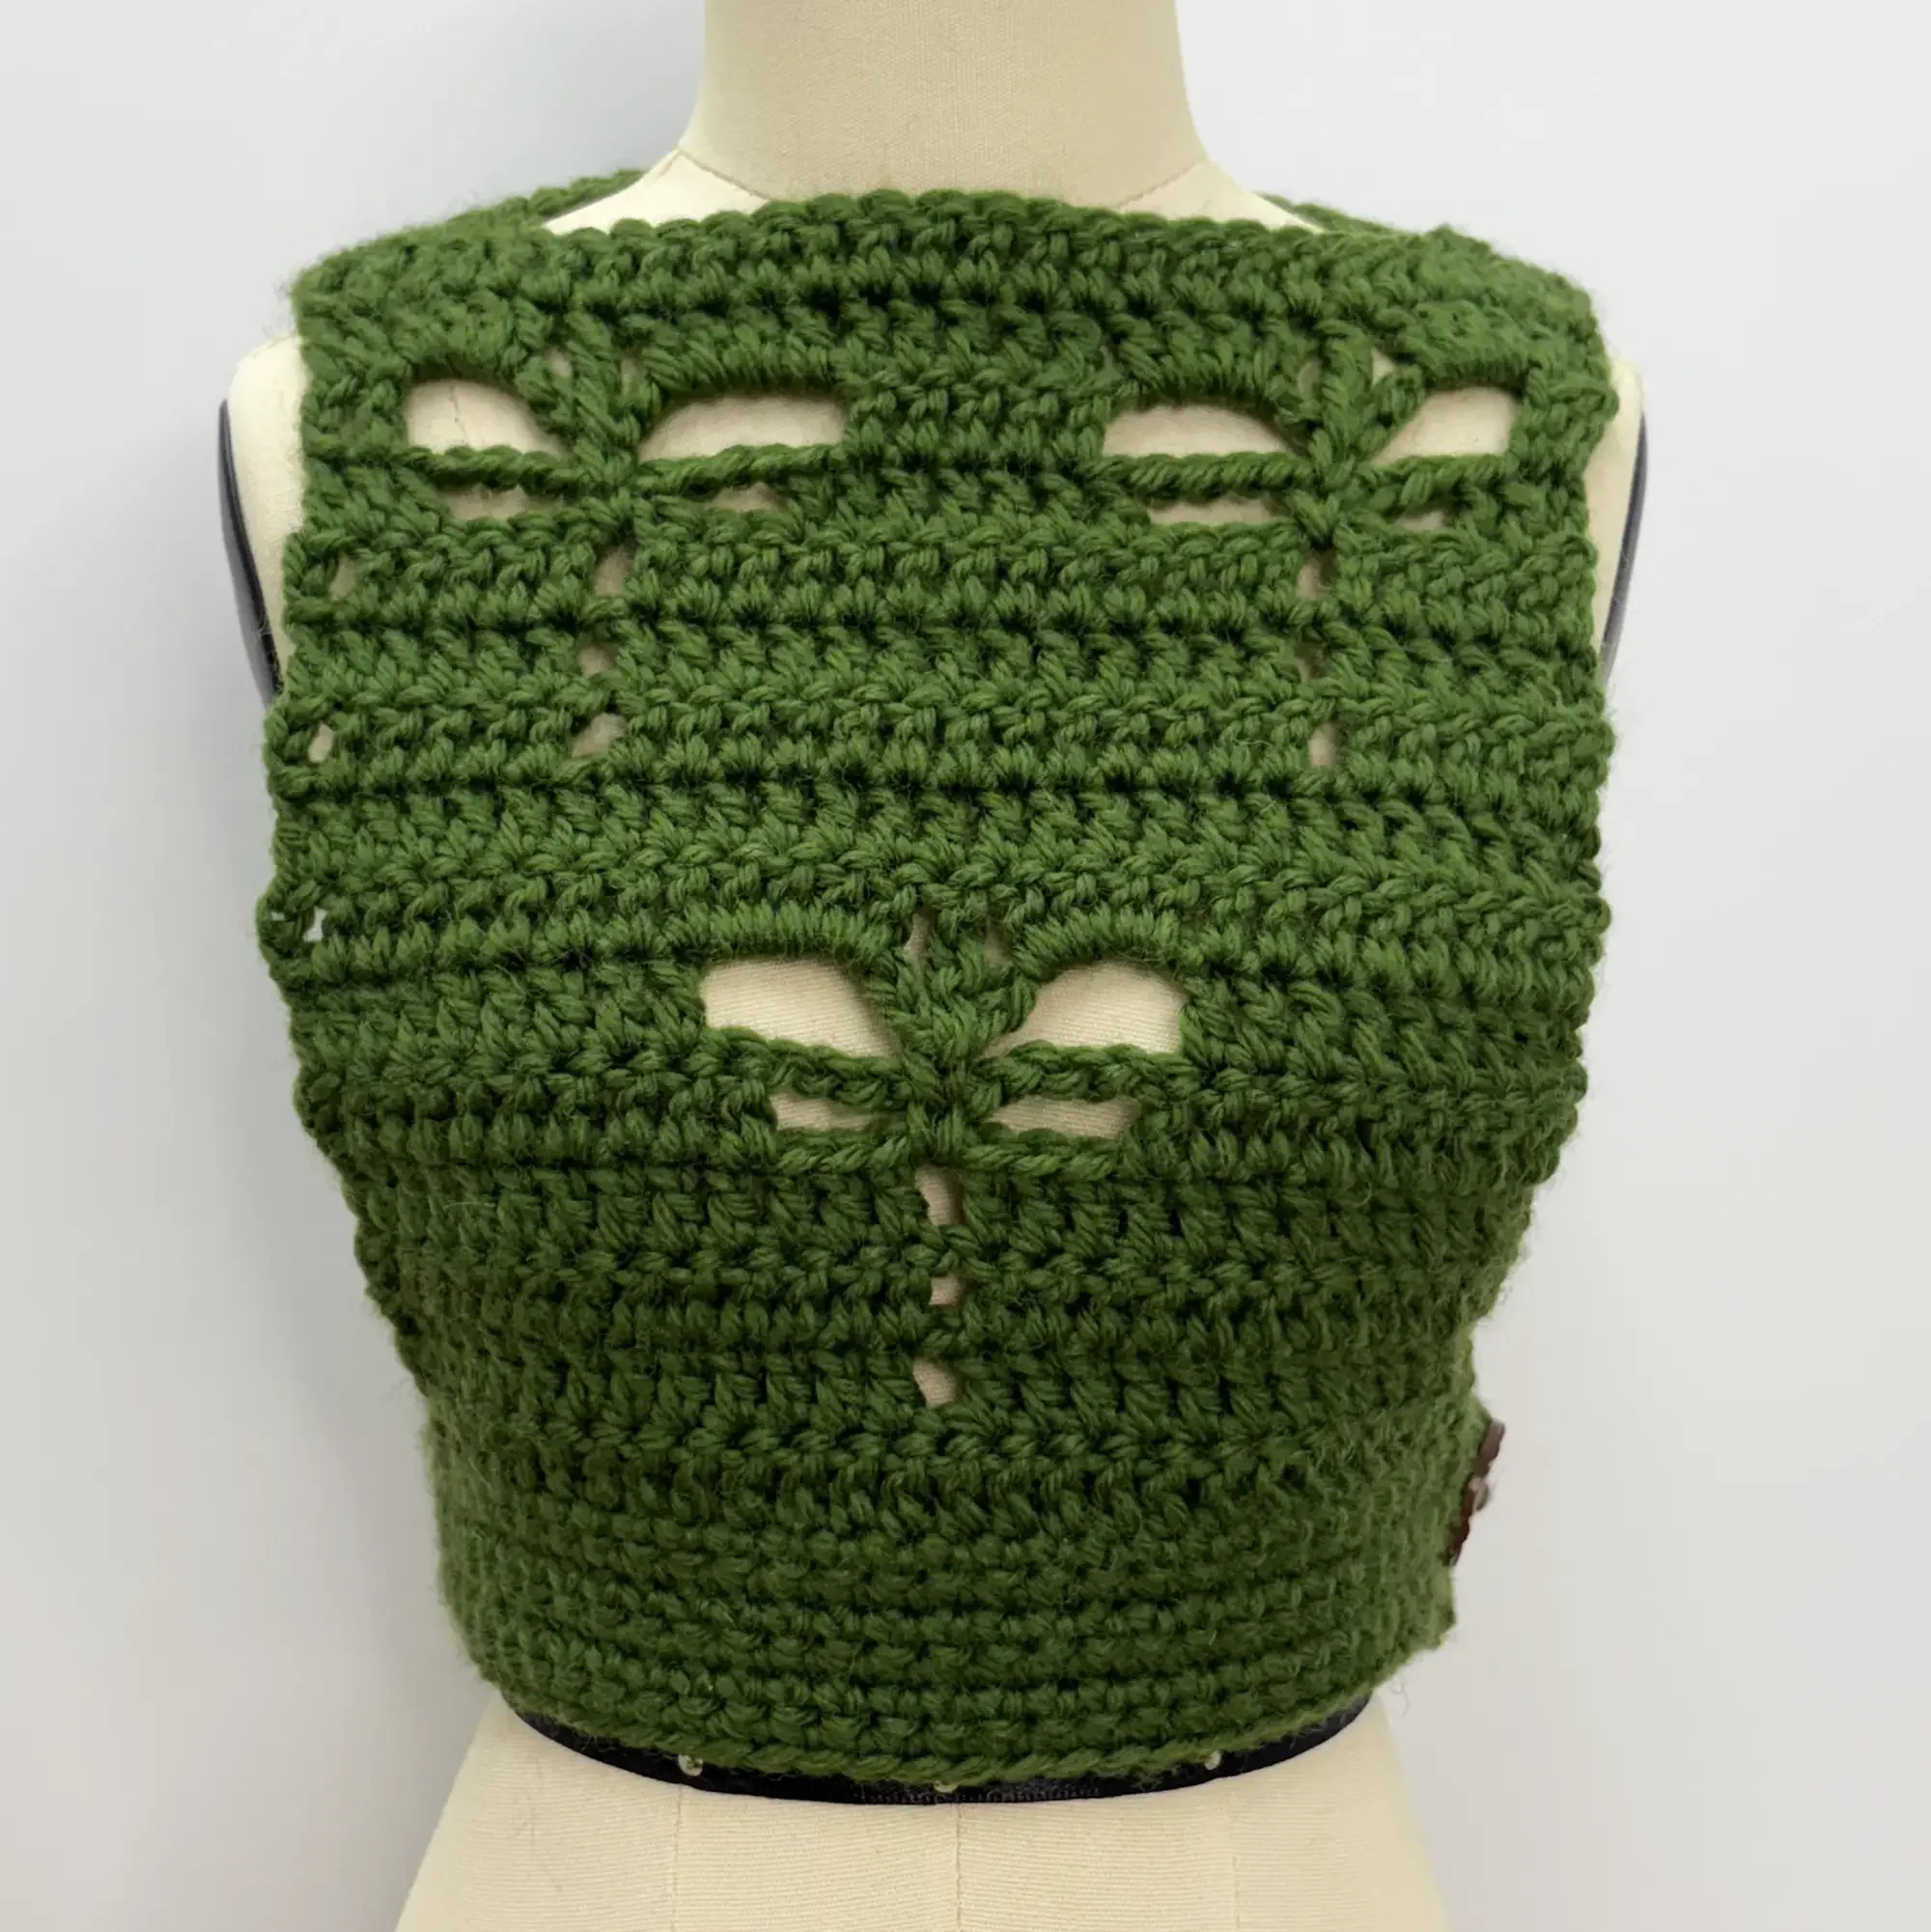
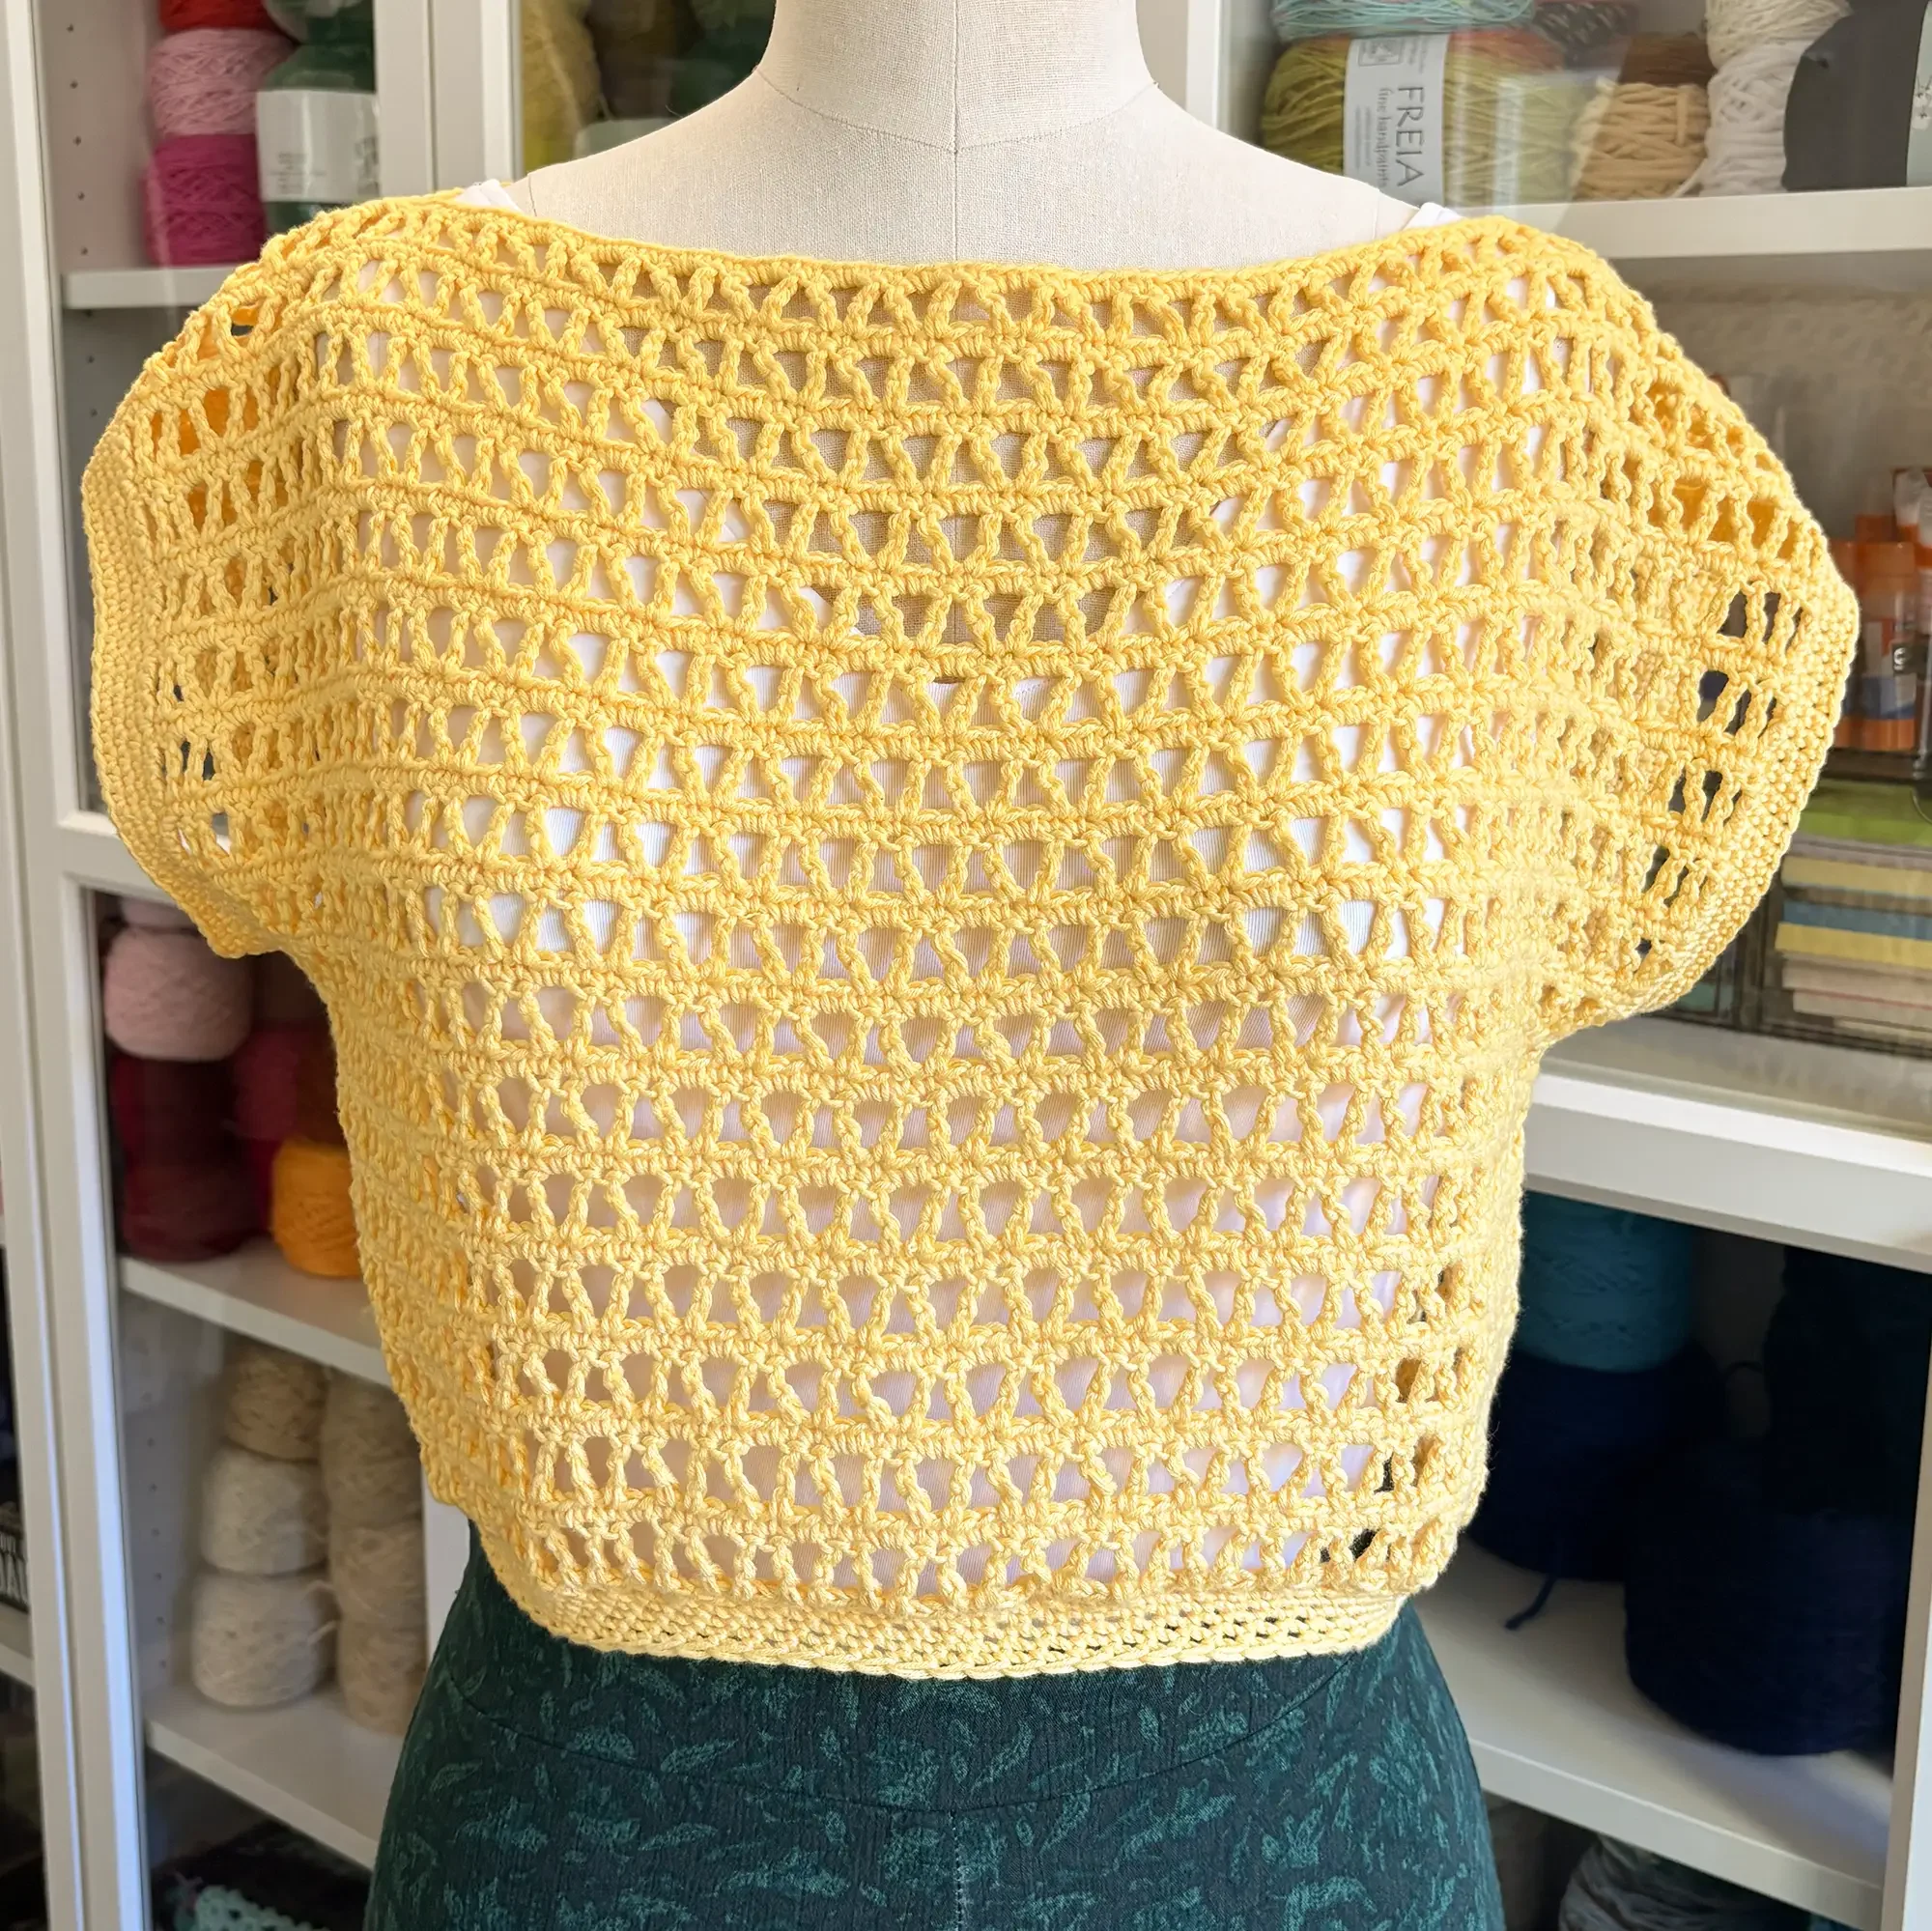
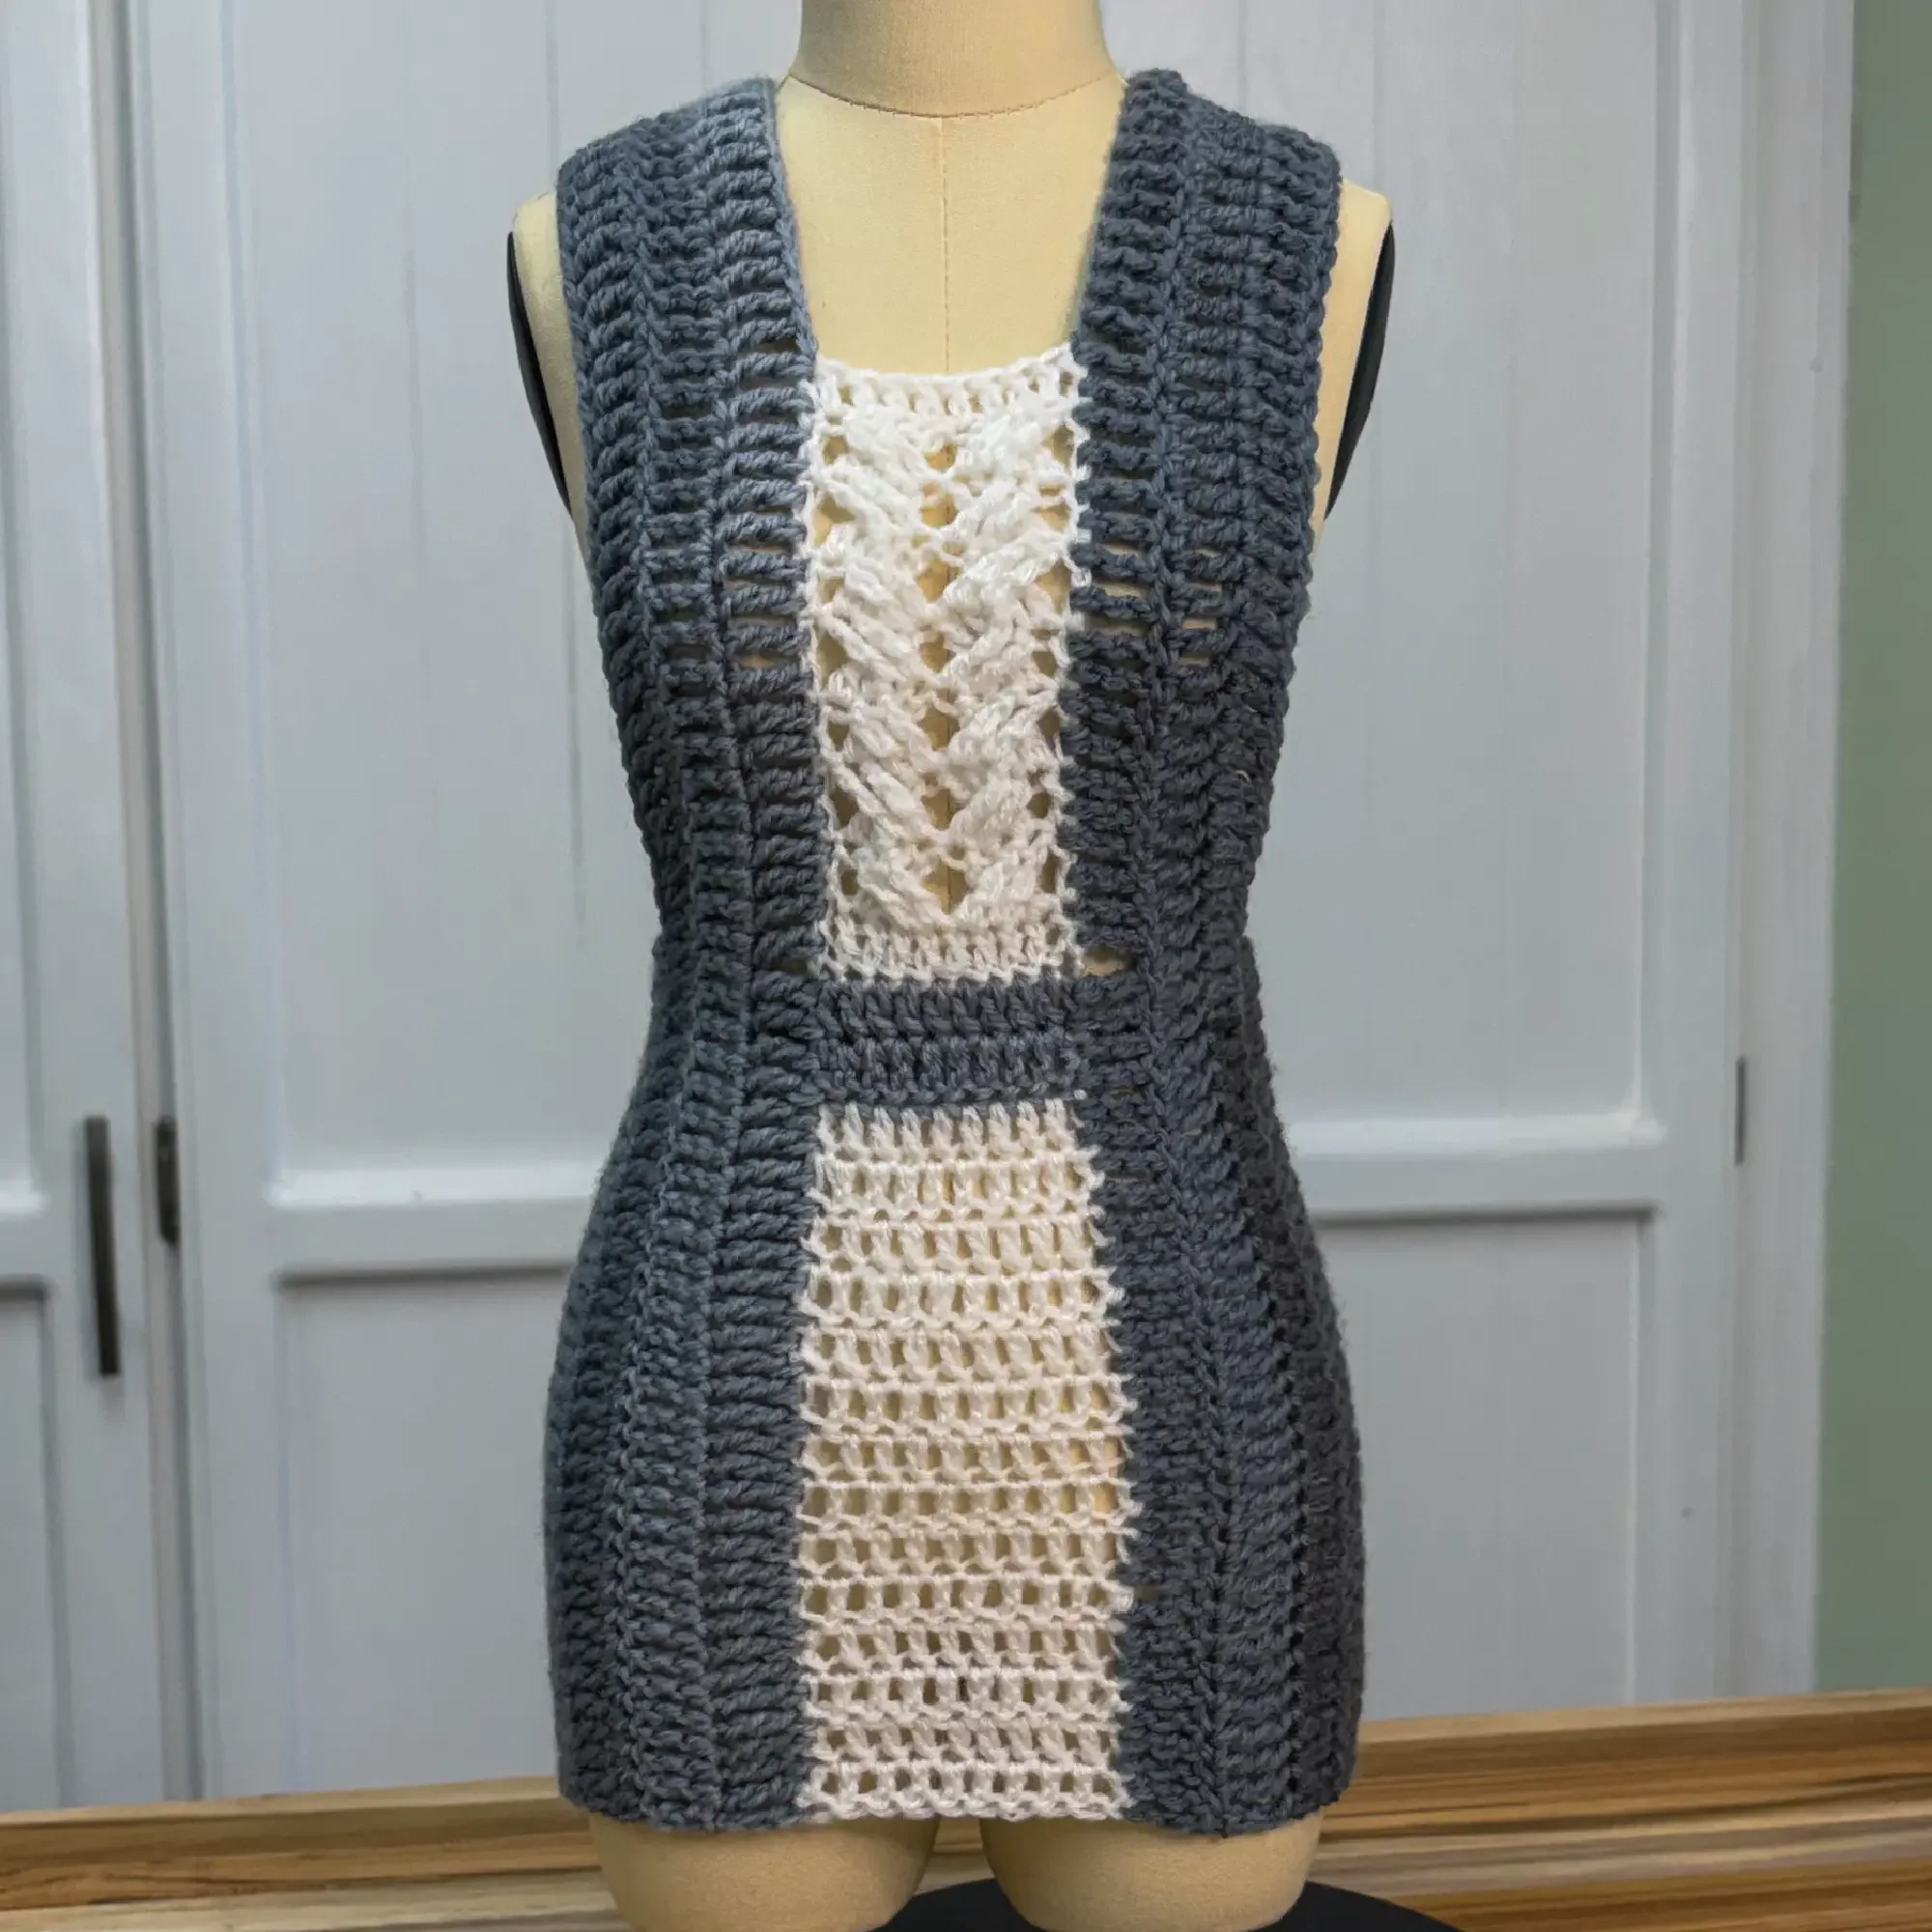
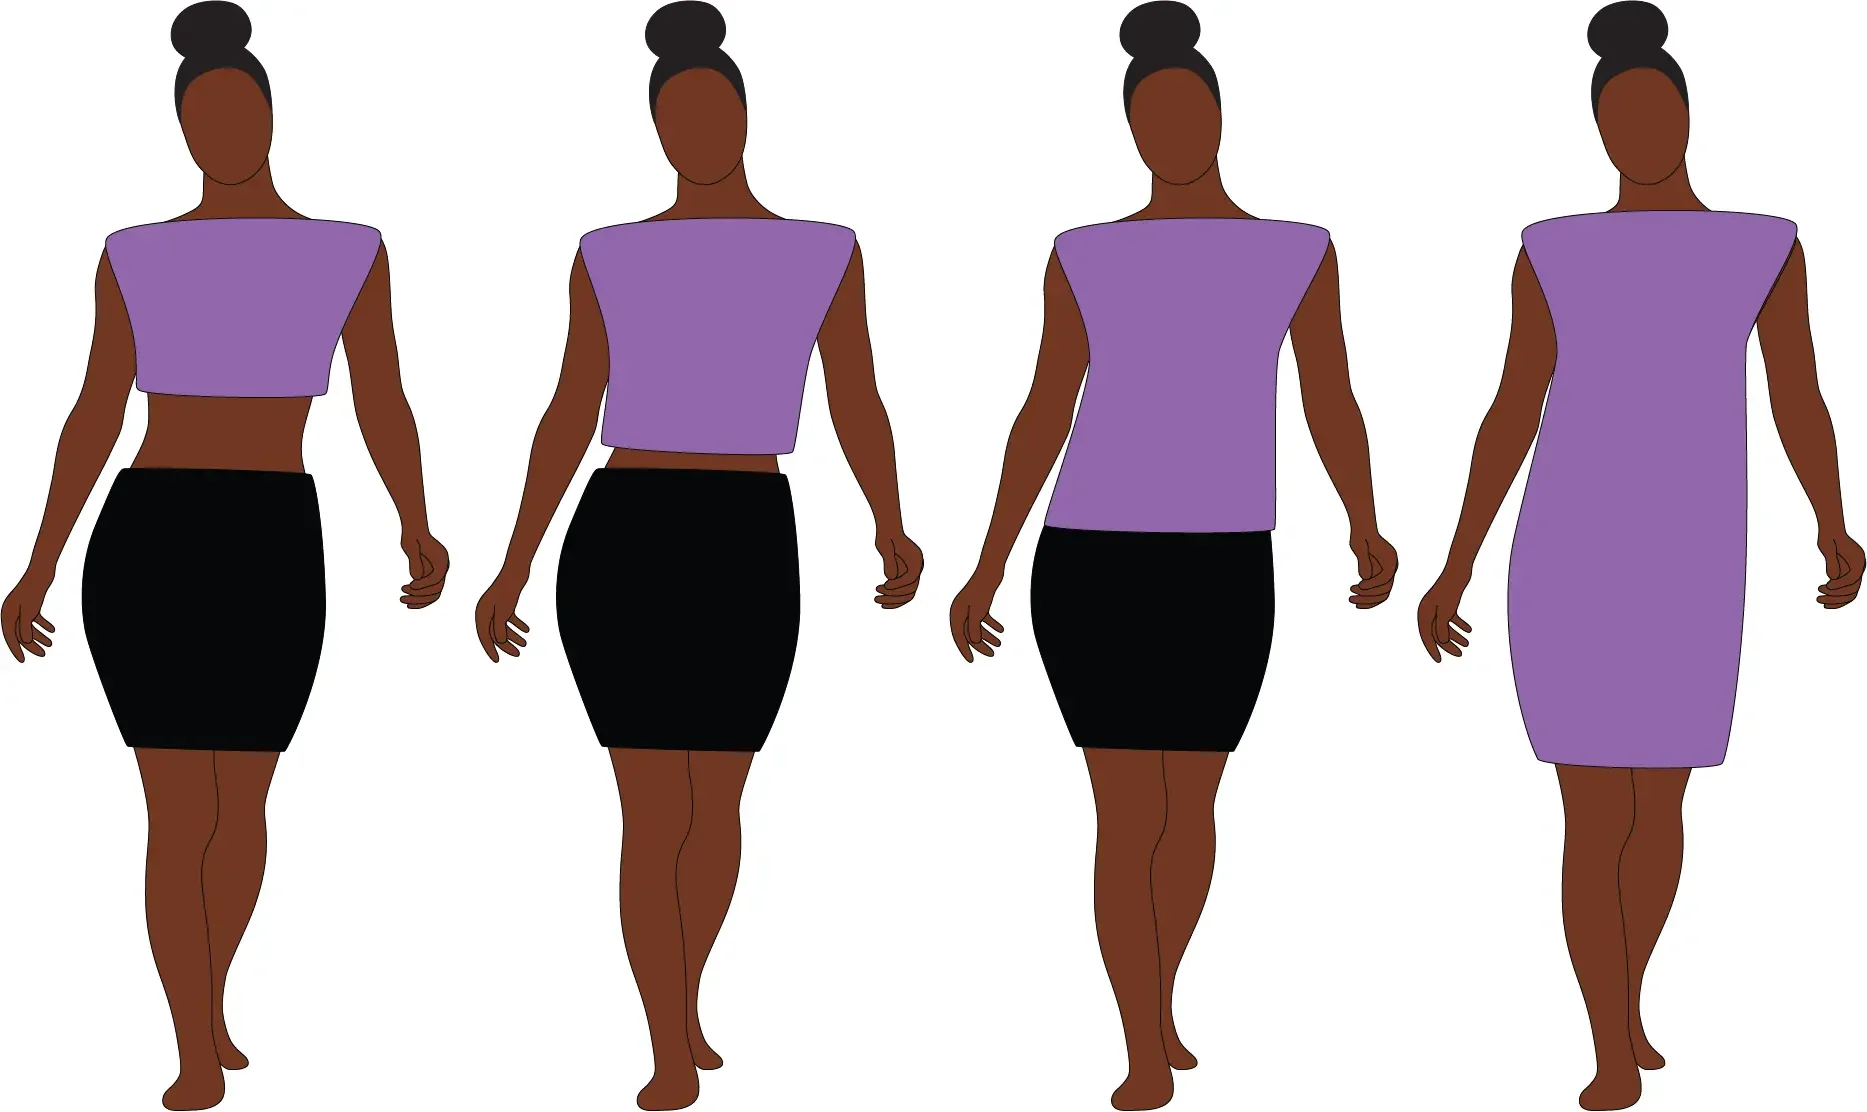
A crochet top can be as basic as two double crochet rectangles (one front and one back bodice) put together. You can change it up by using your favorite stitch or repeat pattern, split the rectangles into multiple panels, add straps, short to long sleeves, cuffs and bands, as well as buttons and zippers. Feel free to mix features from multiple top styles.
Refer to my “Crochet Page” for essentials tools and basic crochet stitches.
Measurements Guide
Before you get started take some measurements.
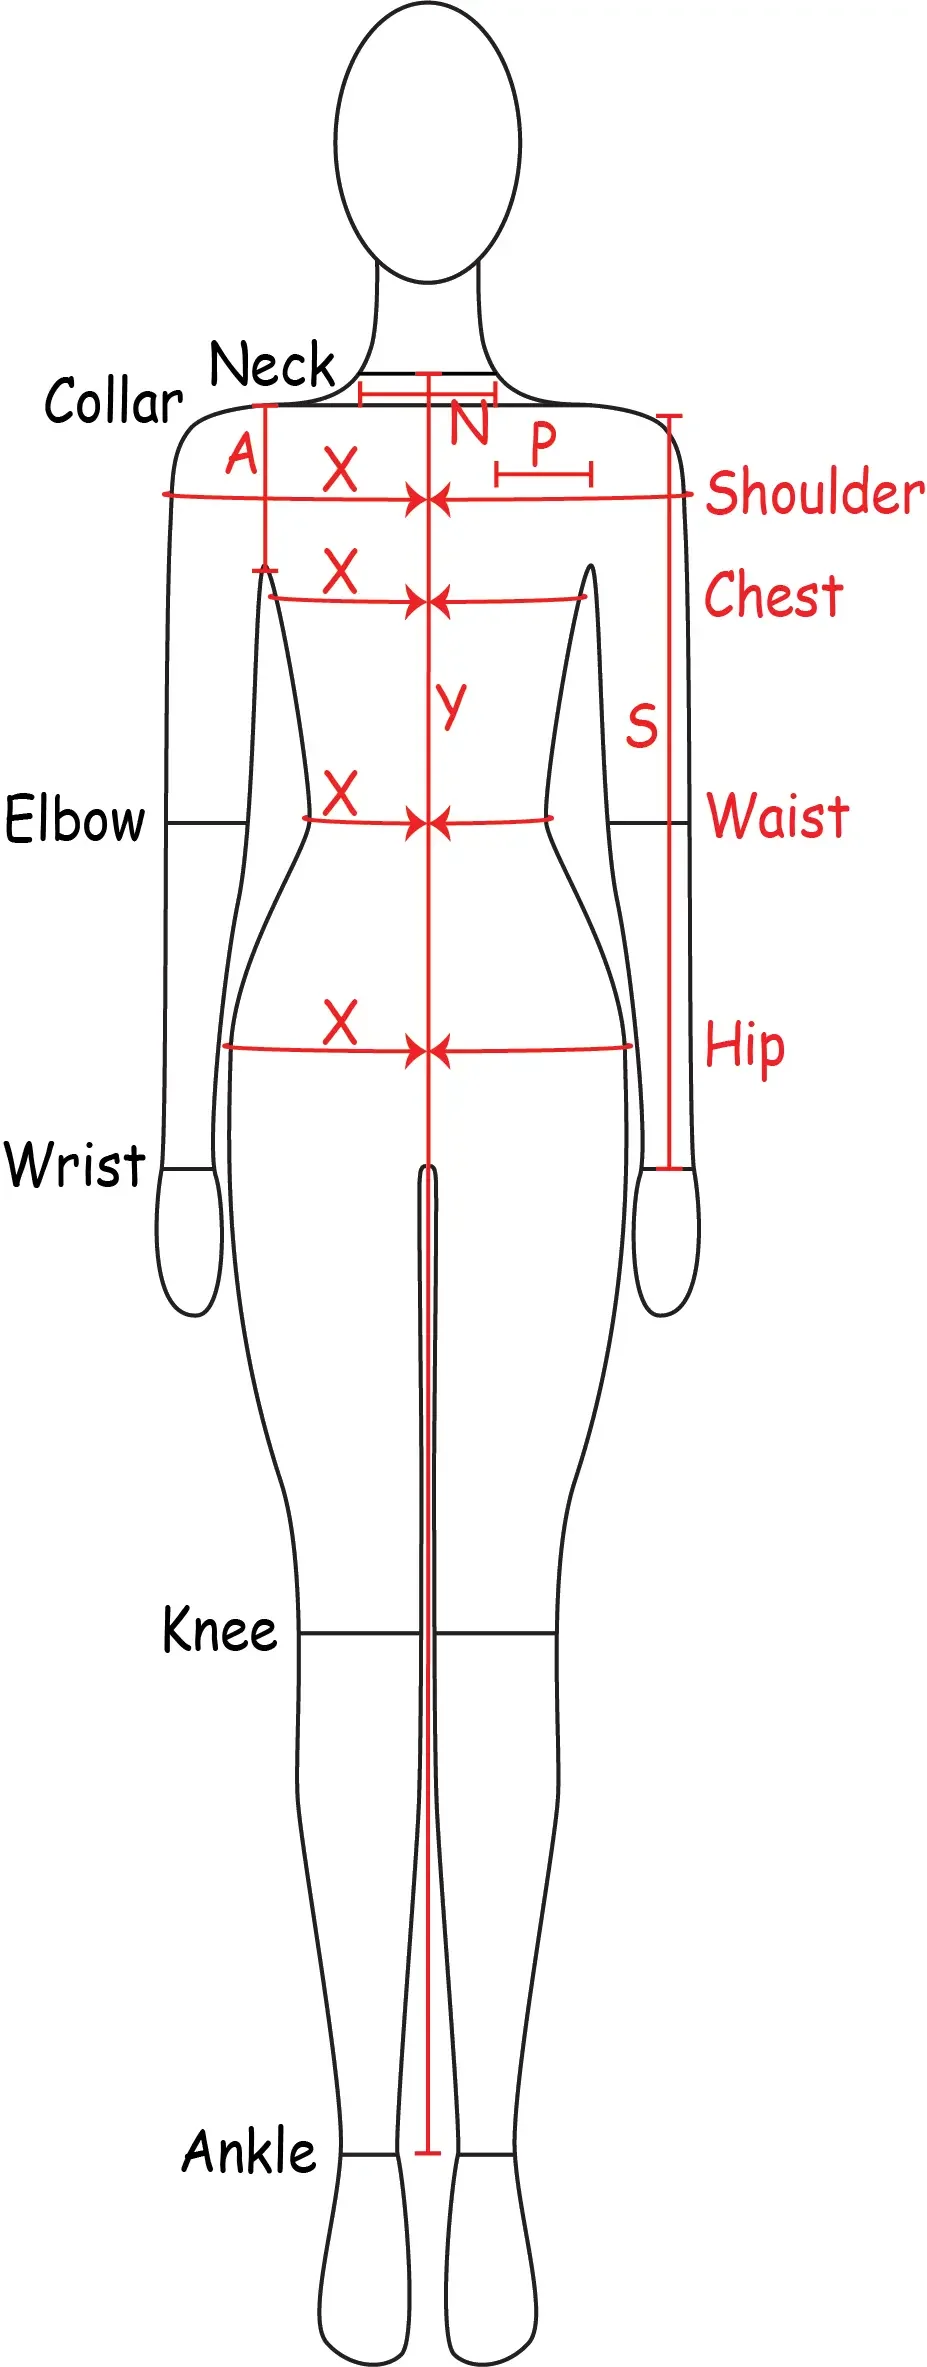
X - Circumference of the widest part of your body. This can either from your shoulders, chest, waist, or hips. You do not need to include areas outside the length of your top. Make your top baggy or tighter by adding or subtracting from X, however, to fit your top must be able to stretch over the widest part of your body. Tighter tops can also be achieved by using ribbing or other closures to cinch in areas. See “Cuffs, Bands, and Closures” at the end for more info.
Y - Length of your top. Start your measurement along the shoulder seam at the highest point and end at any length you want (see specific styles for visuals). Some length will need to be subtracted if you include a band (see “Cuffs, Bands, and Closures” at the end for more info). Keep in mind some heavy yarns can add length to your top over time as gravity pulls them down. Storing your top flat in a drawer instead of on a hanger can help limit this.
S - Sleeve length. With arms at your side measure from the top edge of your shoulder down your arm to your desired length. If your bodice hangs over the edge of your shoulder subtract the amount from the length of your sleeve.
N – Neck width. This needs to be at least the width of your neck or big enough for your head to fit through when doubled. Make larger if you want the top to have a wider neckline.
P – Strap width. This is measured from the edge of N to no farther than the armpit. It does not have to go all the way to the armpit if you want a thinner strap.
A – Armscye length. This is measured from the top of the shoulder to under the arm. Make as tight or baggy as you wish.
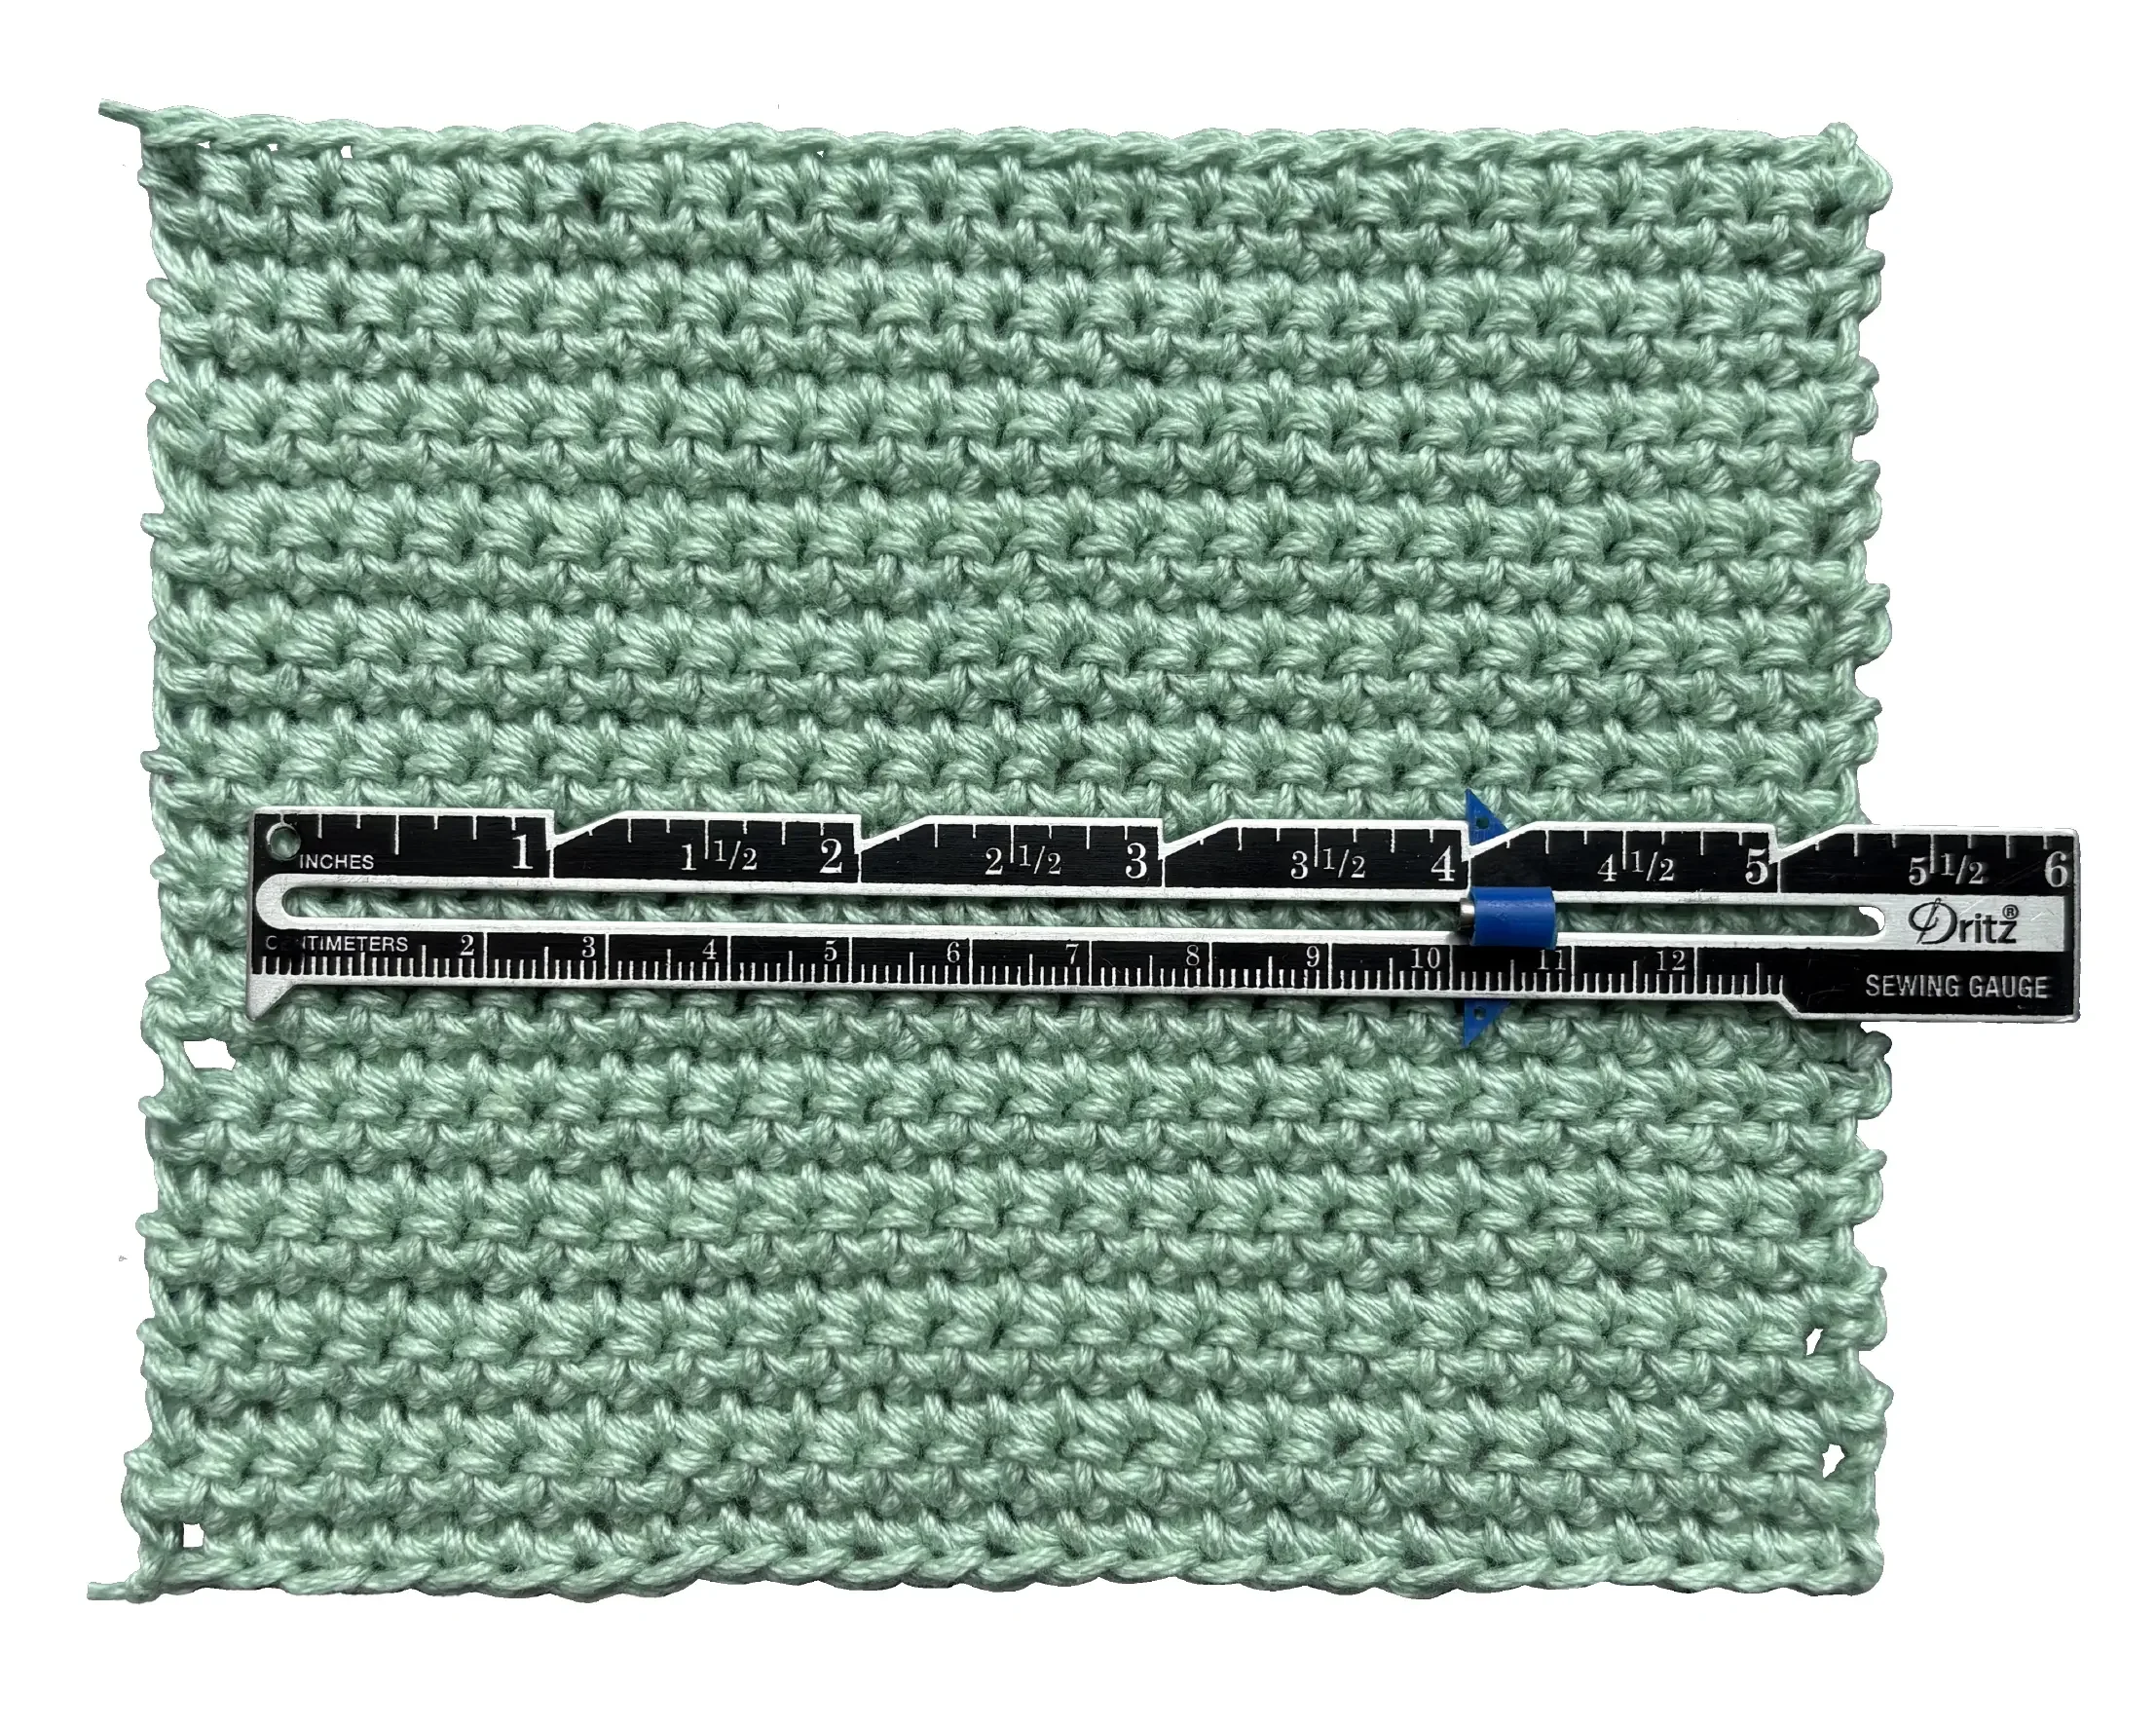
Make a Gauge
Create a gauge using the yarn and crochet stitch or pattern you plan to use. Count how many stitches and rows fit in a specific measurement.
For stretchy patterns you may want to record a gauge without it stretched and one with it stretched to better determine how a garment will fit. One great thing about a stretchy crochet pattern is straight edges can stretch around curves such as necklines and armscye. However, watch for any designs that look too warped when stretched.
Seams
Here are a few seam techniques to join your pieces together.
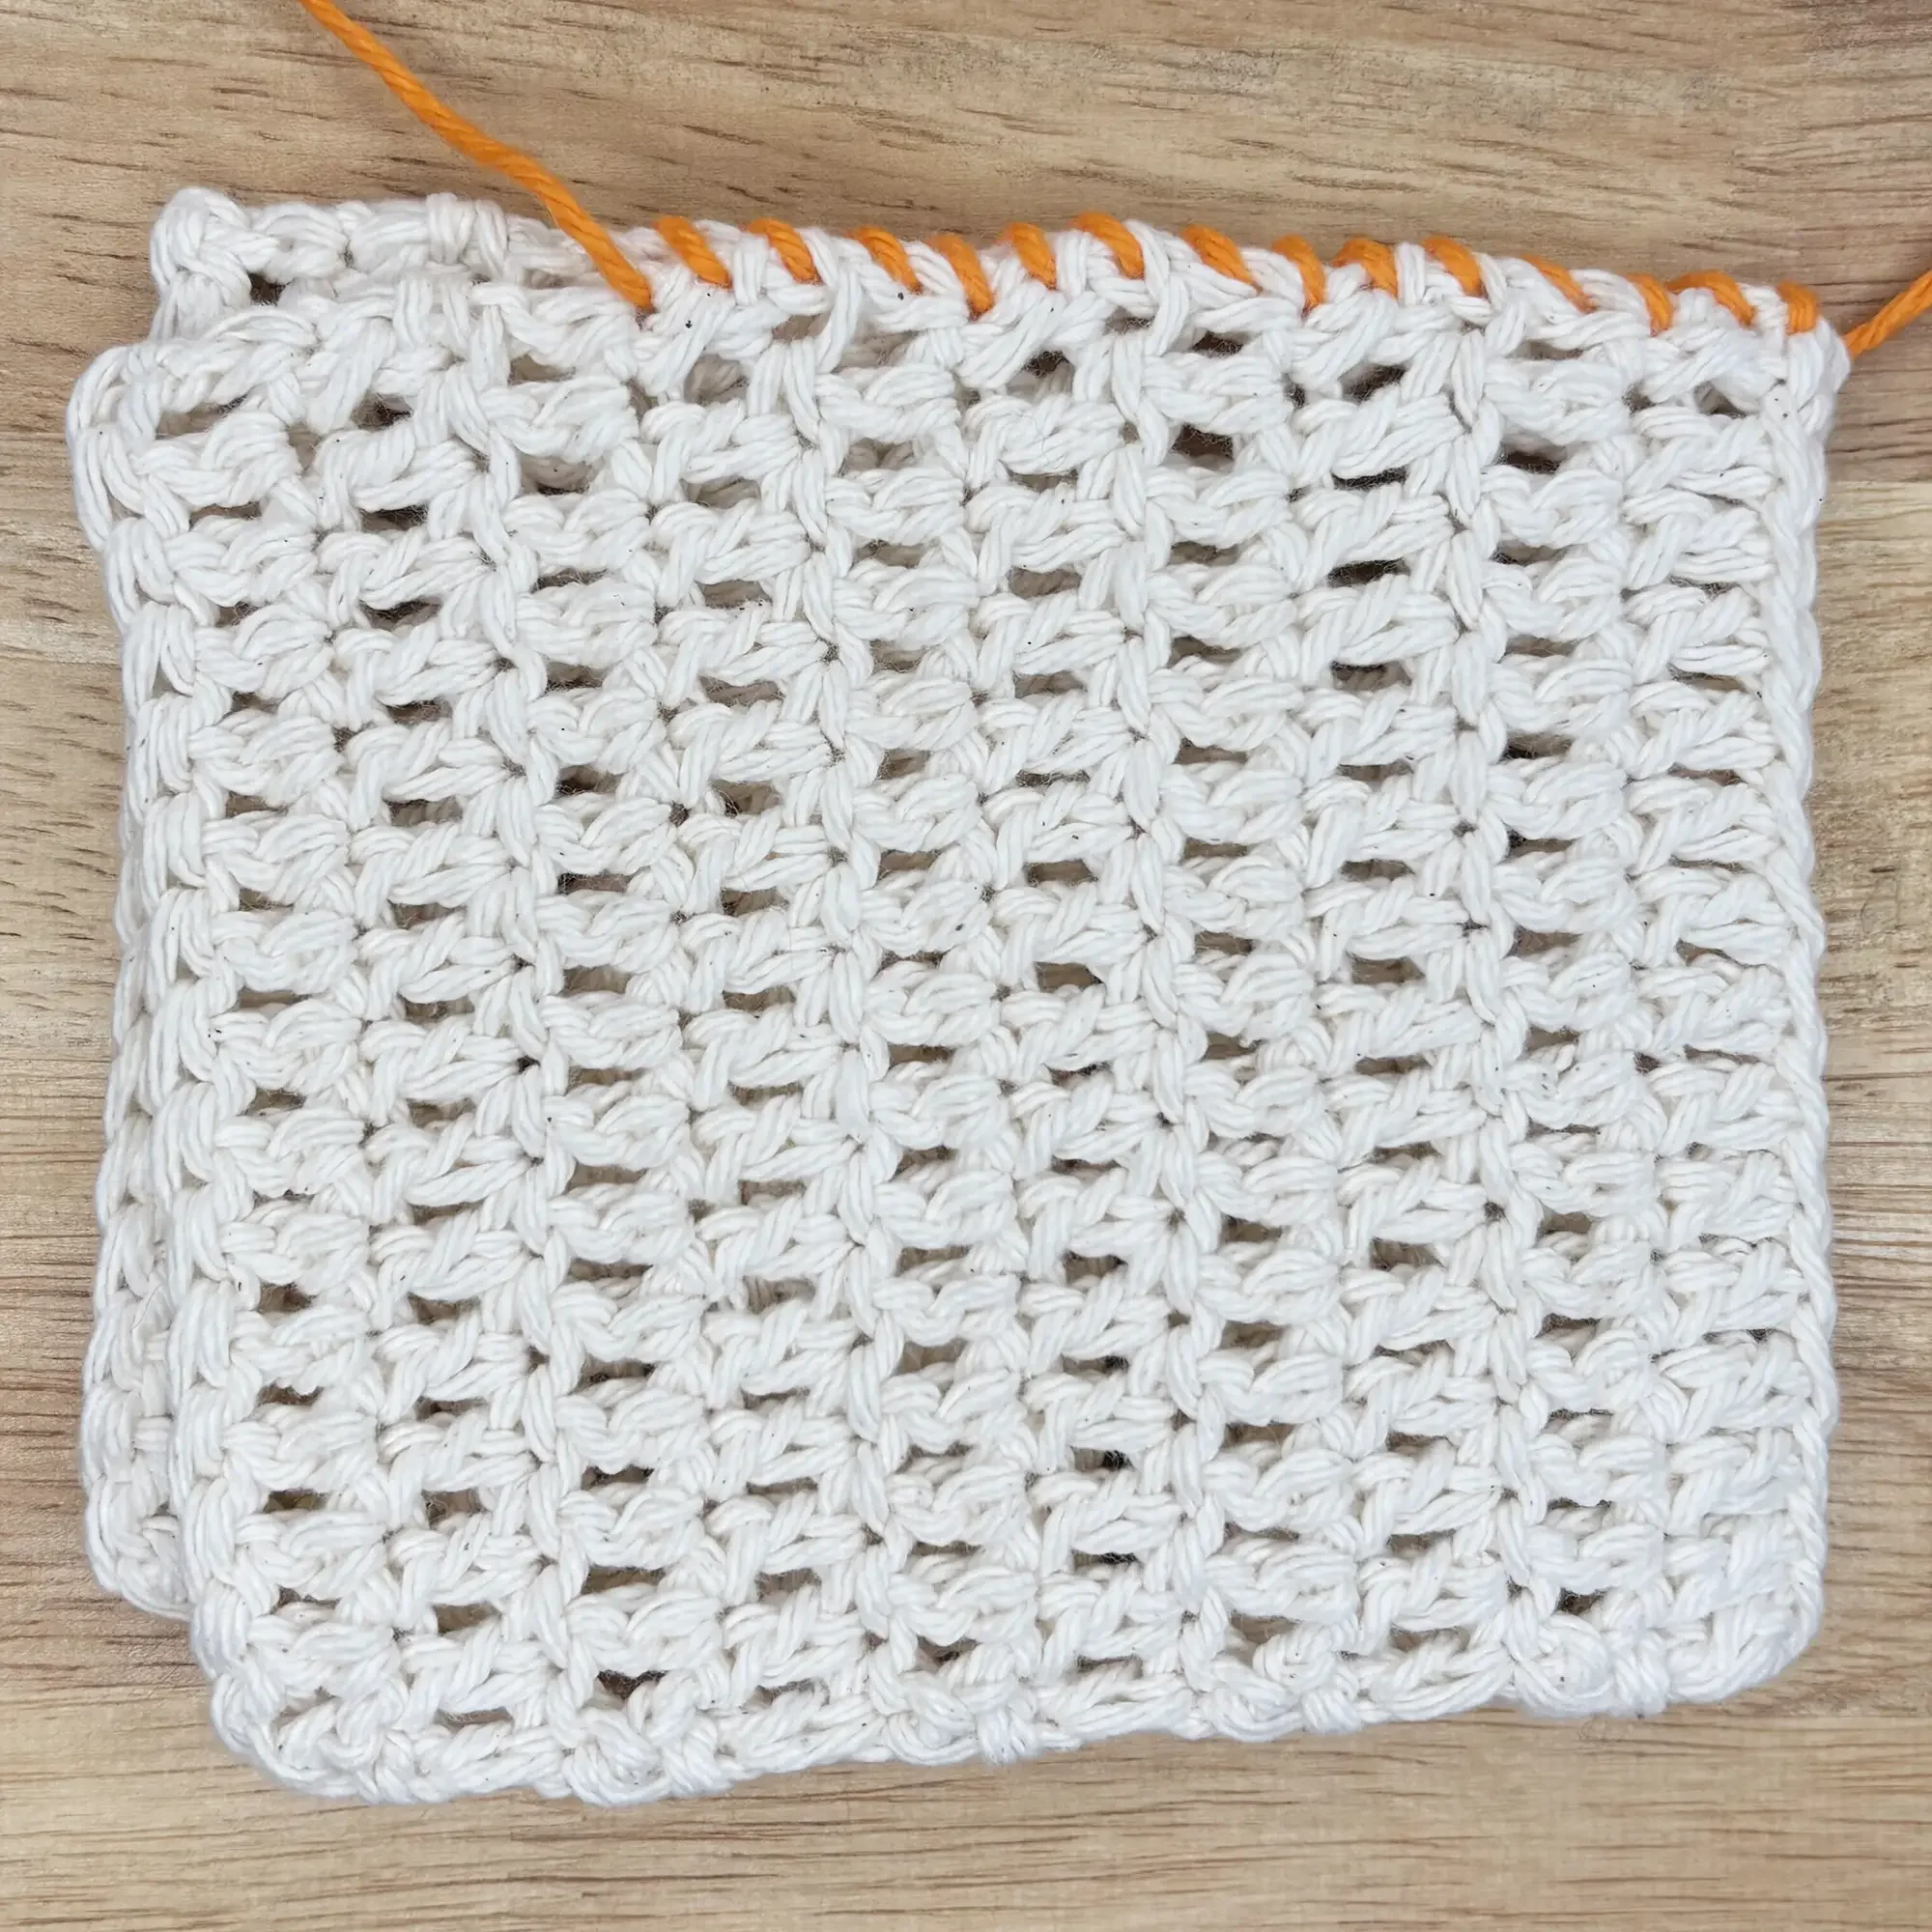
Whip Stitch
Put right sides together and hand sew through both edges using a whip stitch to join.
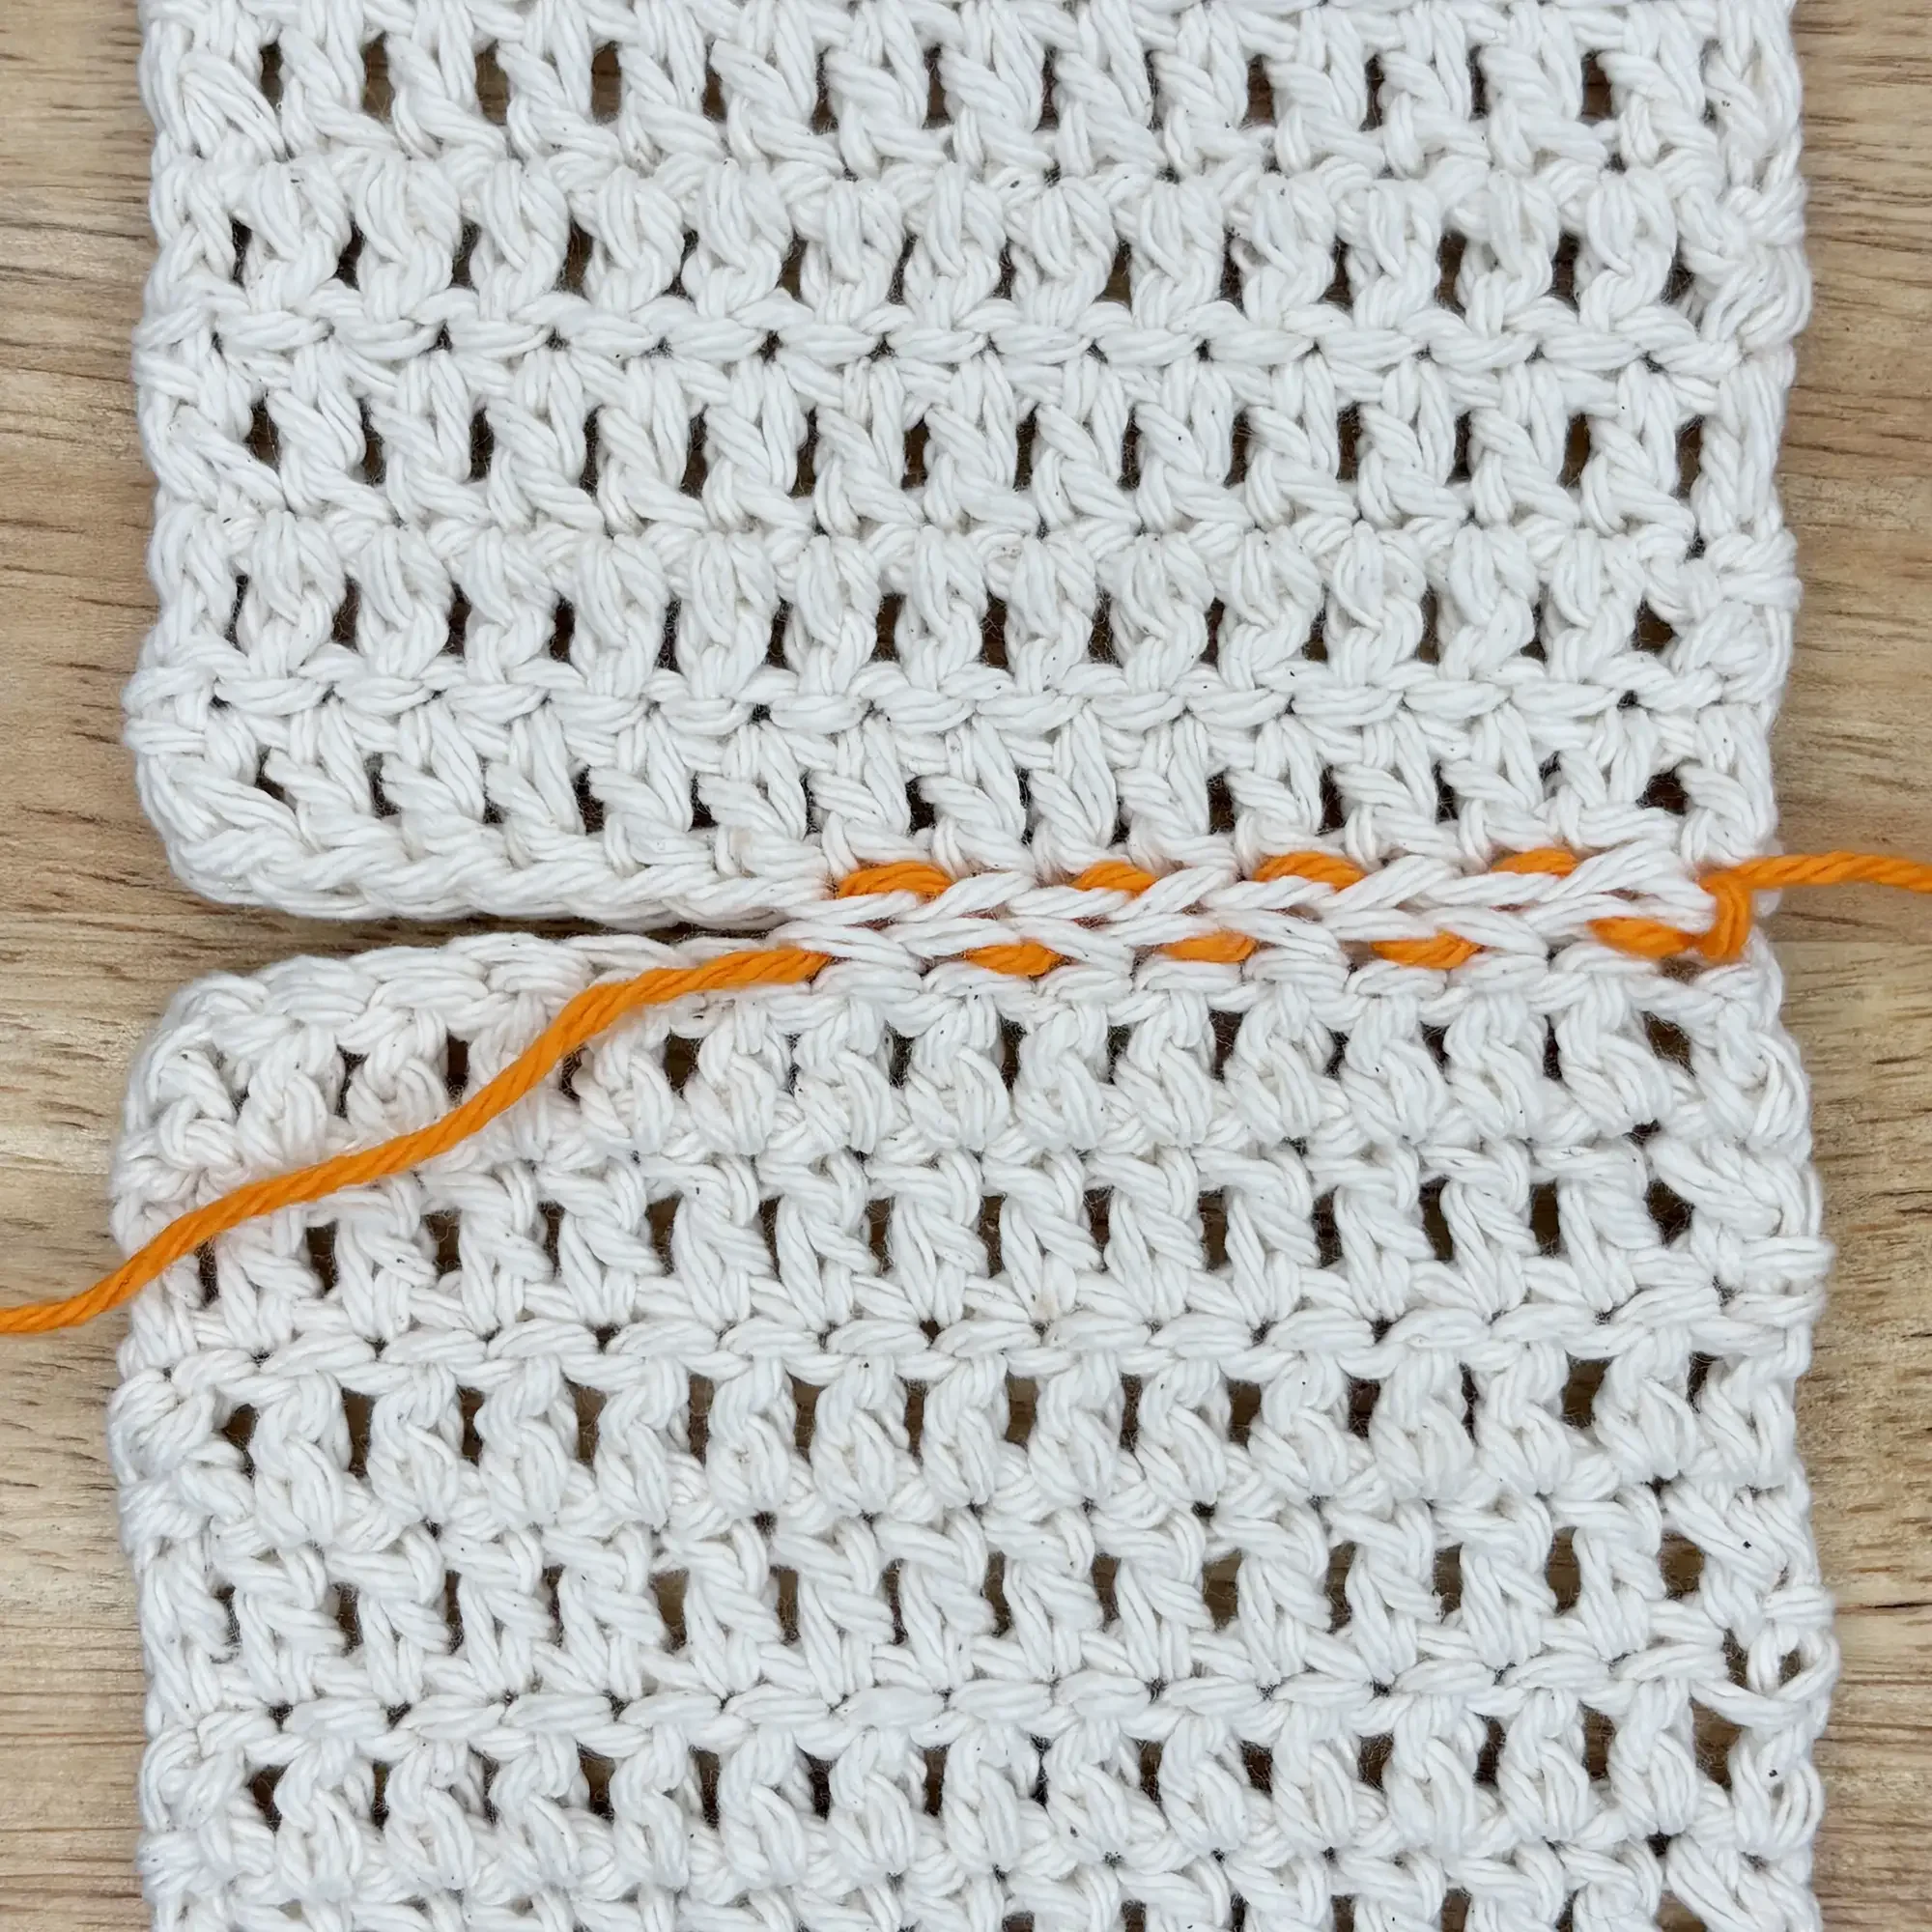
Weave Seam
Align edges side by side with right sides facing down and weave back and forth between them to join.
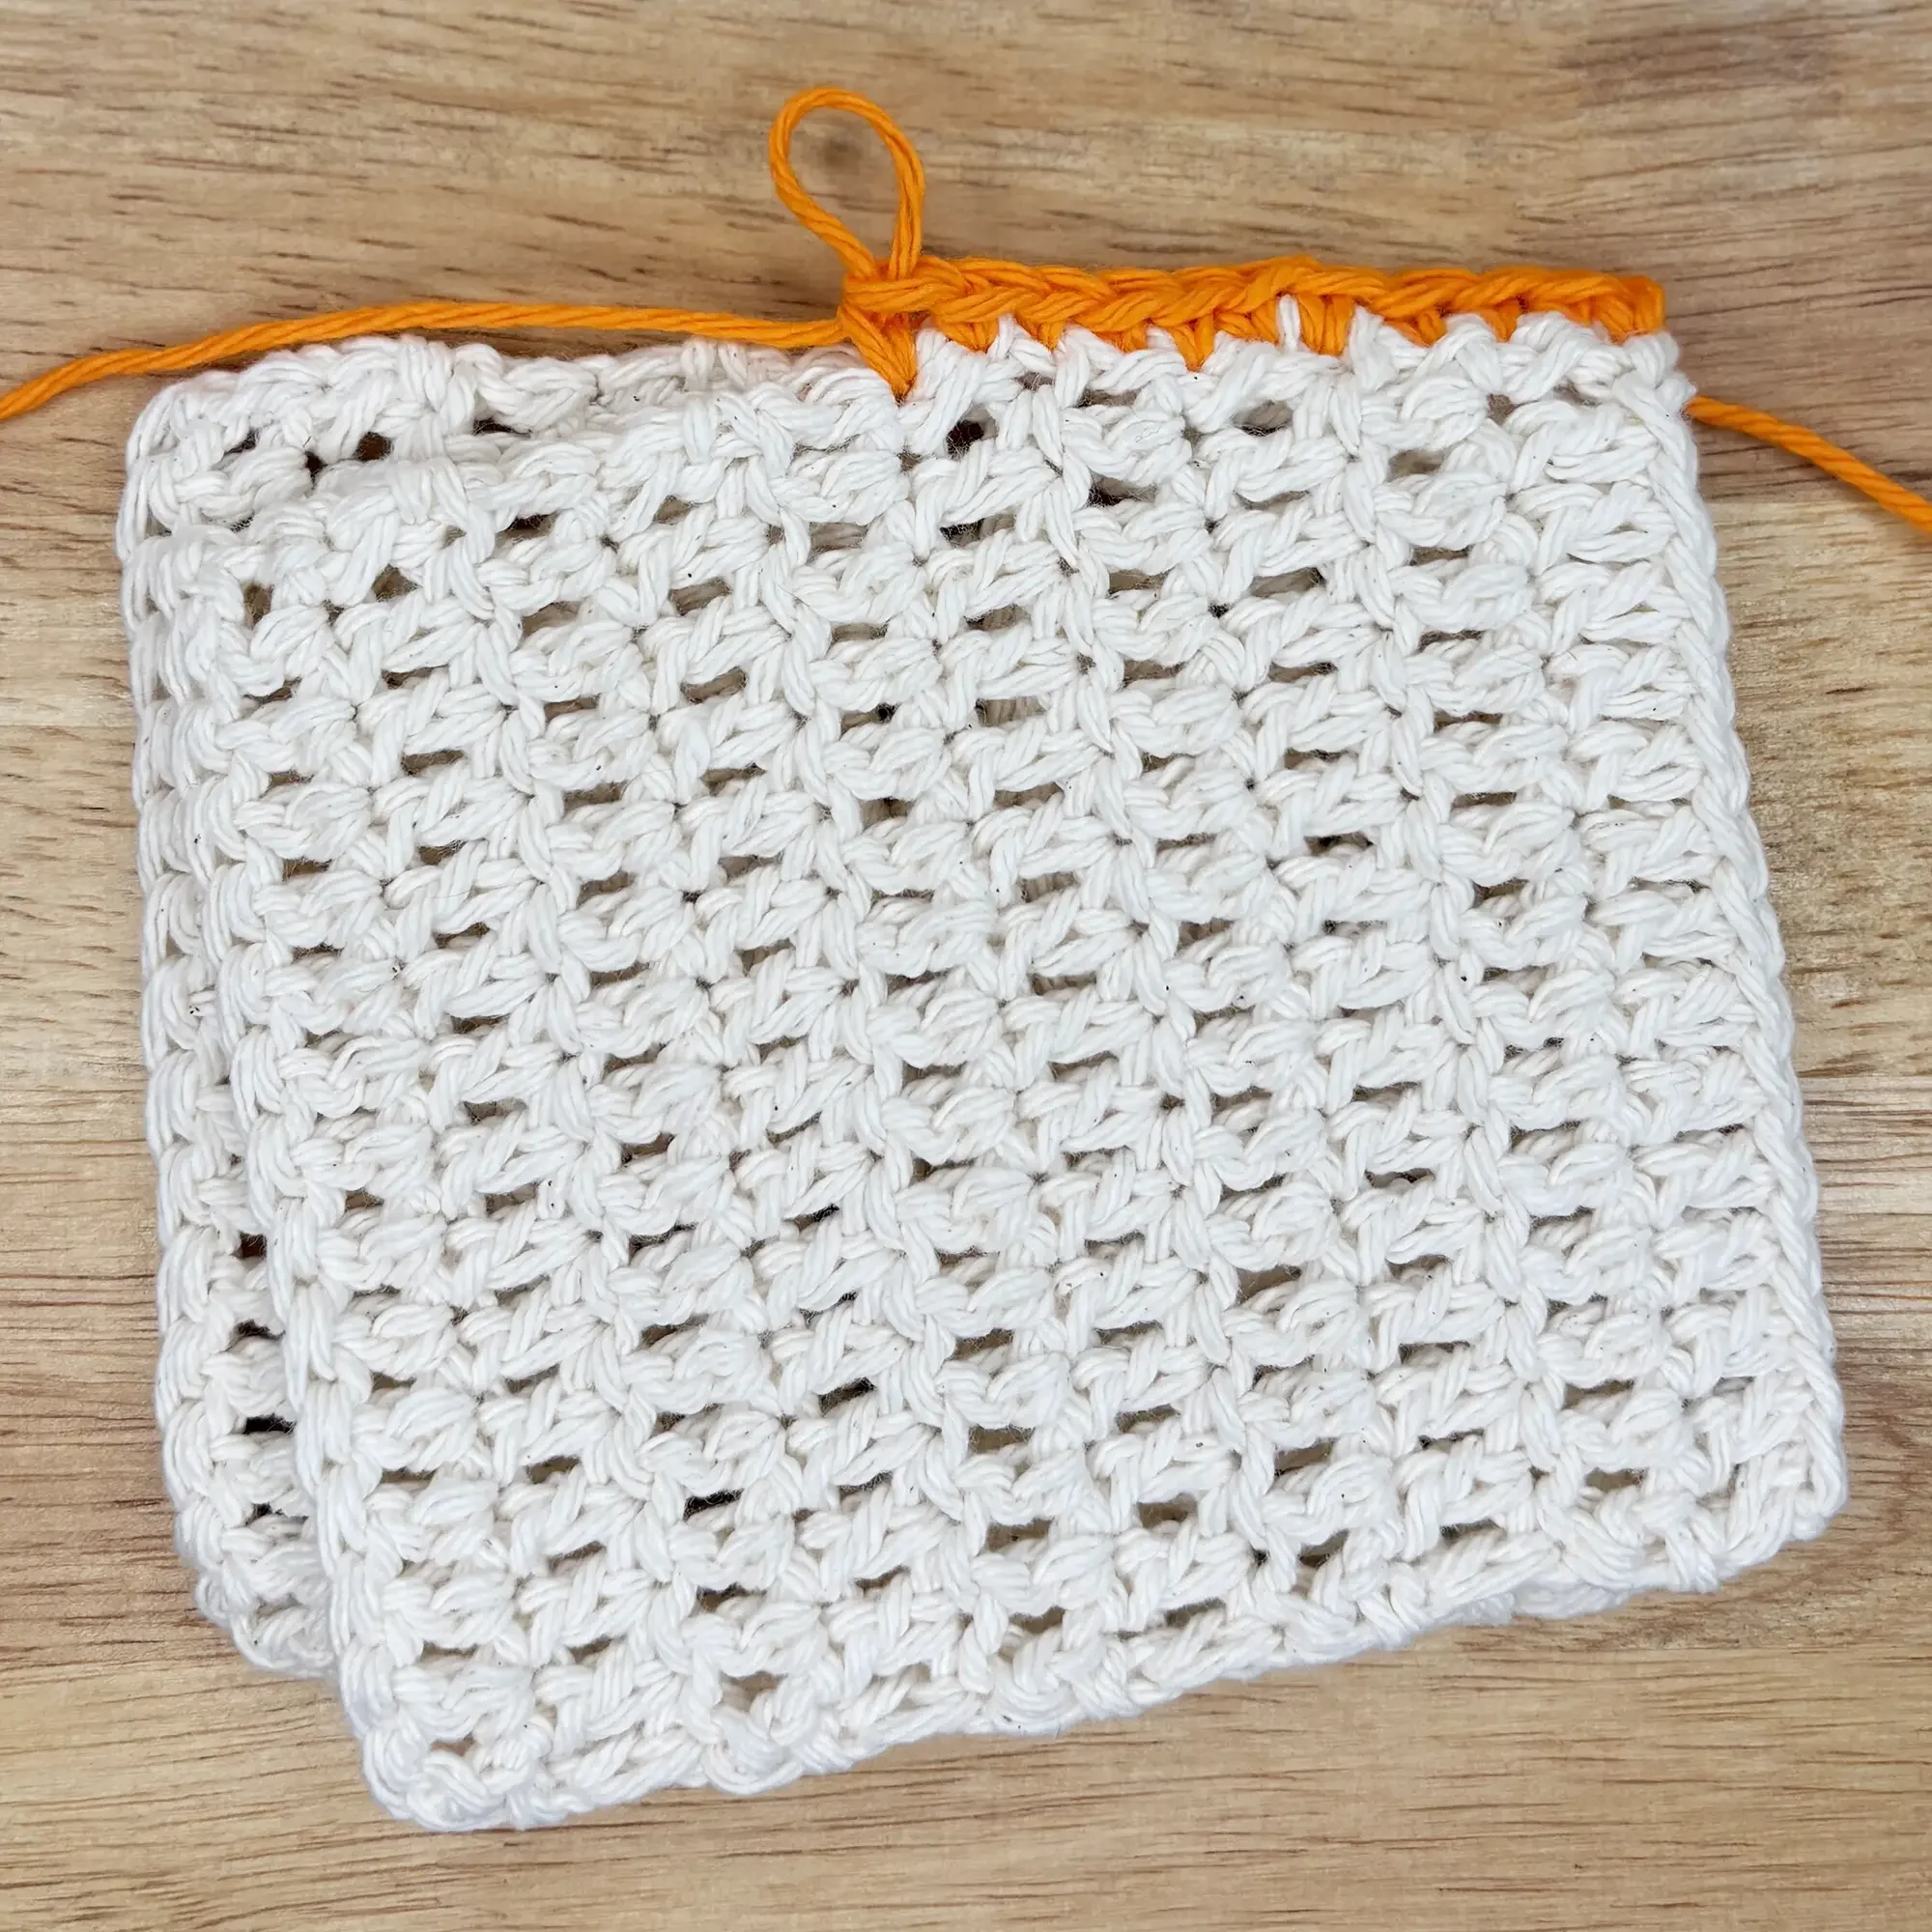
Crochet Seam
Put right sides (hide seam) or wrong sides (visible seam) together and crochet across the edges with a single crochet or other stitch to join.
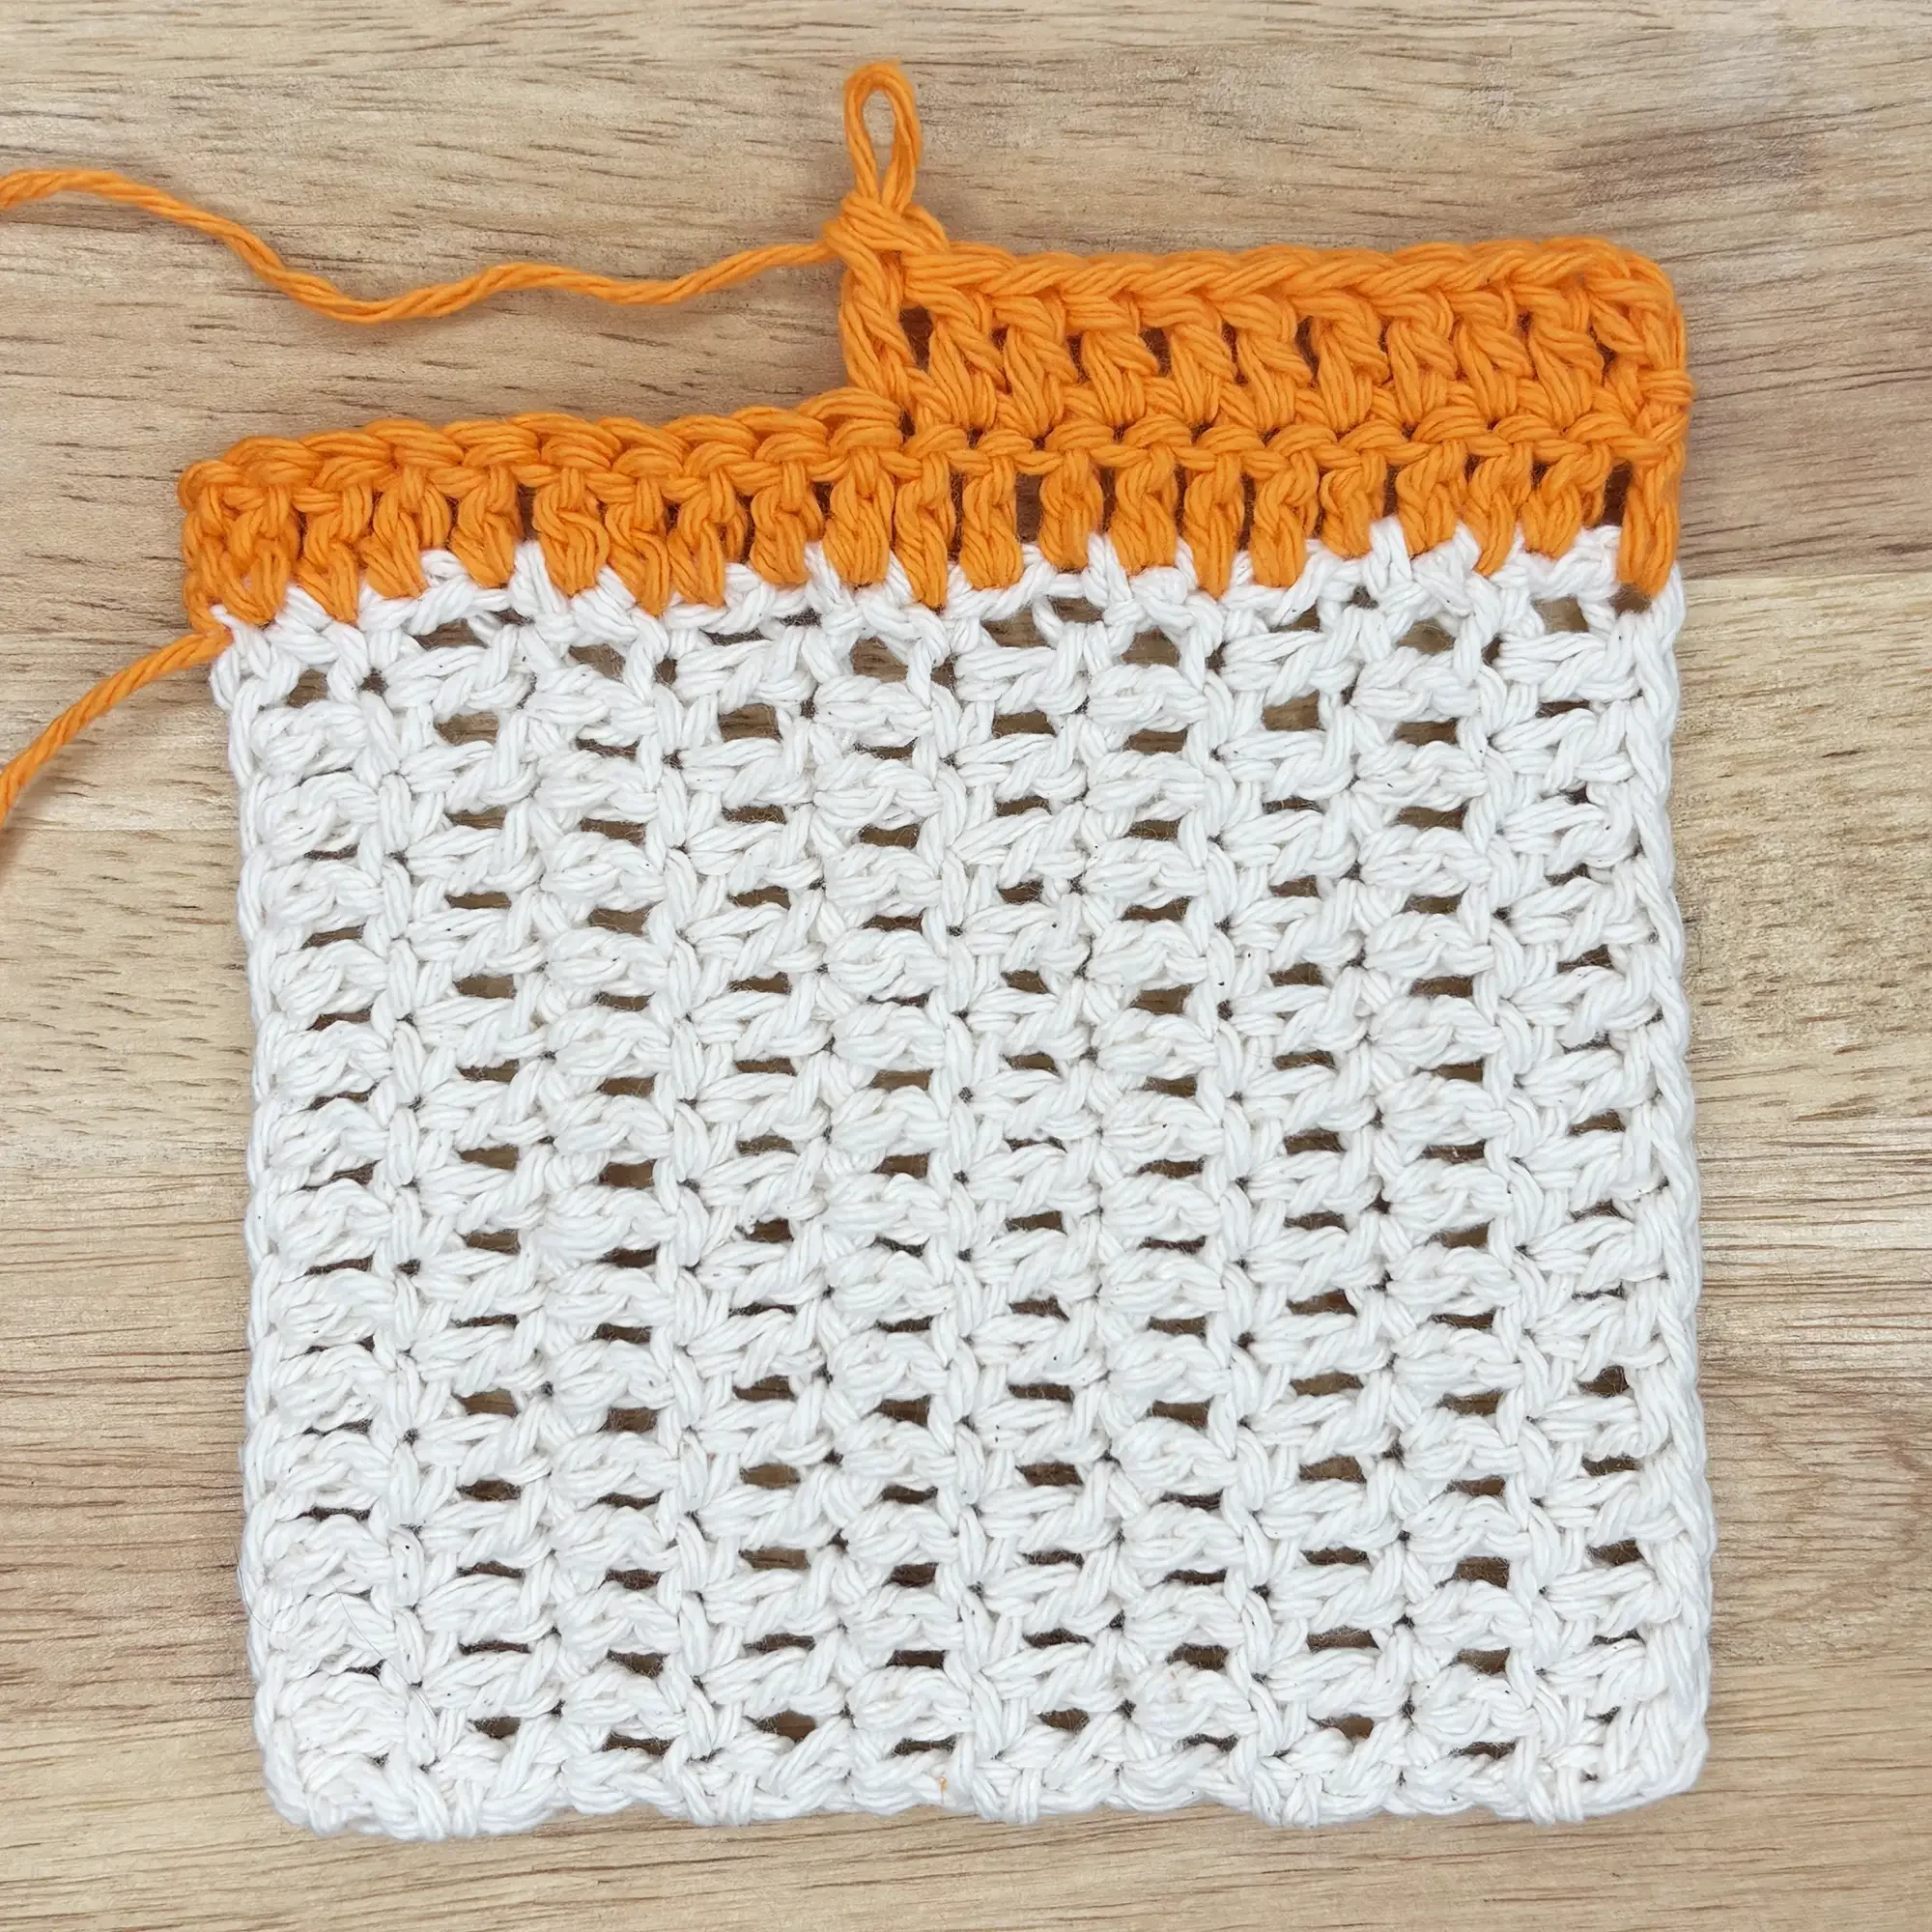
Crochet Directly Together
Work the next crochet piece directly along the edge of the one you want to connect it to.
Front and Back Bodice
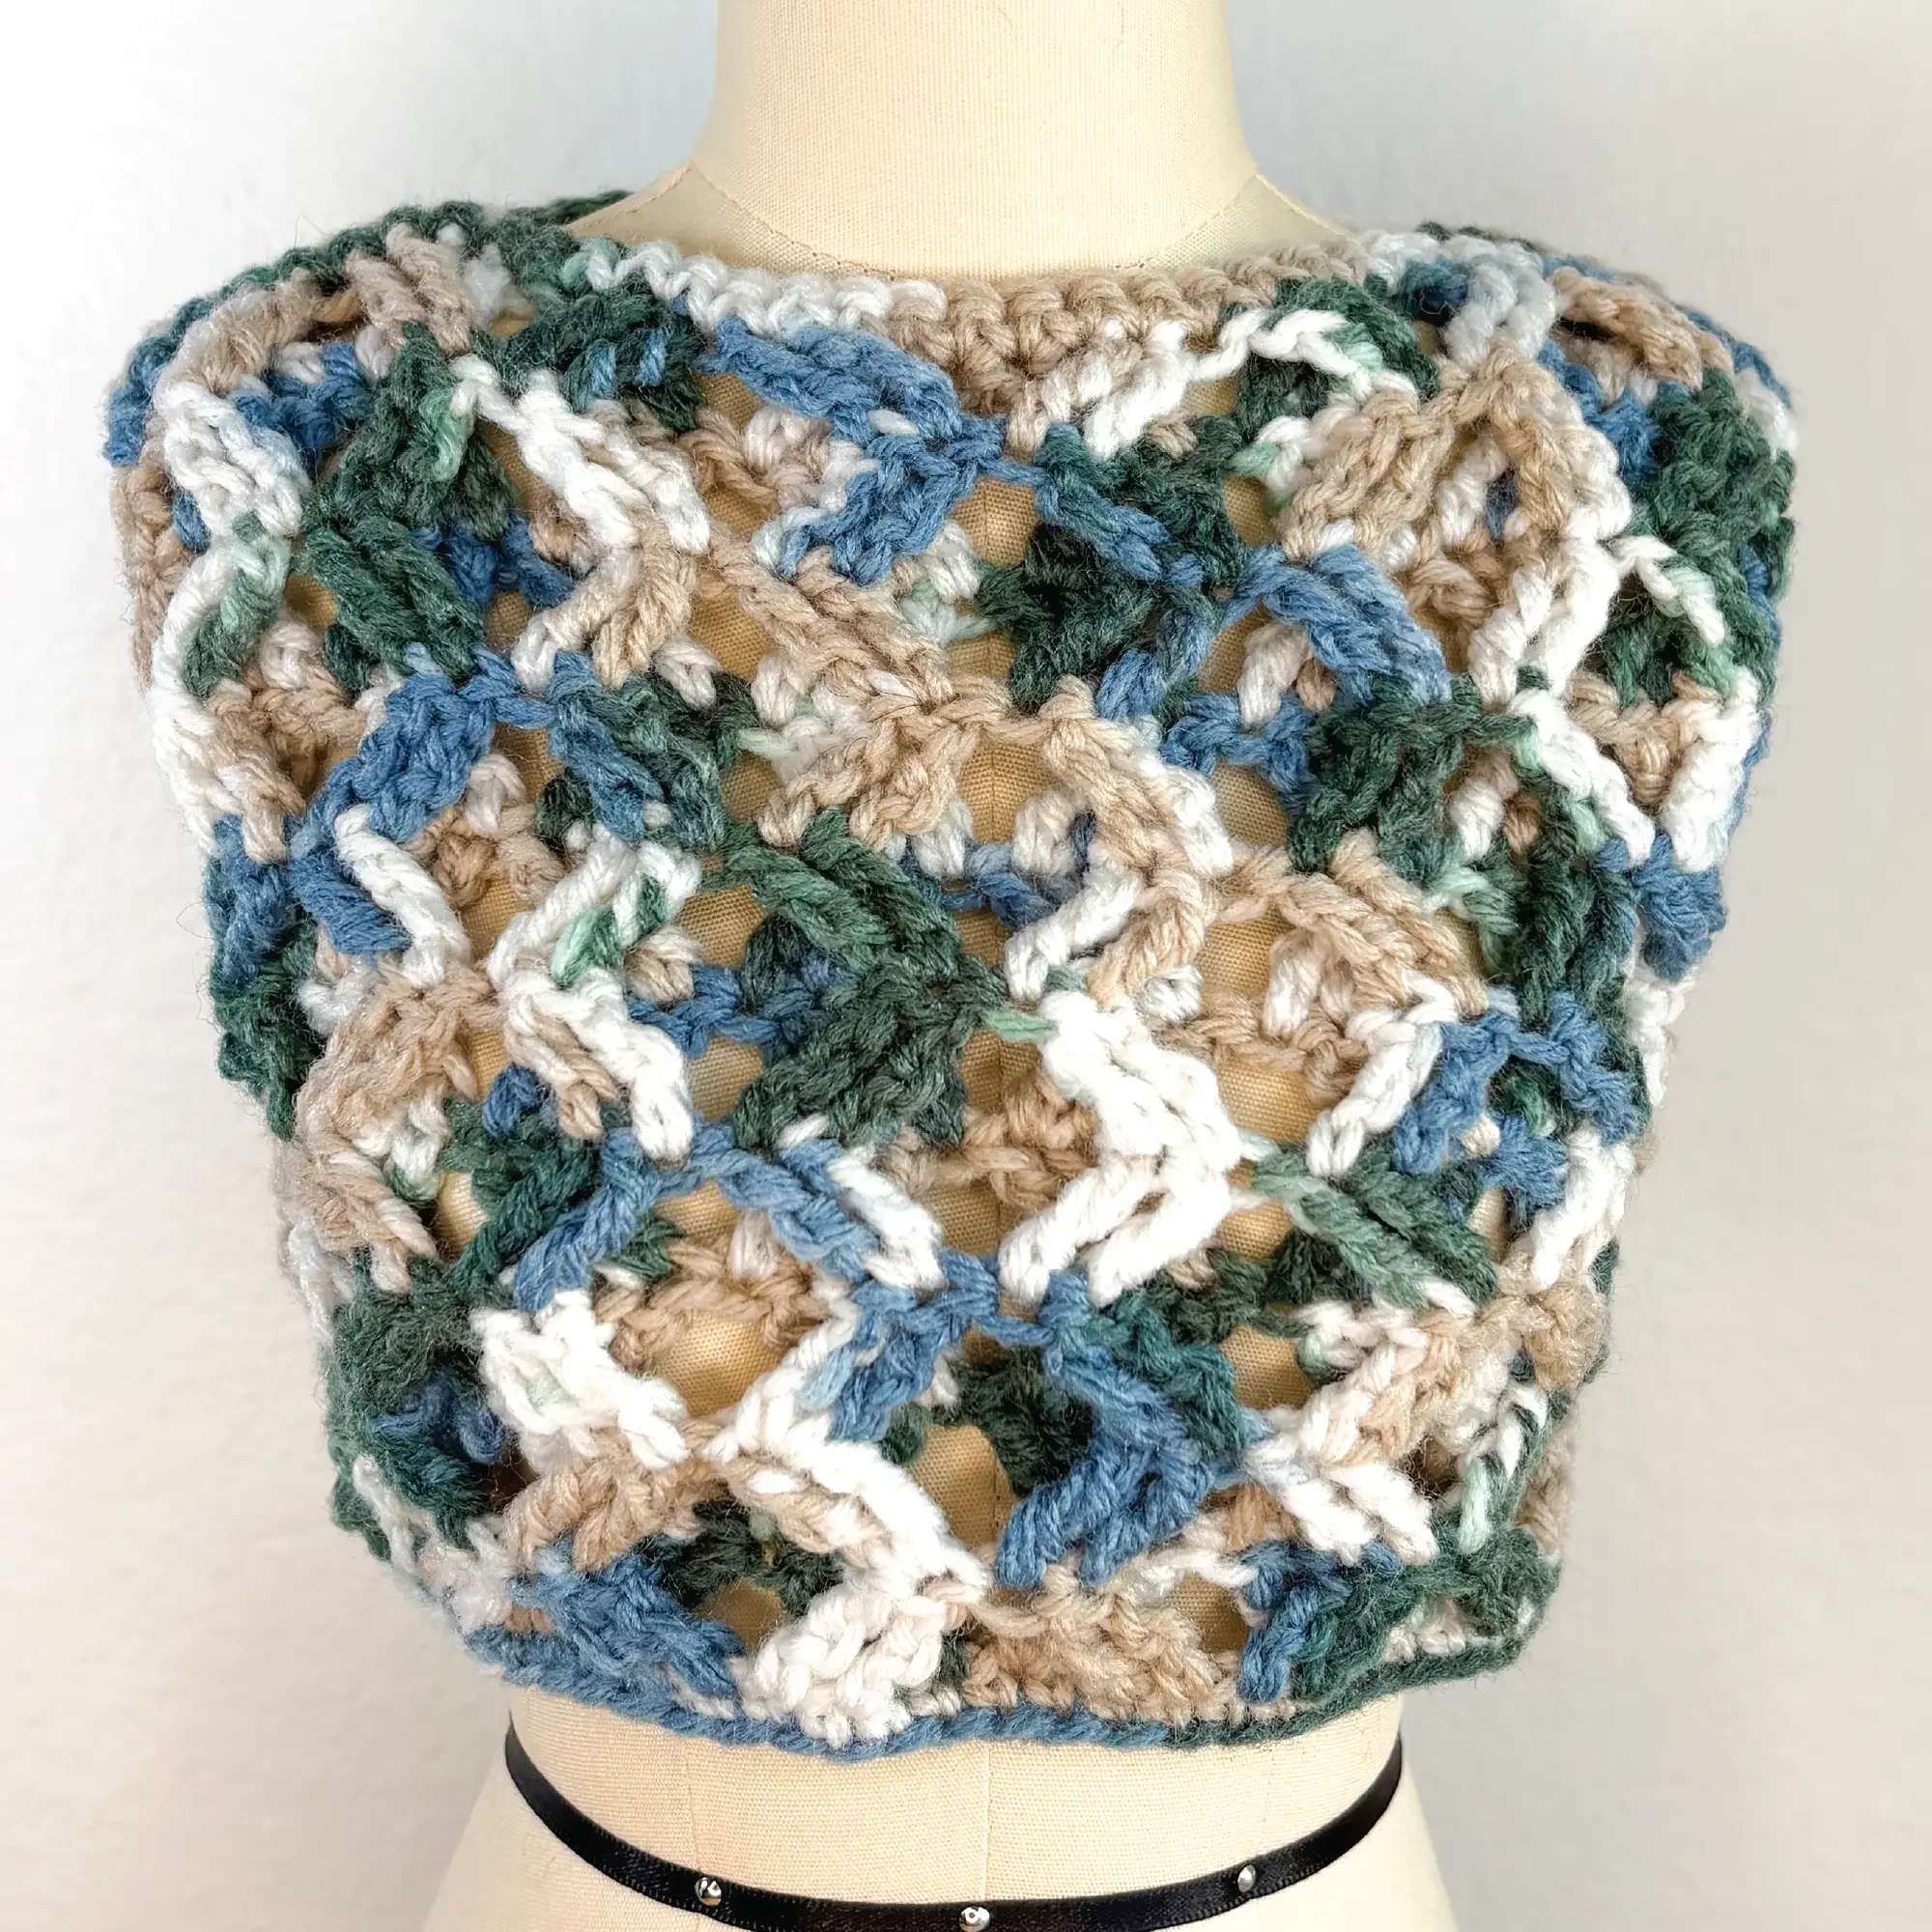
Top A: Basic 2 Panels
Pieces to Crochet
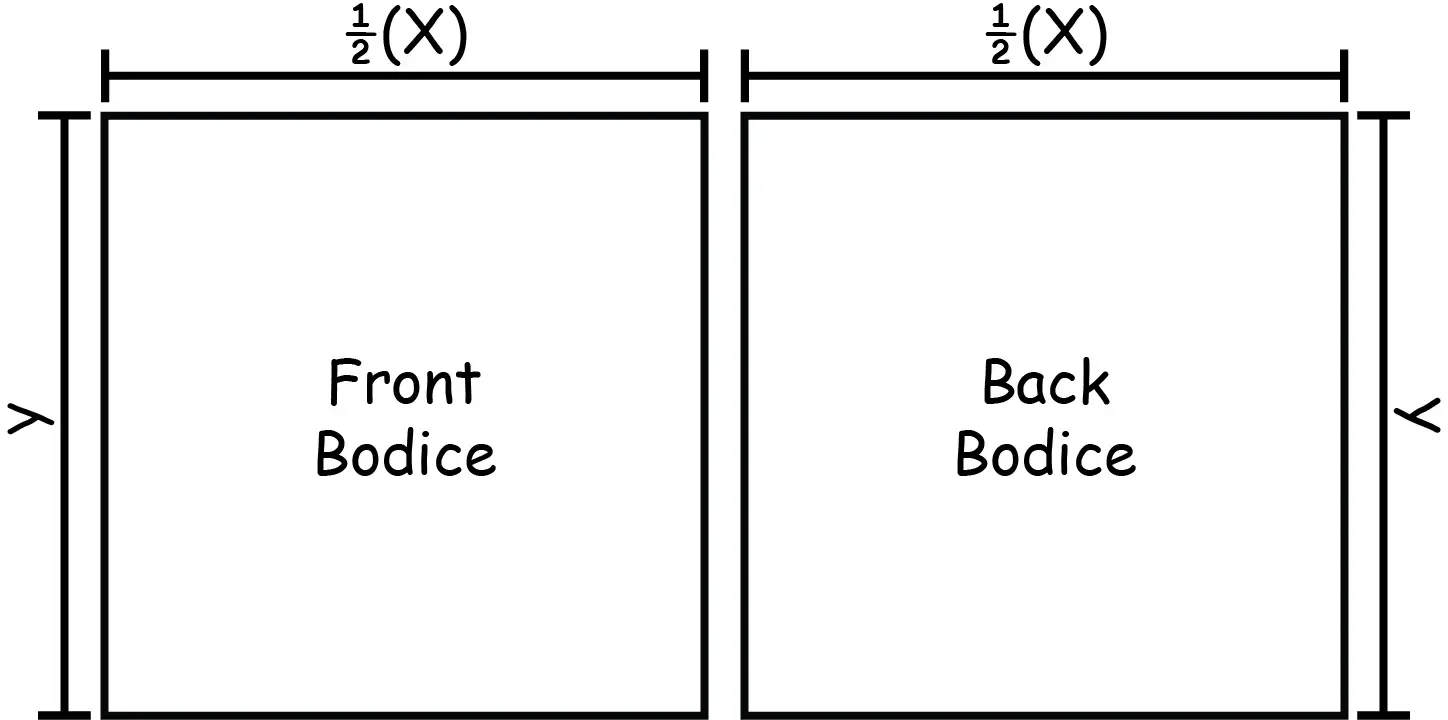
Crochet one front & one back bodice each with a:
Width = ½(X)
Length = Y
How to Assemble

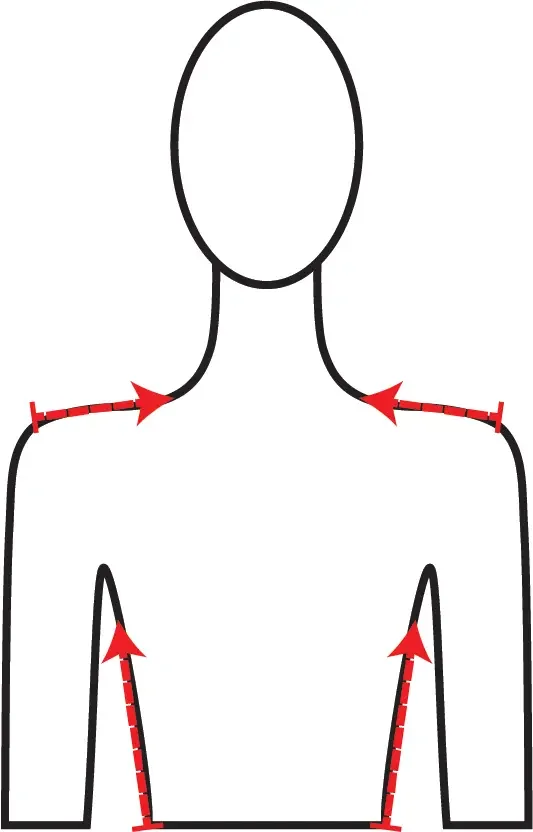
Shoulder seams – with front and back bodice together, attach them starting at the edge of the right shoulders toward the center of the bodices. Repeat on left side. This seam can stop after an inch or go as far as the edge of the neck. Leave enough room for your head to fit.
Mark armscyes - put the top over your head, mark the bottom of your armscyes on each bodice piece, then remove your top.
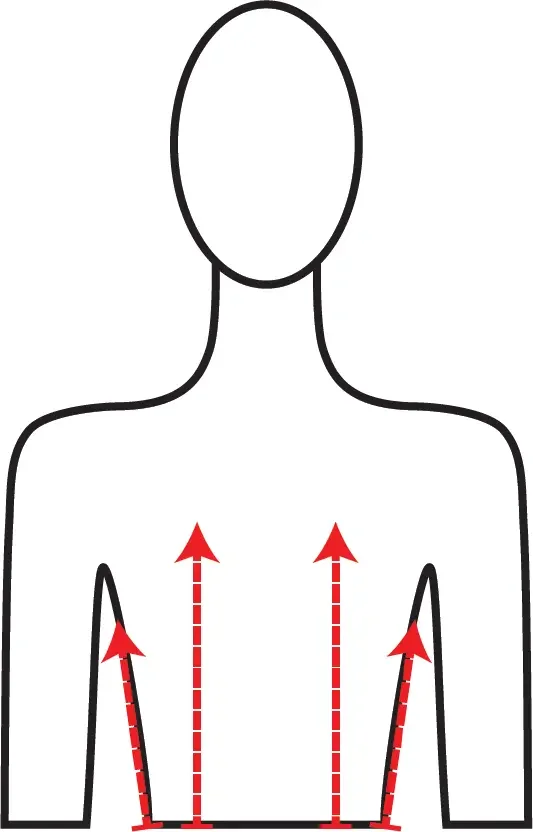
Side seams – with front and back bodice together, attach them starting at the bottom edge of your right sides up to the bottom of your armscye. Repeat with left sides.
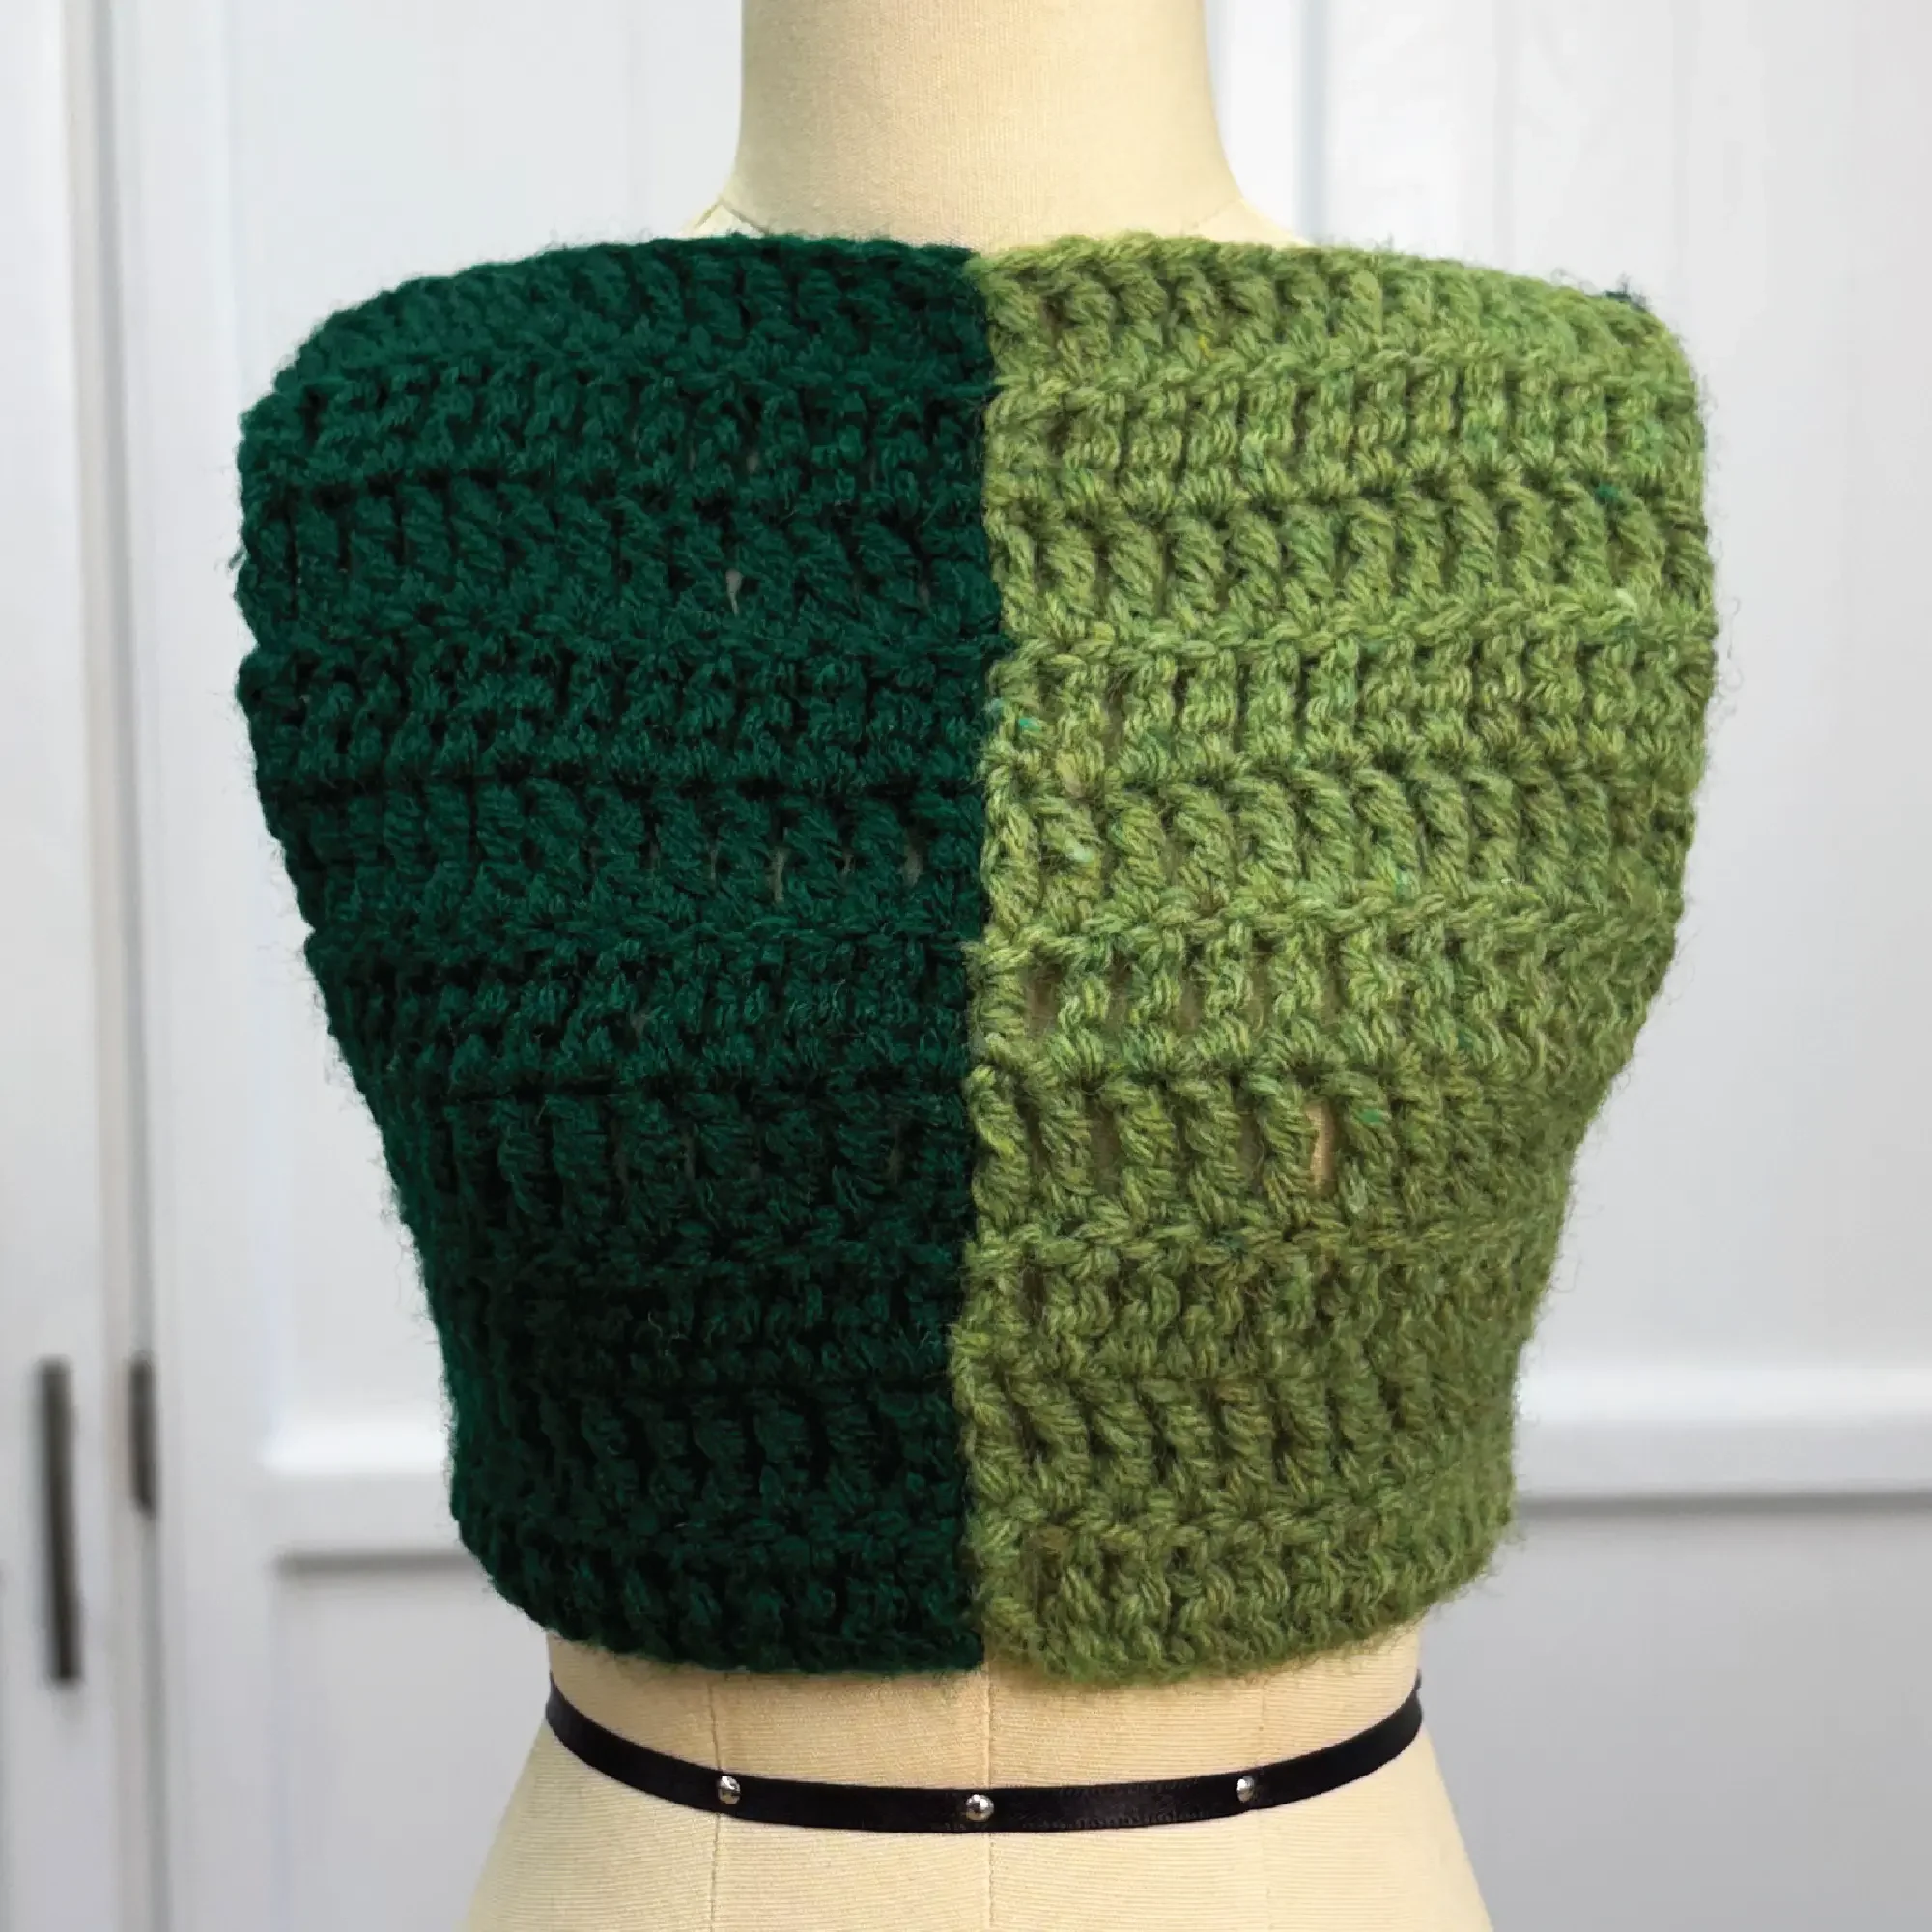
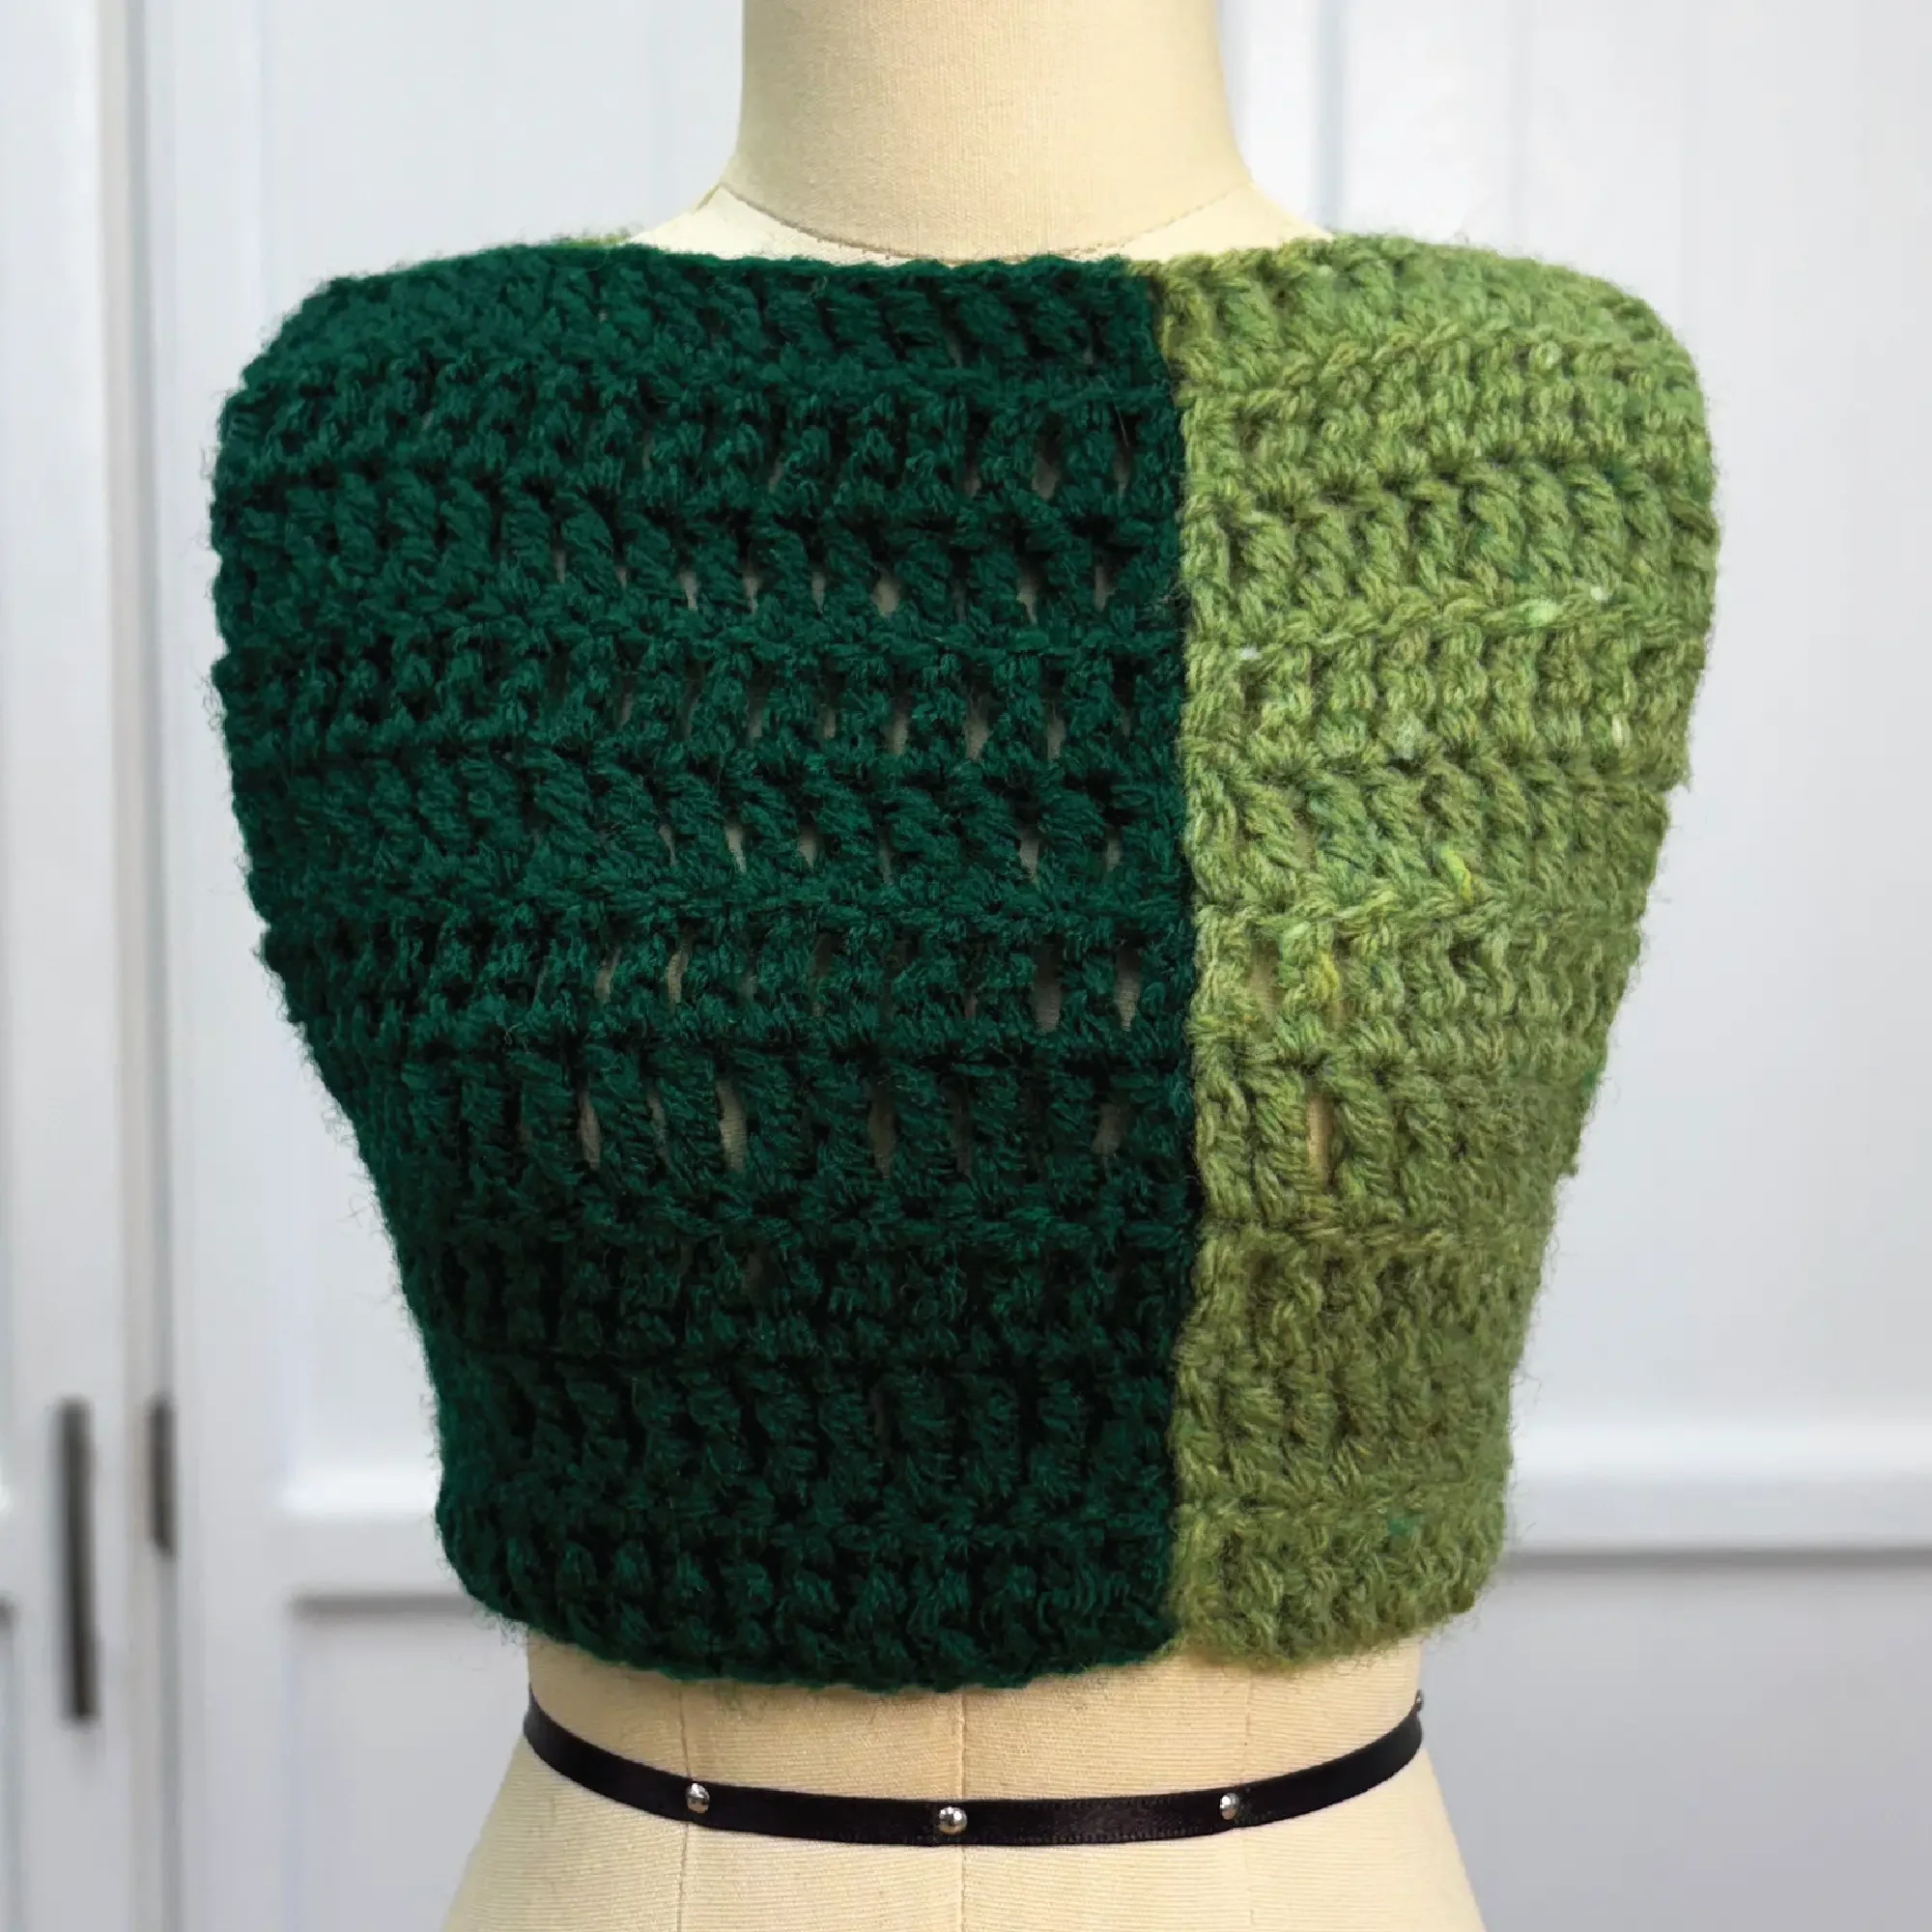
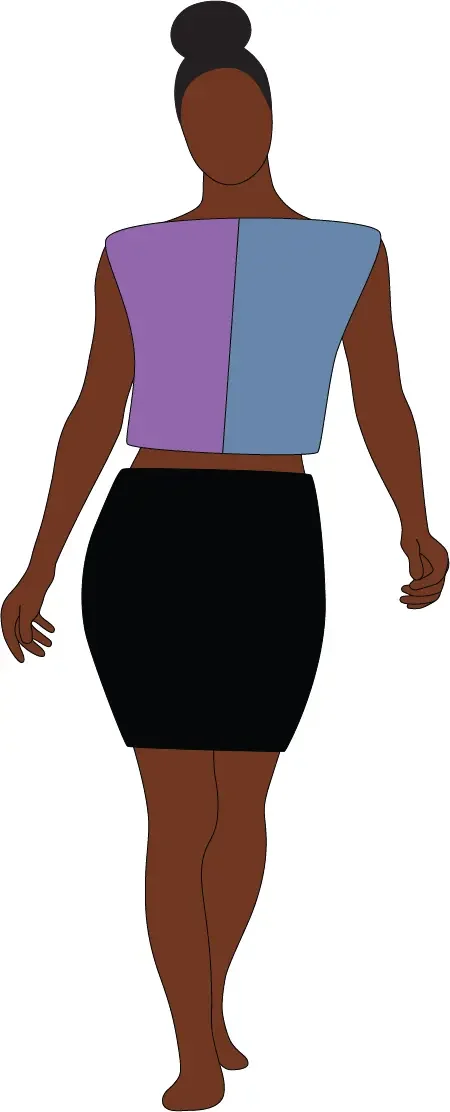
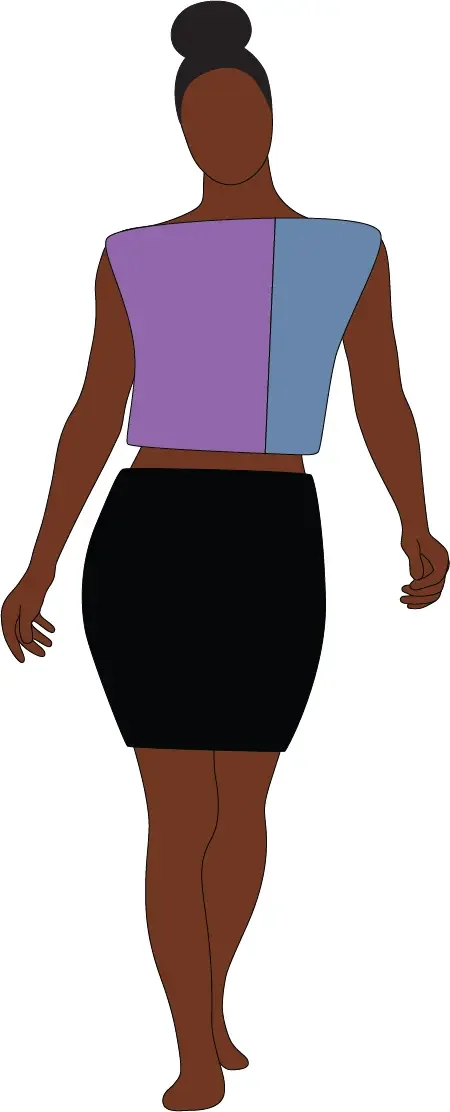
Top B: Basic 4 Panels
Treble Crochet Stitch
Pieces to Crochet
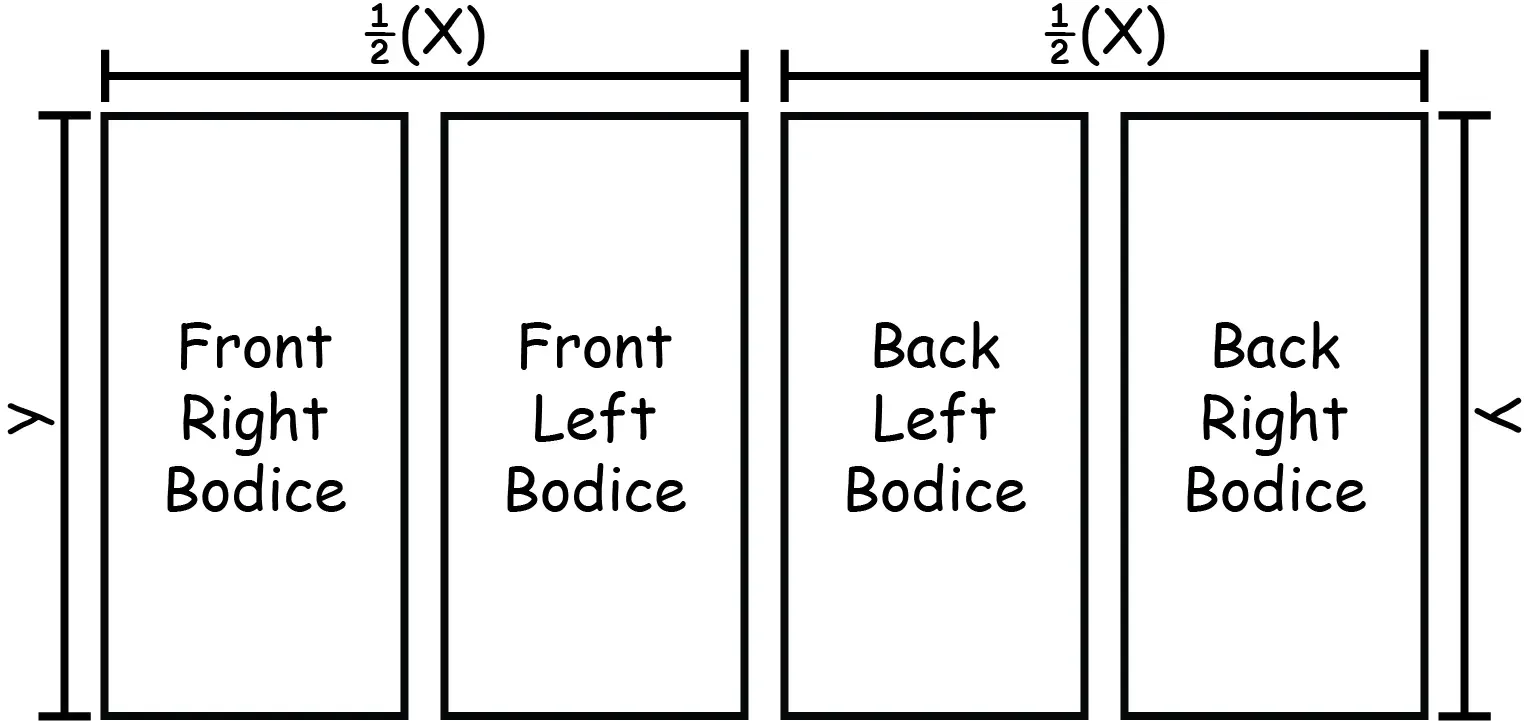
Crochet a set of two front bodices & a set of two back bodices:
Each set with a combined width = ½(X).
Each bodice with a length = Y
How to Assemble
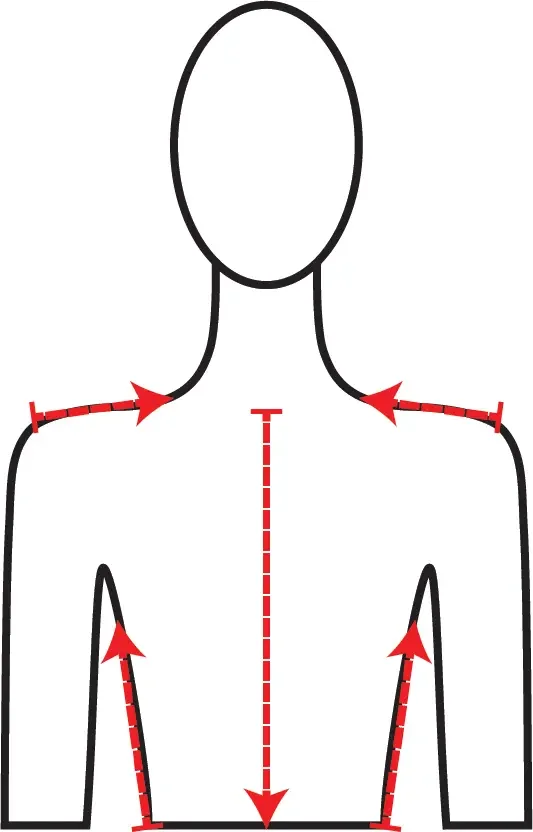
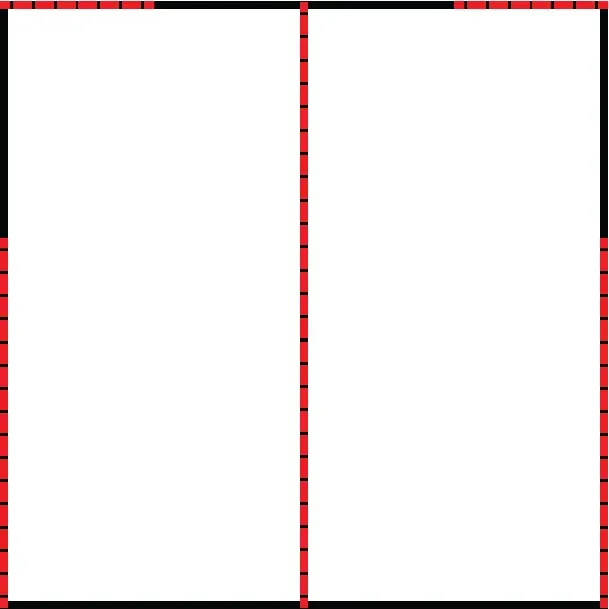
Center front and back seams – with front right and left bodices together attach them along the center fronts from top to bottom. Repeat with back bodices
Shoulder seams – with front right and back right bodice together, attach them starting at the edge of the shoulders toward the center of the bodices. Repeat with left bodices. This seam can stop after an inch or go as far as the edge of the neck. Leave enough room for your head to fit.
Mark armscyes - put the top over your head, mark the bottom of your armscyes on each bodice piece, then remove your top.
Side seams– with front and back bodice together, attach them starting at the bottom edge of your right sides up to the bottom of your armscye. Repeat with left sides.
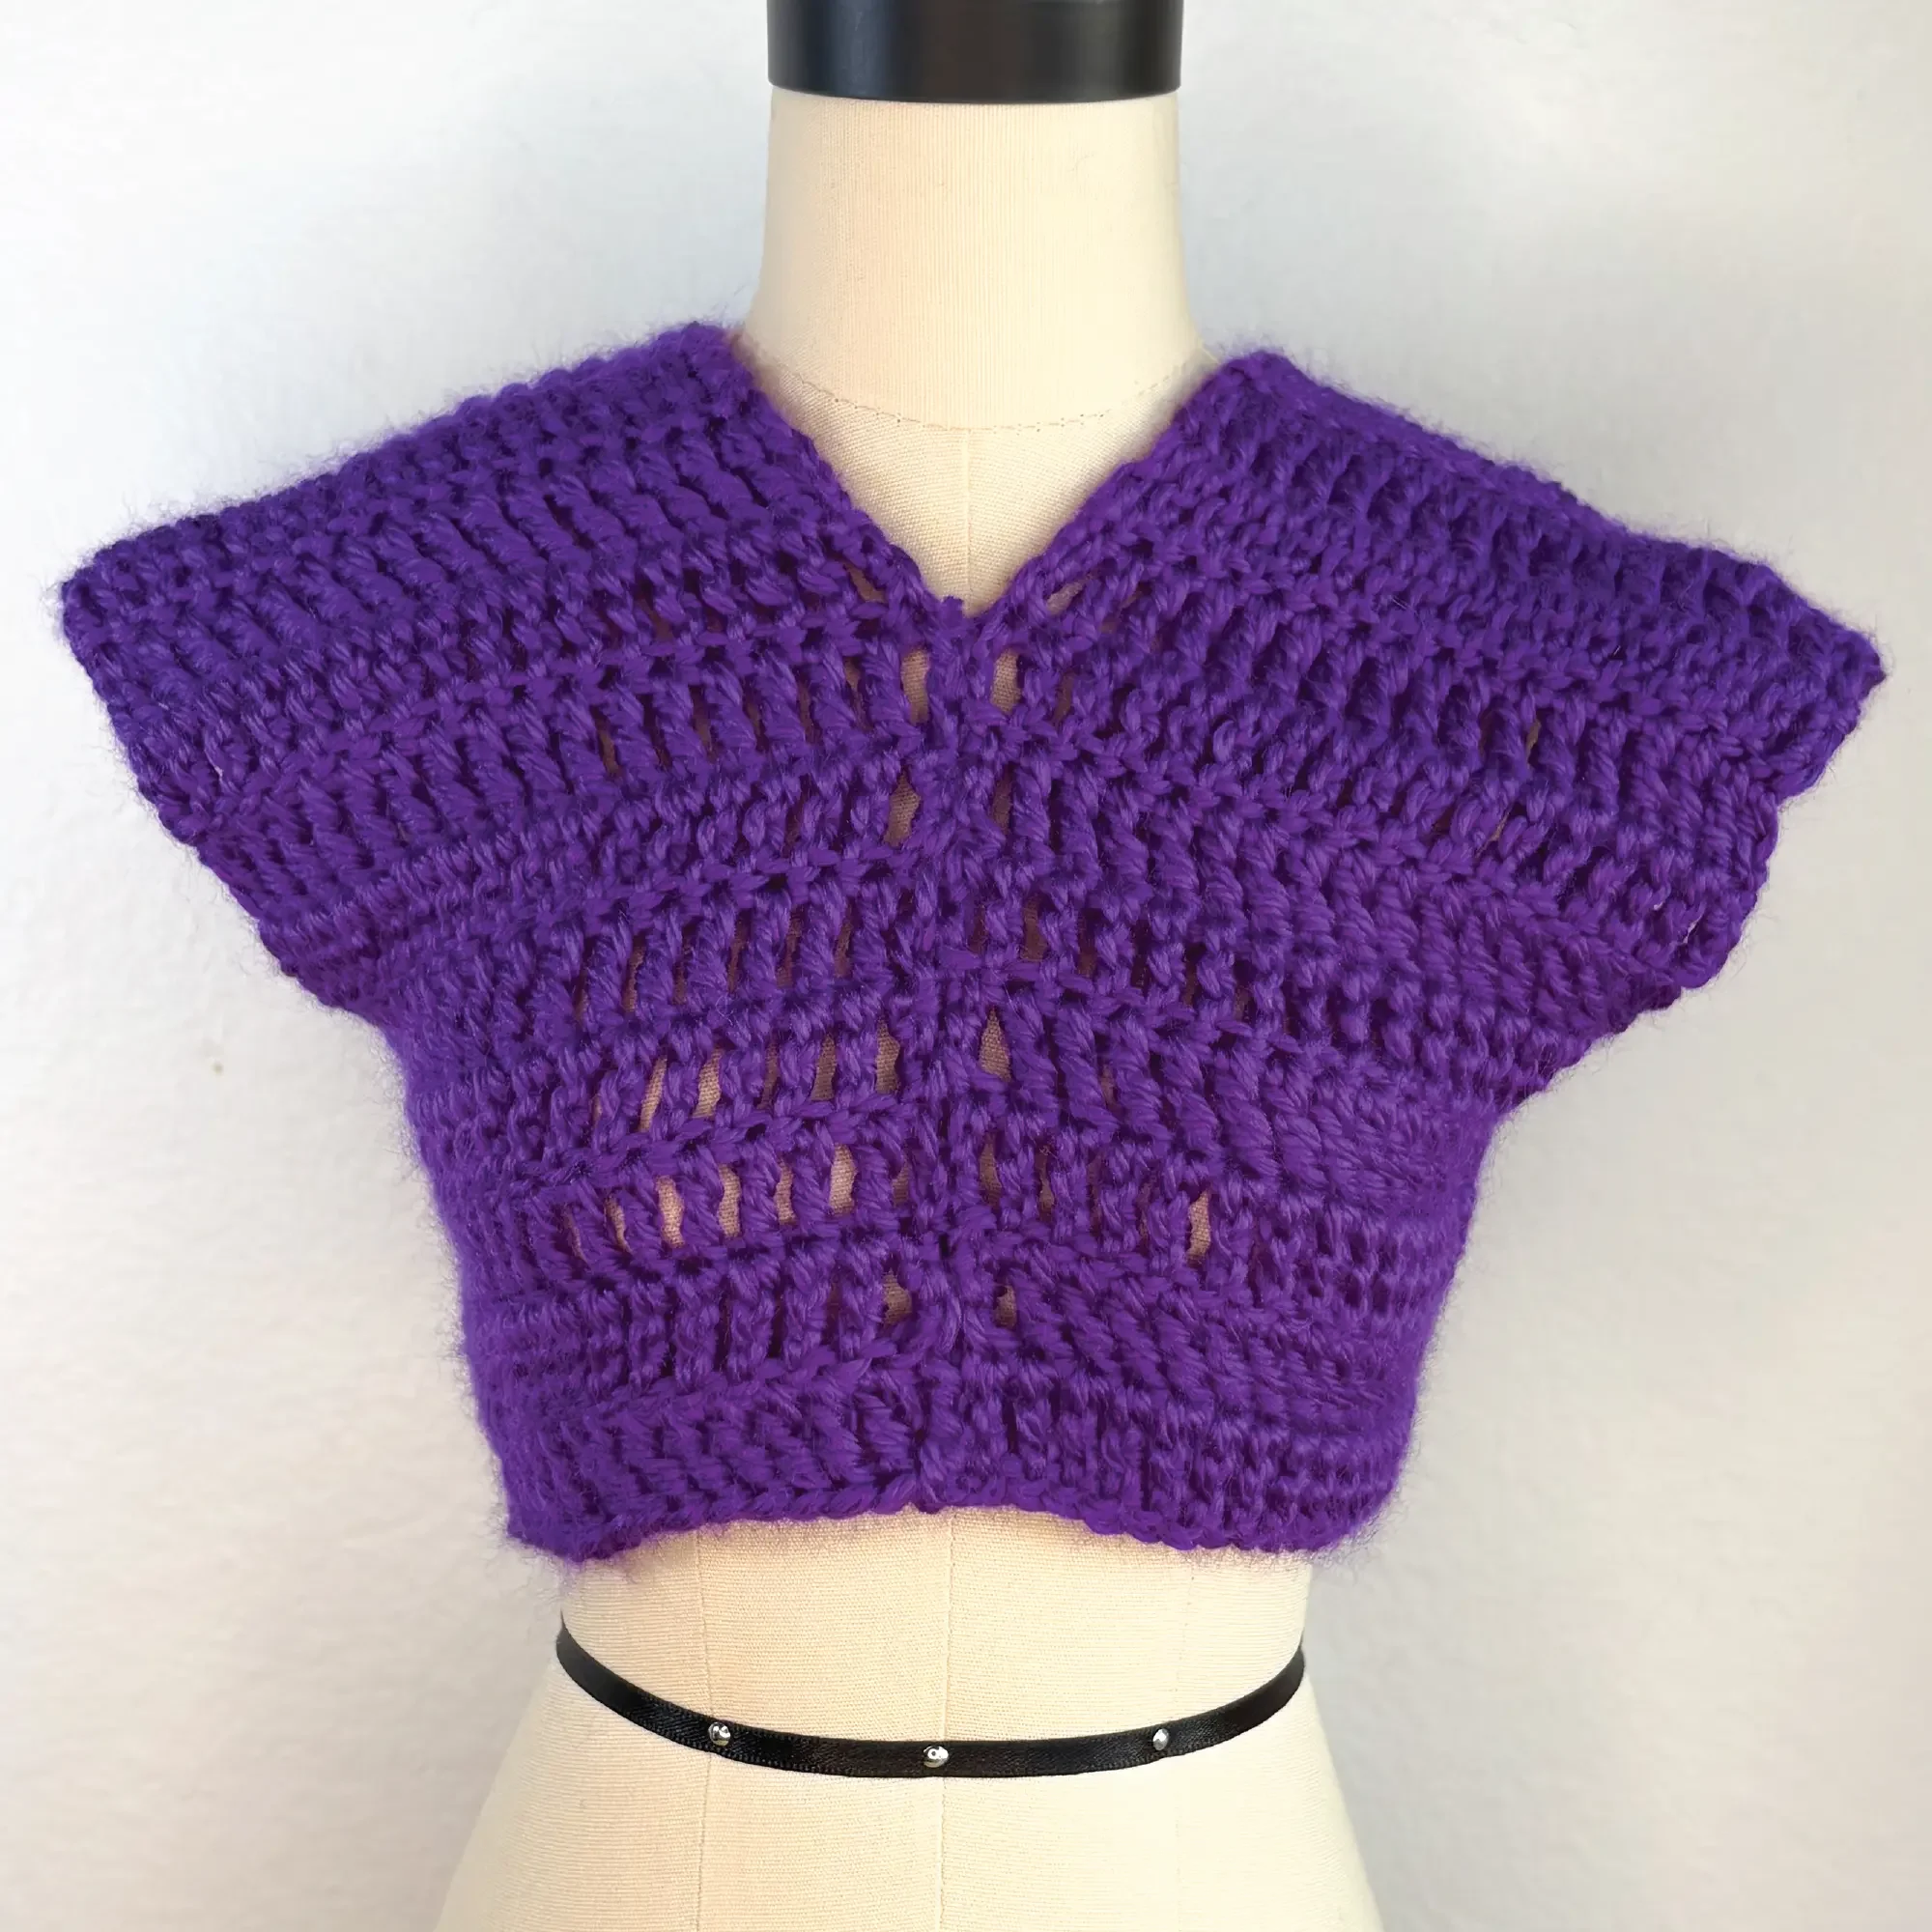
Top C: V-Neck
Treble Crochet Stitch
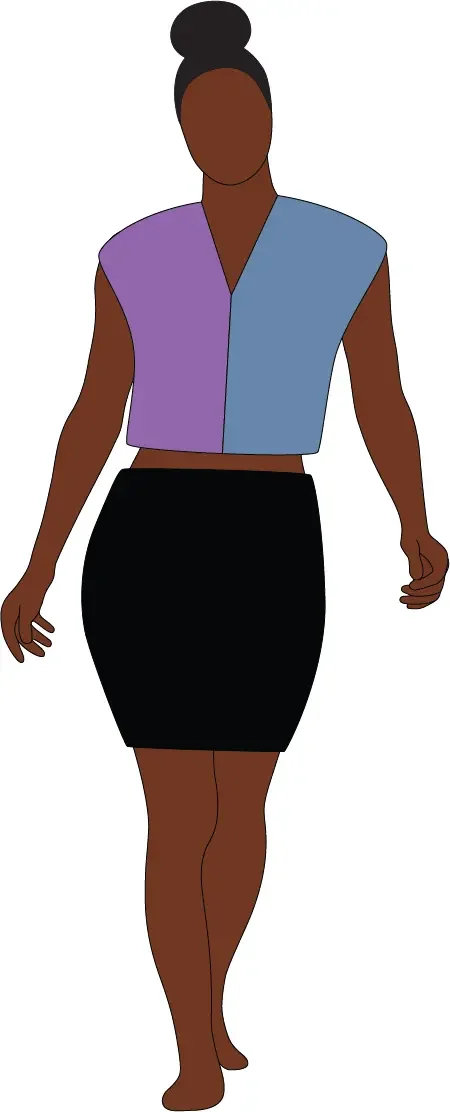
Version 1
Pieces to Crochet
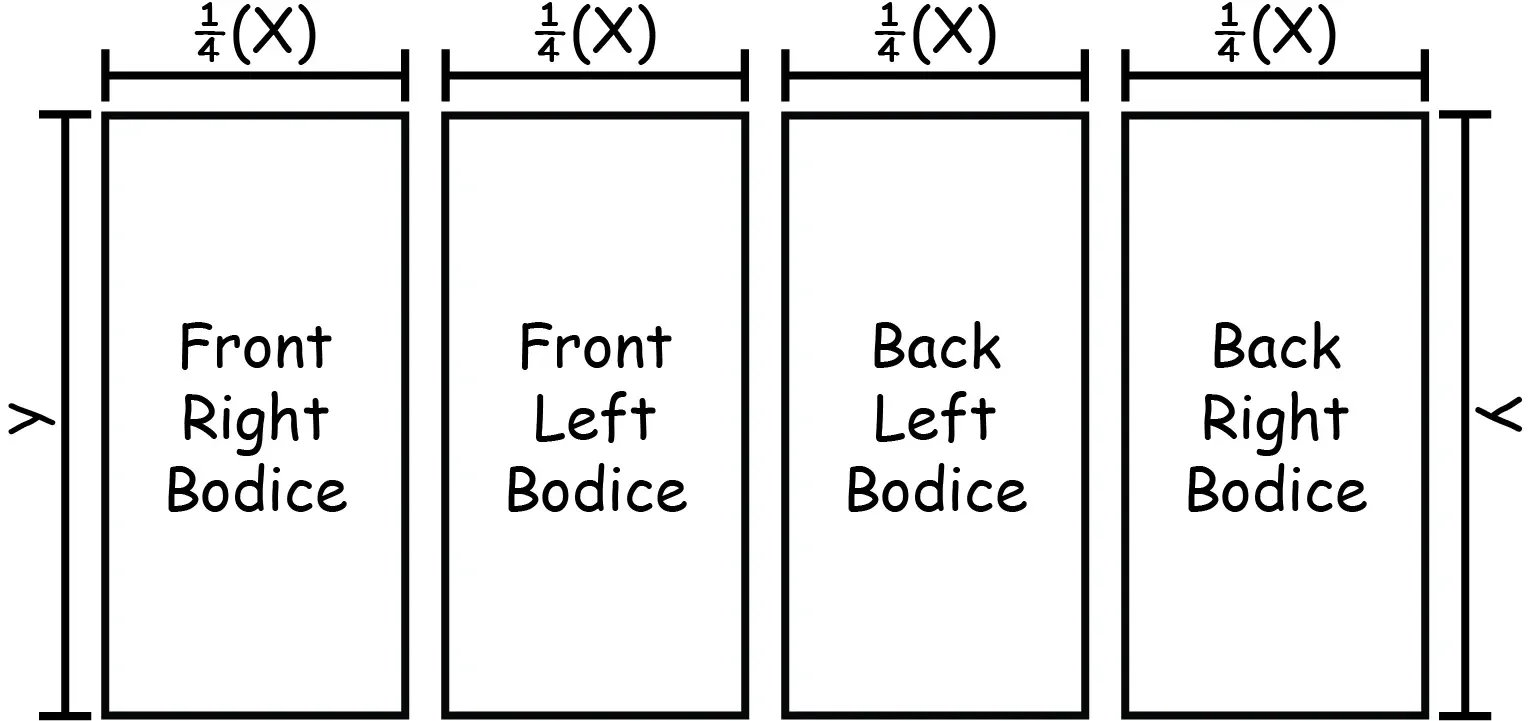
Crochet two front & two back bodices each with a:
Width = ¼(X)
Length = Y
Best layout if your stitch or pattern’s design is one directional.
How to Assemble
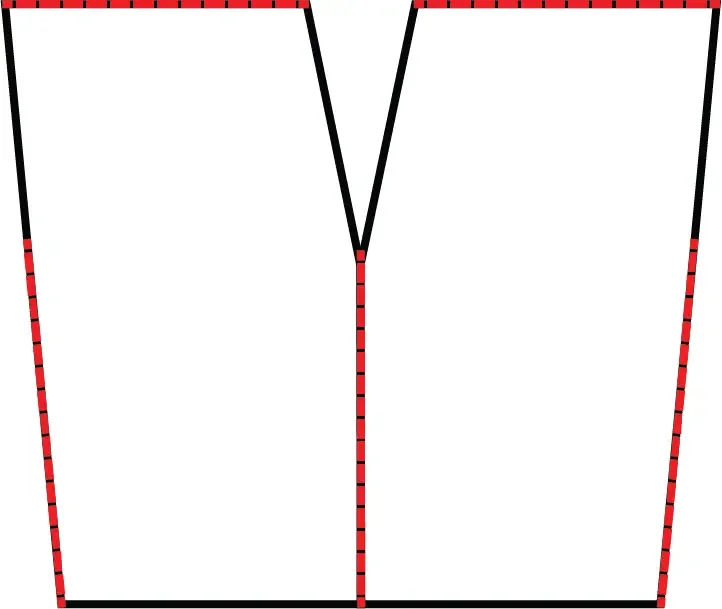
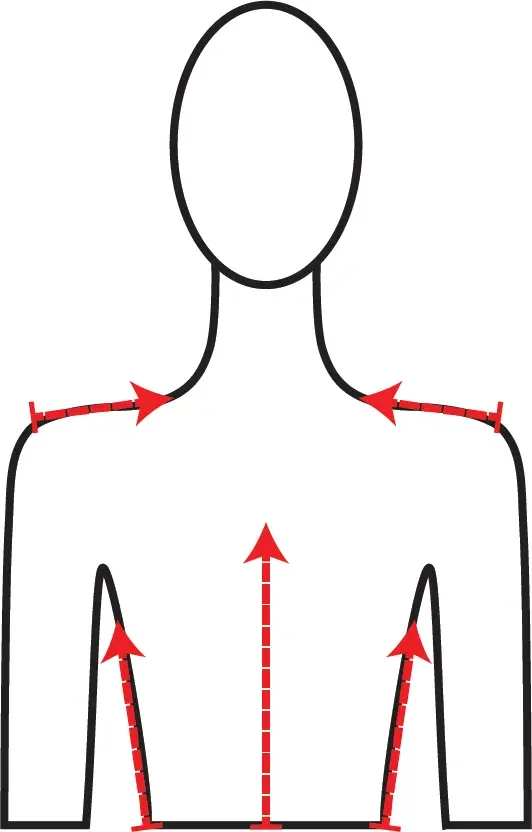
Center front and back seams – with front right and left bodices together attach them along the center fronts starting from the bottom and go up as far as you want. Repeat with the back bodices. Leave enough room for your head to fit.
Shoulder seams – with front right and back right bodices together attach them across the shoulder from end to end. Repeat with left bodices.
Mark armscyes - put the top over your head, mark the bottom of your armscyes on each bodice piece, then remove your top.
Side seams – with front and back bodice together, attach them starting at the bottom edge of your right sides up to the bottom of your armscye. Repeat with left sides.
Version 2
Pieces to Crochet
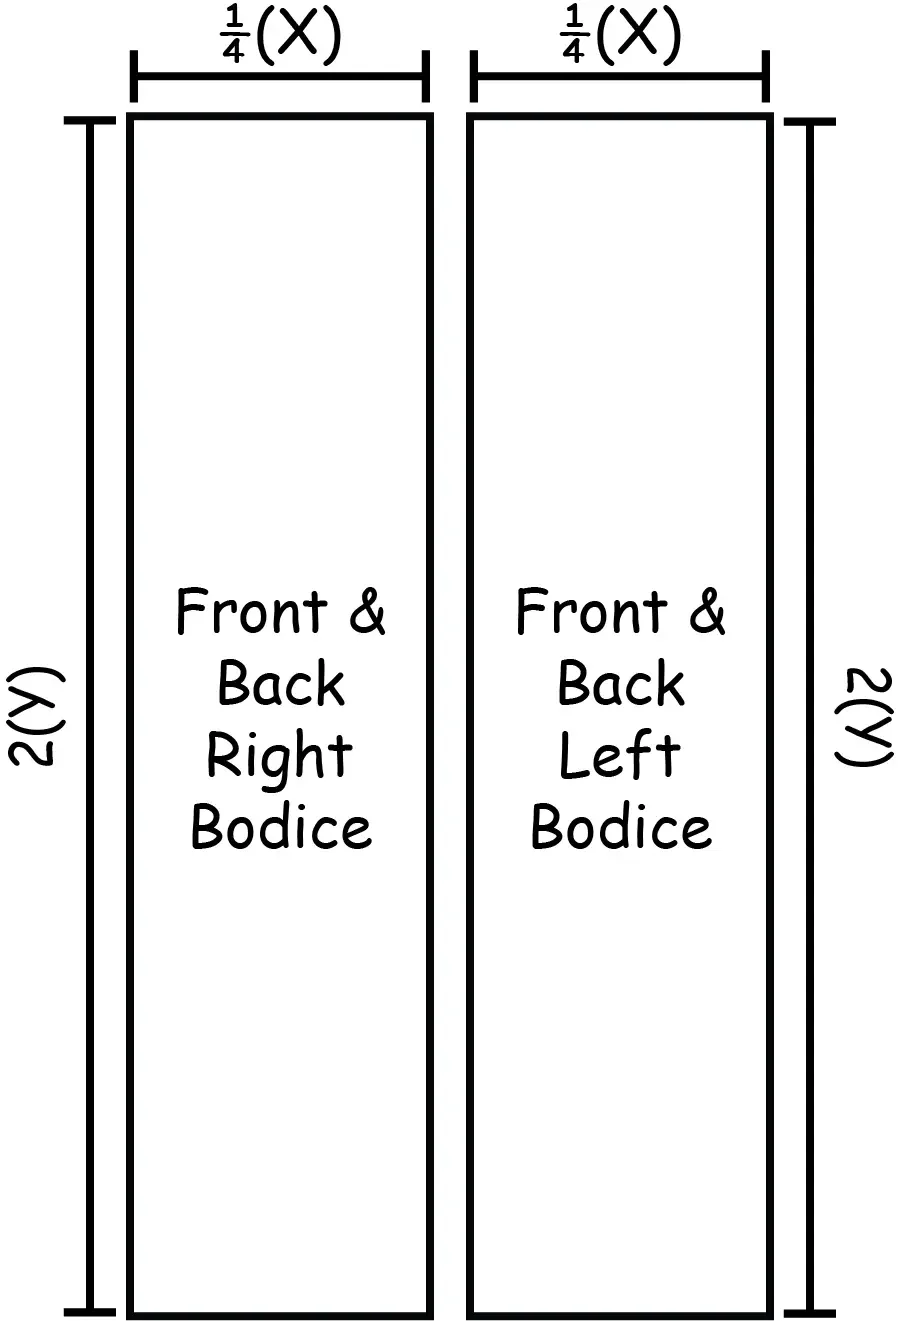
Crochet one right bodice (front & back combined) & one left bodice (front & back combined) each with a:
Width = ¼(X)
Length = 2(Y)
Do not use if stitch or pattern’s design is one directional as one side will be upside down.
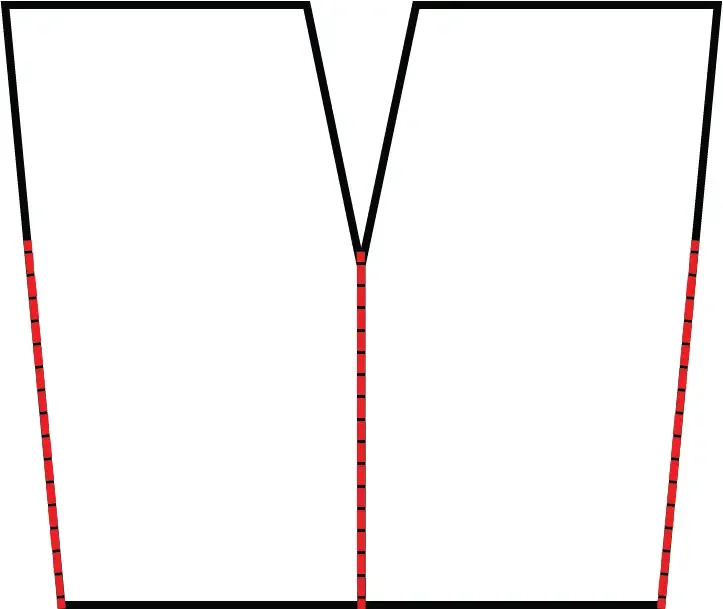
How to Assemble
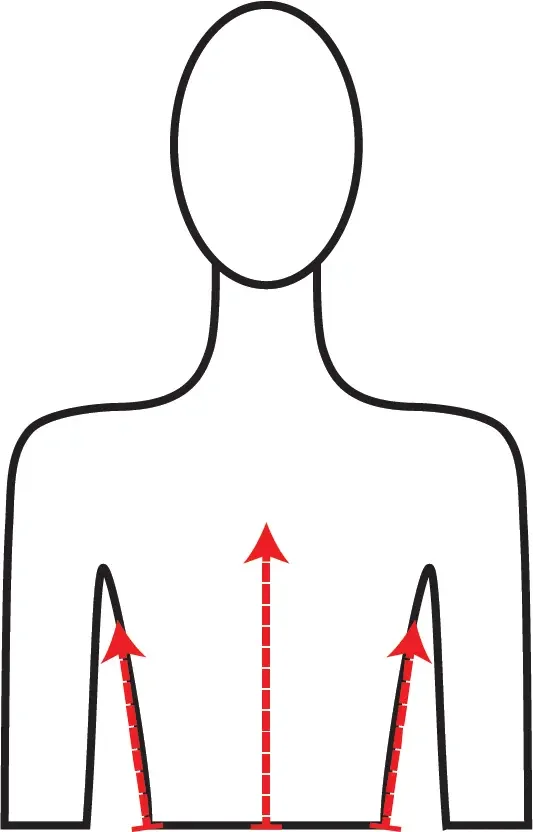
Follow steps 1, 3, and 4 of version 1.
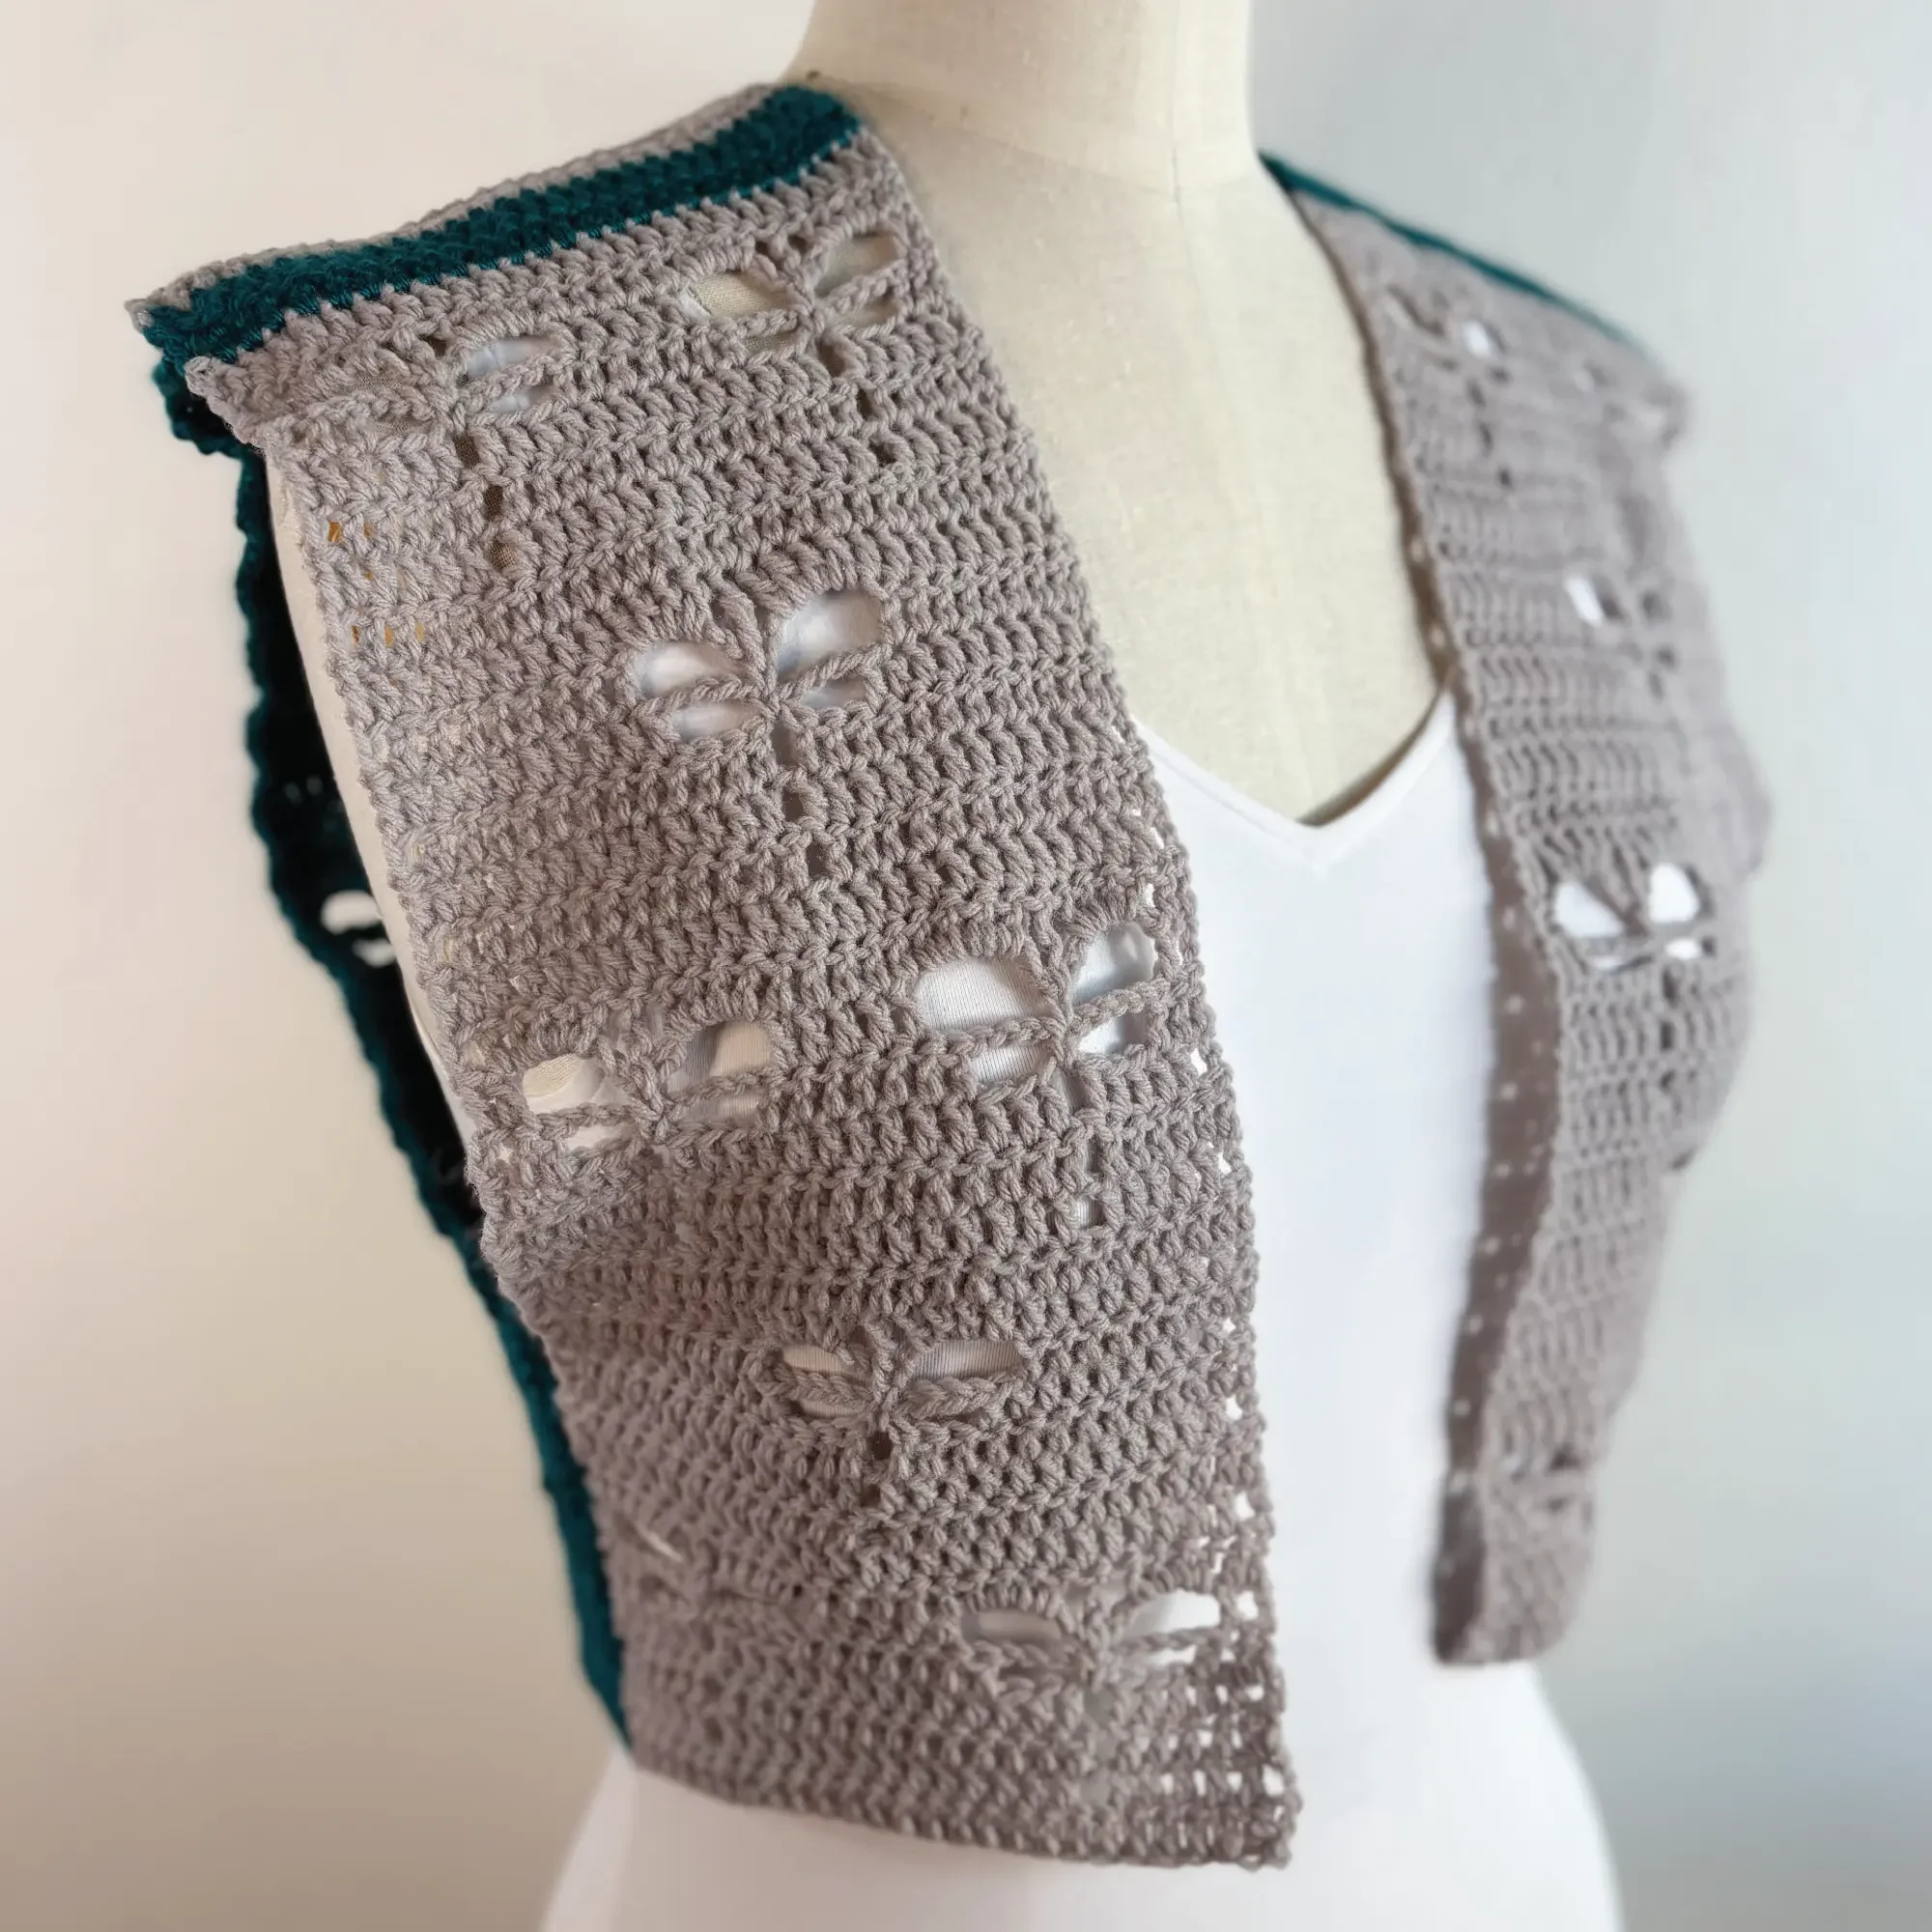
Top D: Vest
Double Crochet Stitch &
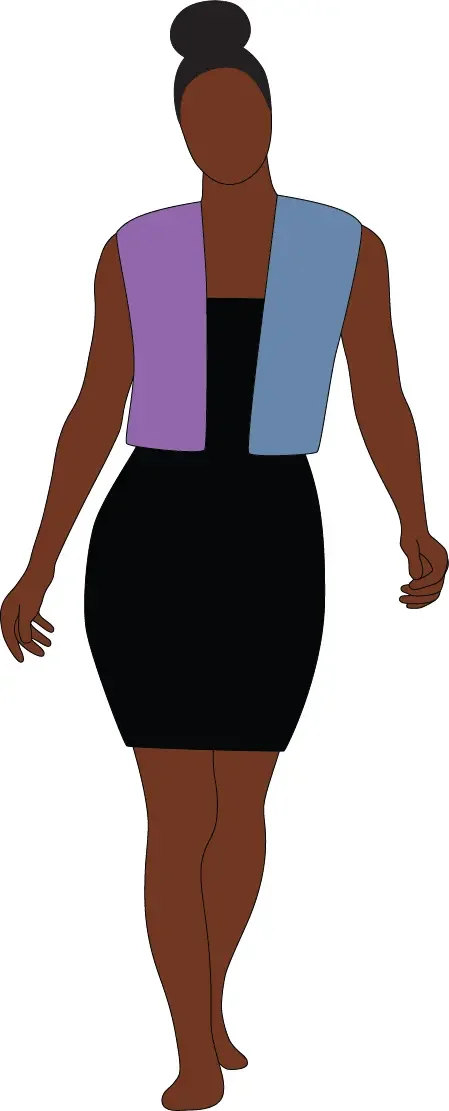
Pieces to Crochet
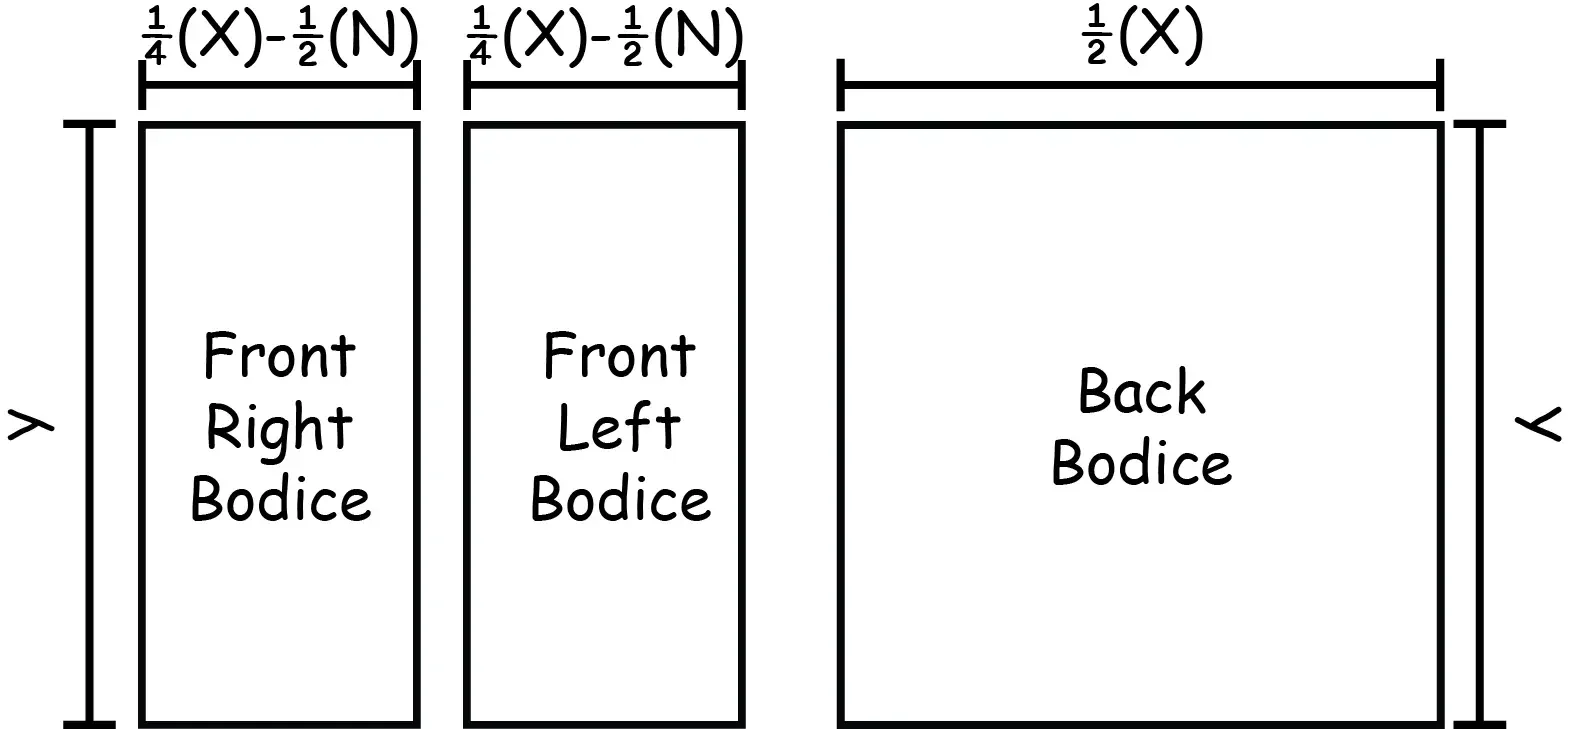
Crochet two front bodices each with a:
Width = ¼(X) - ½(N)
Length = Y
Crochet one back bodice with a:
Width = ½(X)
Length = Y
How to Assemble
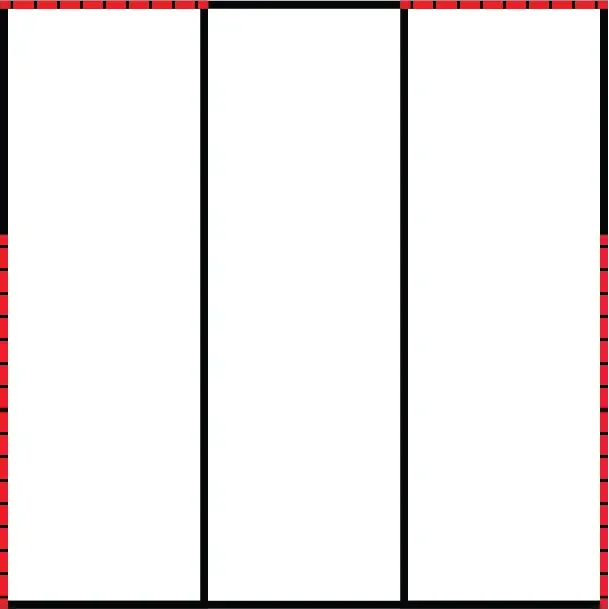
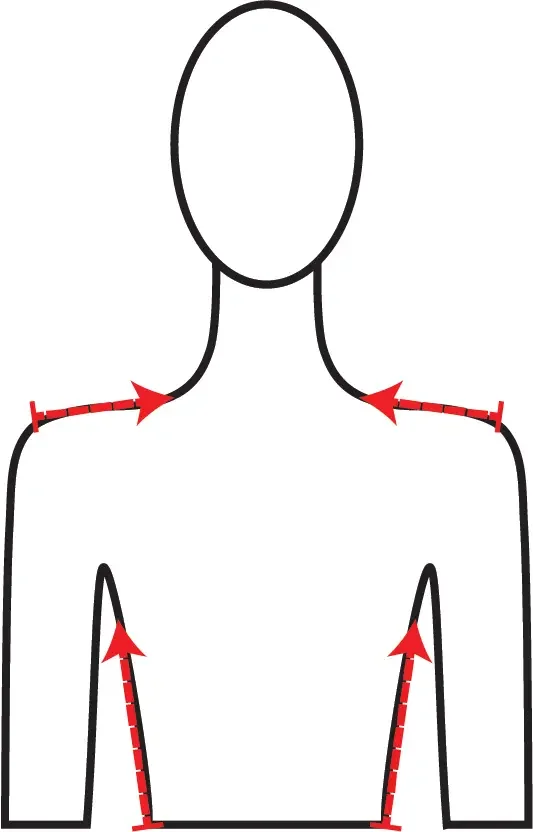
Shoulder seams – Line up front right bodice to the right side of the back bodice at the shoulder edges and attach along the whole width of the front right bodice. Repeat with front left bodice and left side of back bodice.
Mark armscyes - put the top over your head, mark the bottom of your armscyes on each bodice piece, then remove your top.
Side seams – with front and back bodice together, attach them starting at the bottom edge of your right sides up to the bottom of your armscye. Repeat with left sides.
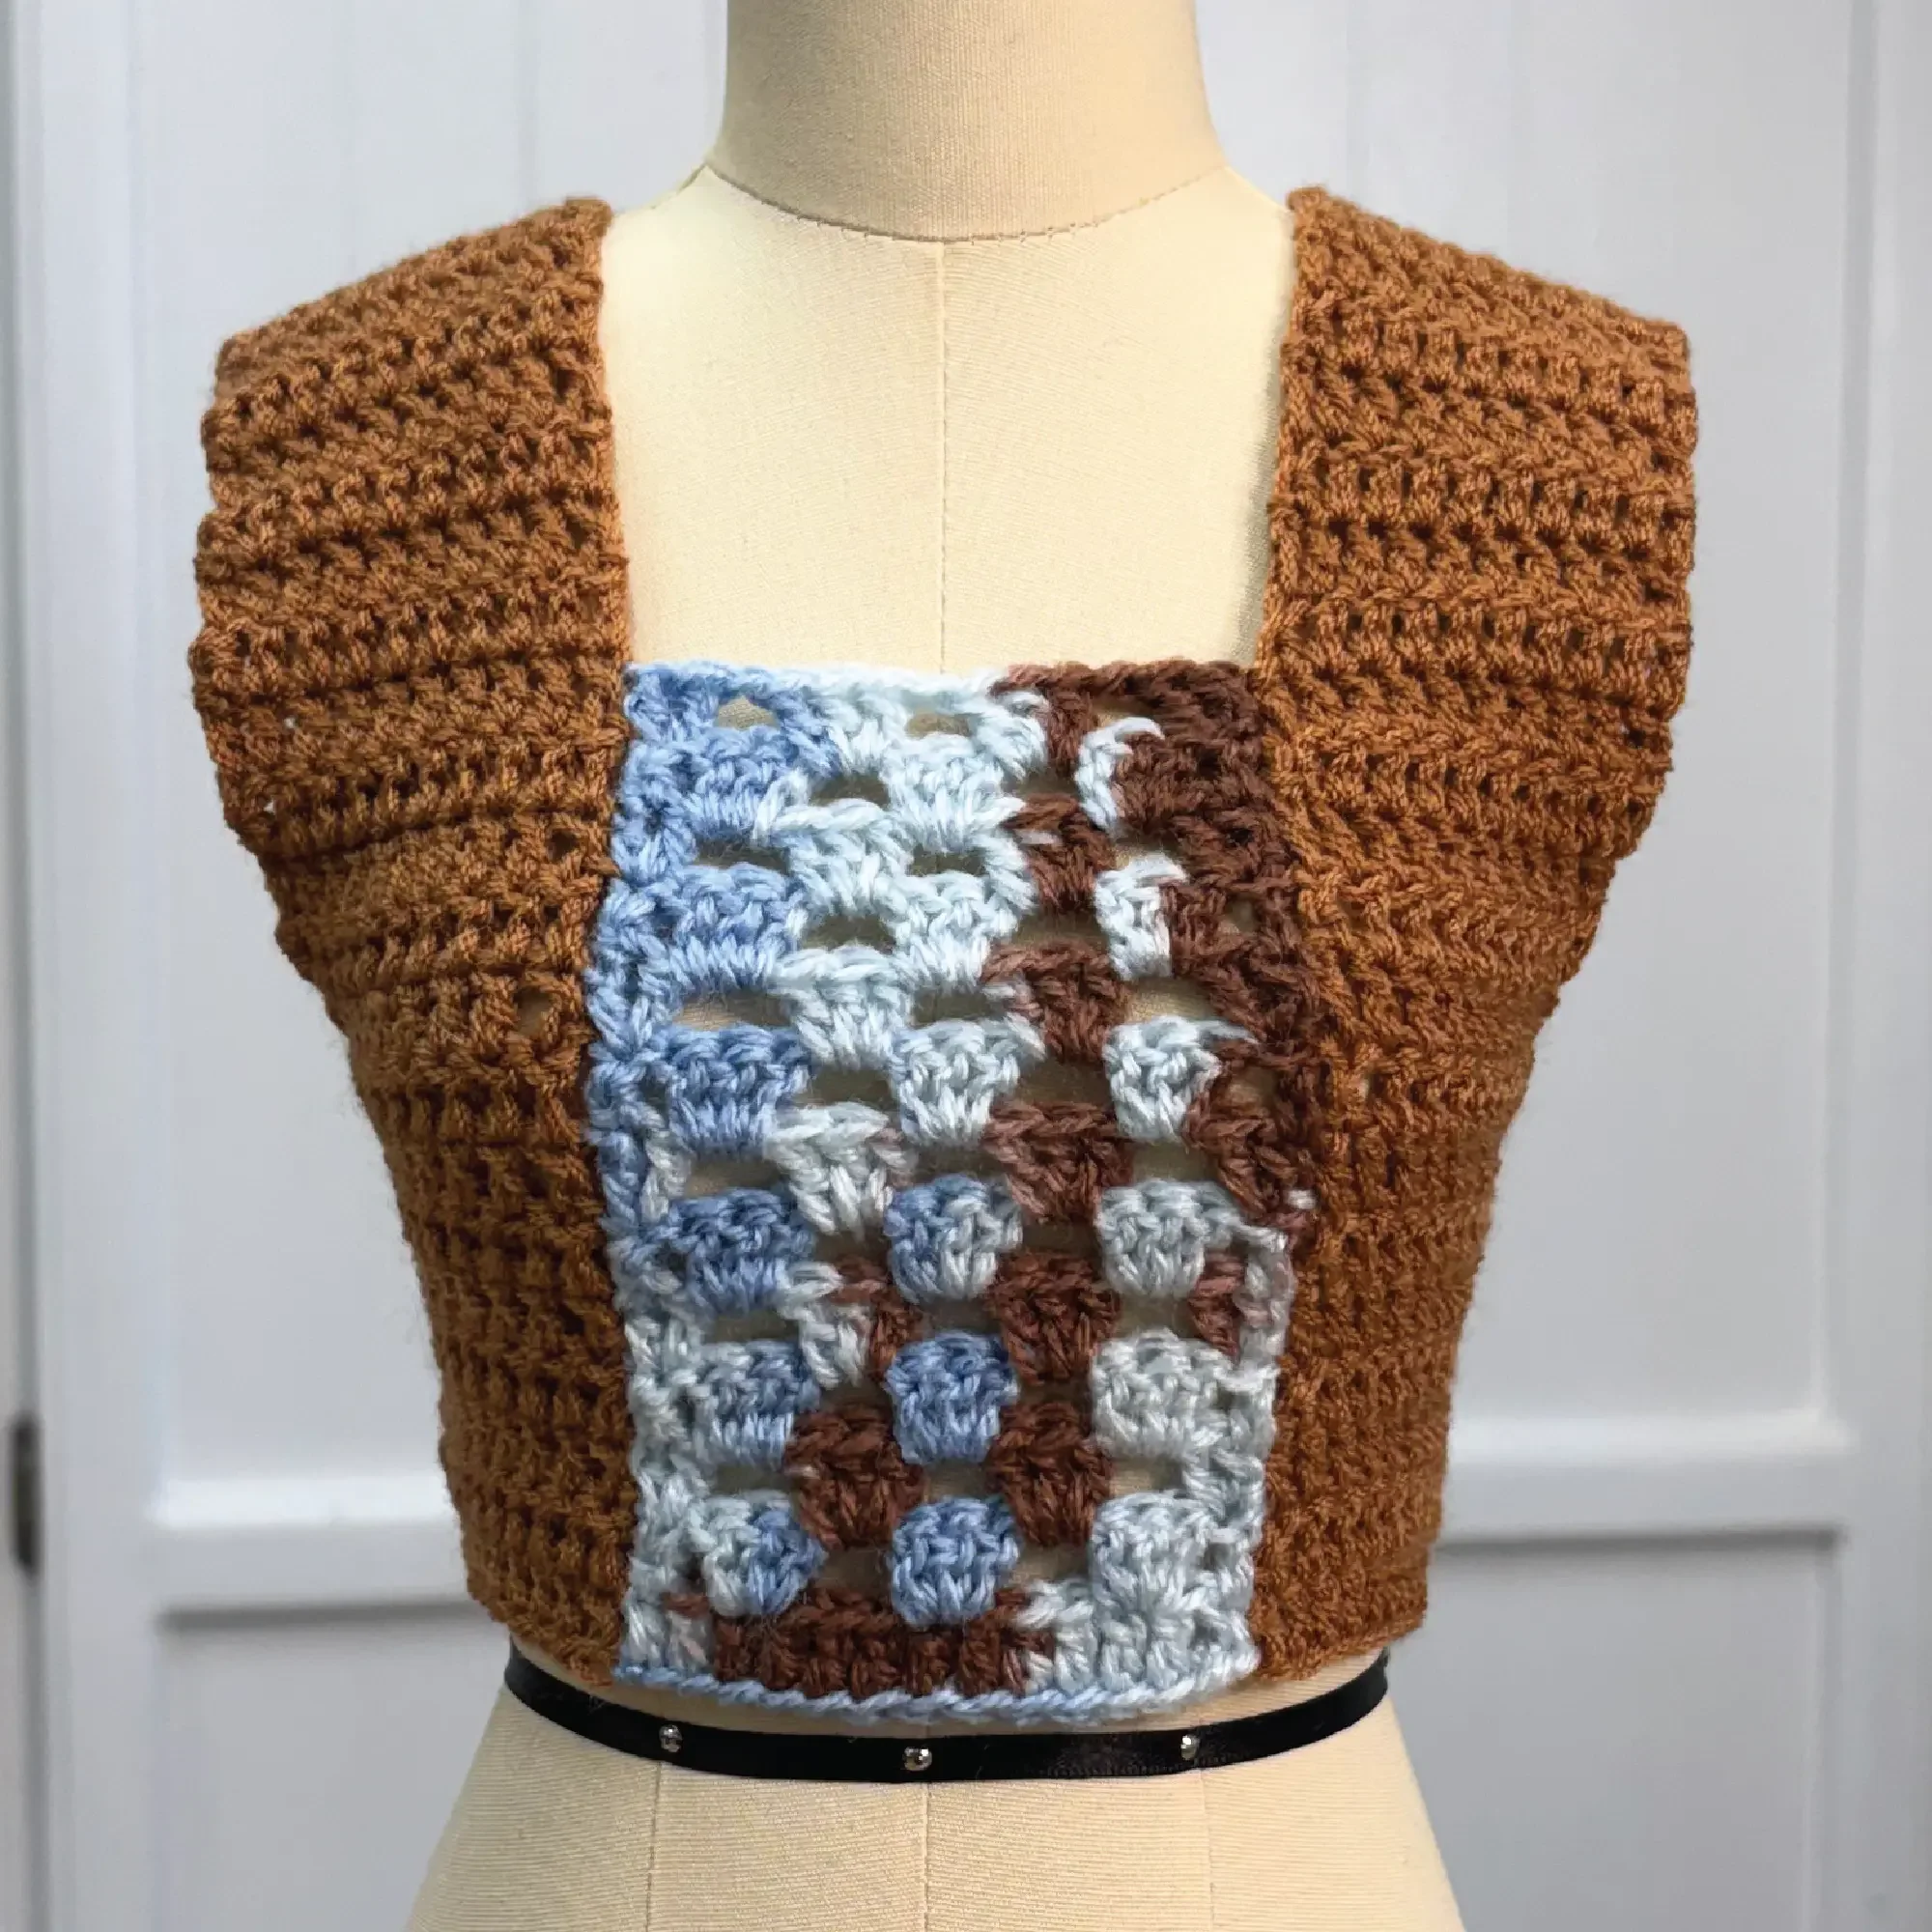
Top E: 6 Panels
Double Crochet Stitch &
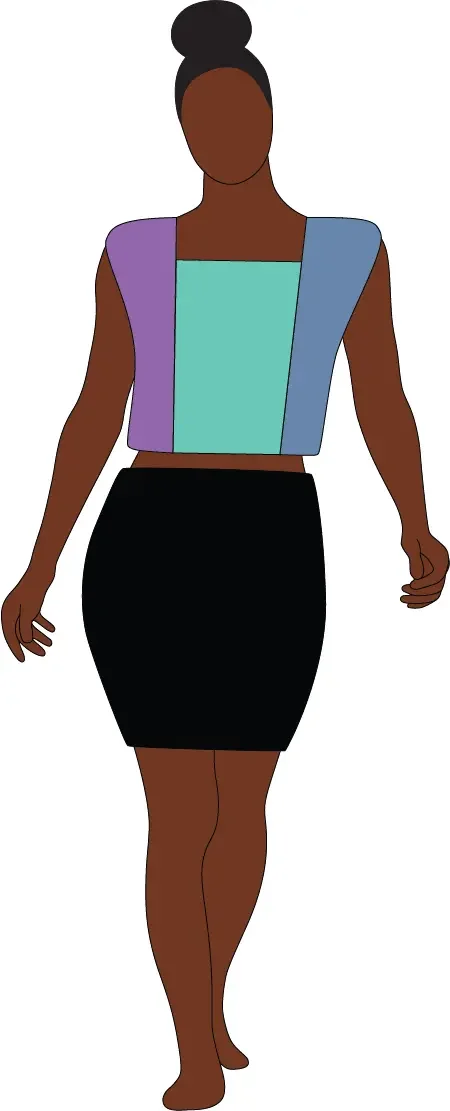
Version 1
Pieces to Crochet
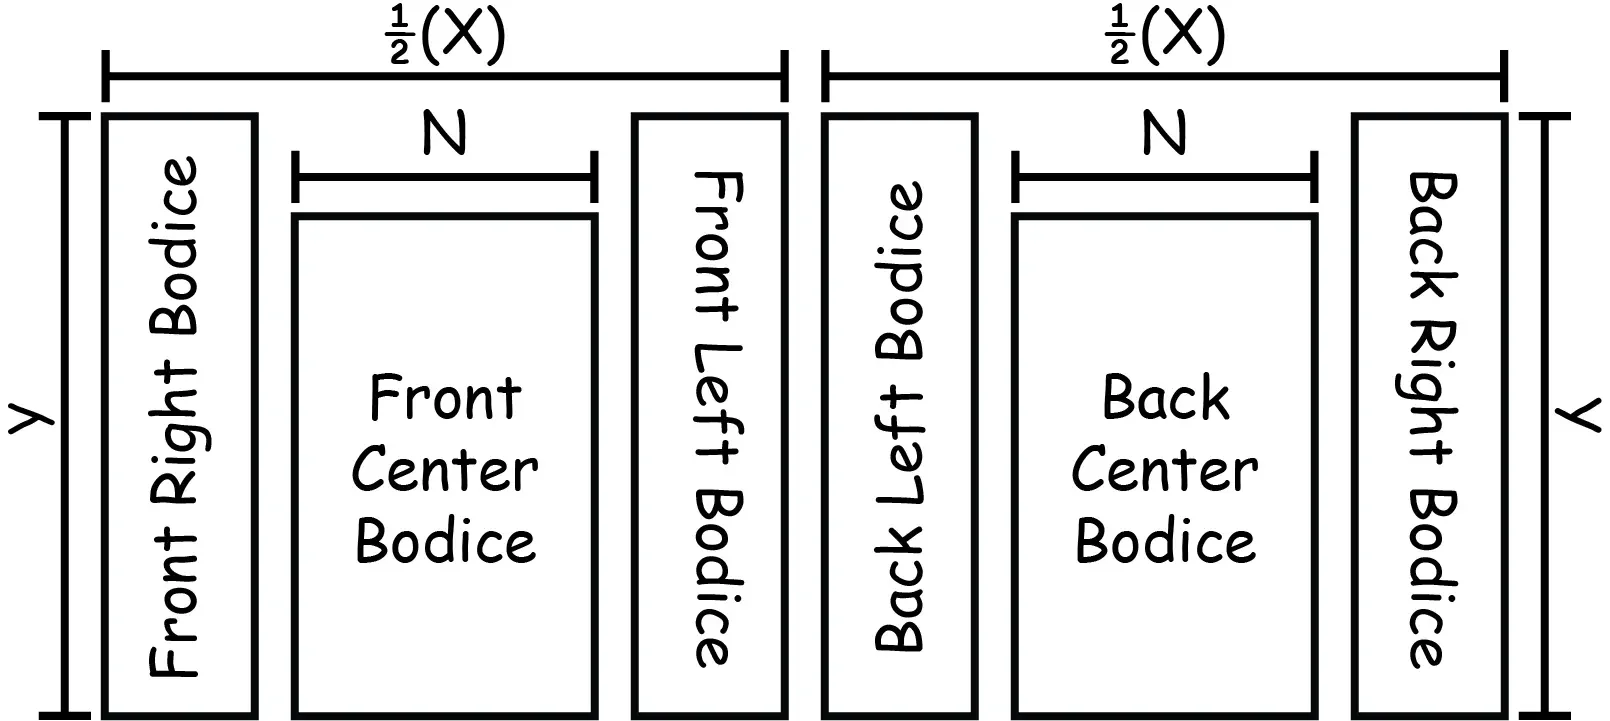
Crochet two center bodices (one front & one back) each with a:
Width = N
Length = Y - desired drop of neckline.
Crochet two right bodices (one front & one back) & two left bodices (one front & one back) each with a:
Width = (½(X) - N) / 2
Length = Y
How to Assemble
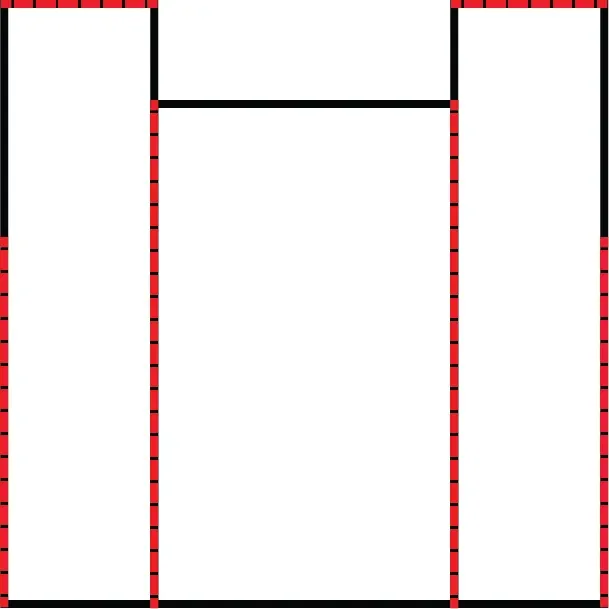
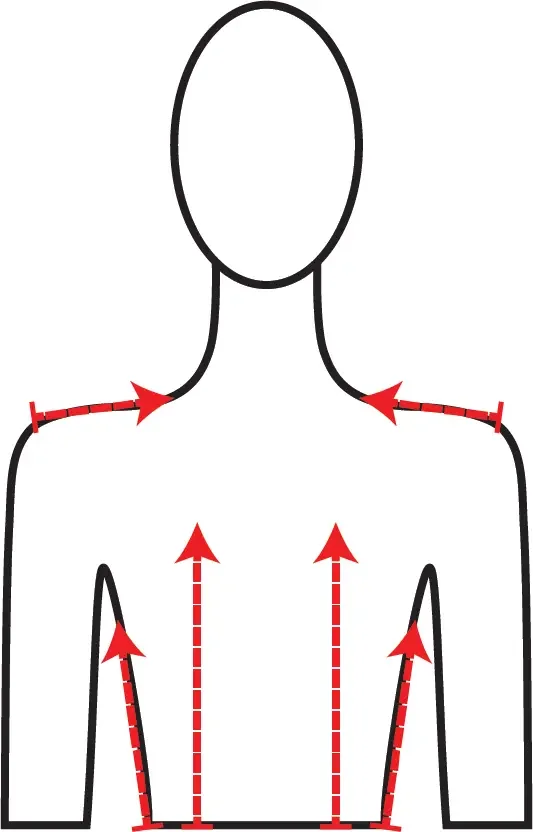
Right and left seams for center front and back – Line up front right bodice to the right side of front center bodice at the bottom edges and attach along the whole length of the front center bodice. Repeat with front left bodice and left side of center front bodice. Repeat the same for back bodice panels.
Shoulder seams – with front right and back right bodices together attach them across the shoulder from end to end. Repeat with the left bodices.
Mark armscyes - put the top over your head, mark the bottom of your armscyes on each bodice piece, then remove your top.
Side seams – with front and back bodice together, attach them starting at the bottom edge of your right sides up to the bottom of your armscye. Repeat with left sides.
Version 2
Pieces to Crochet
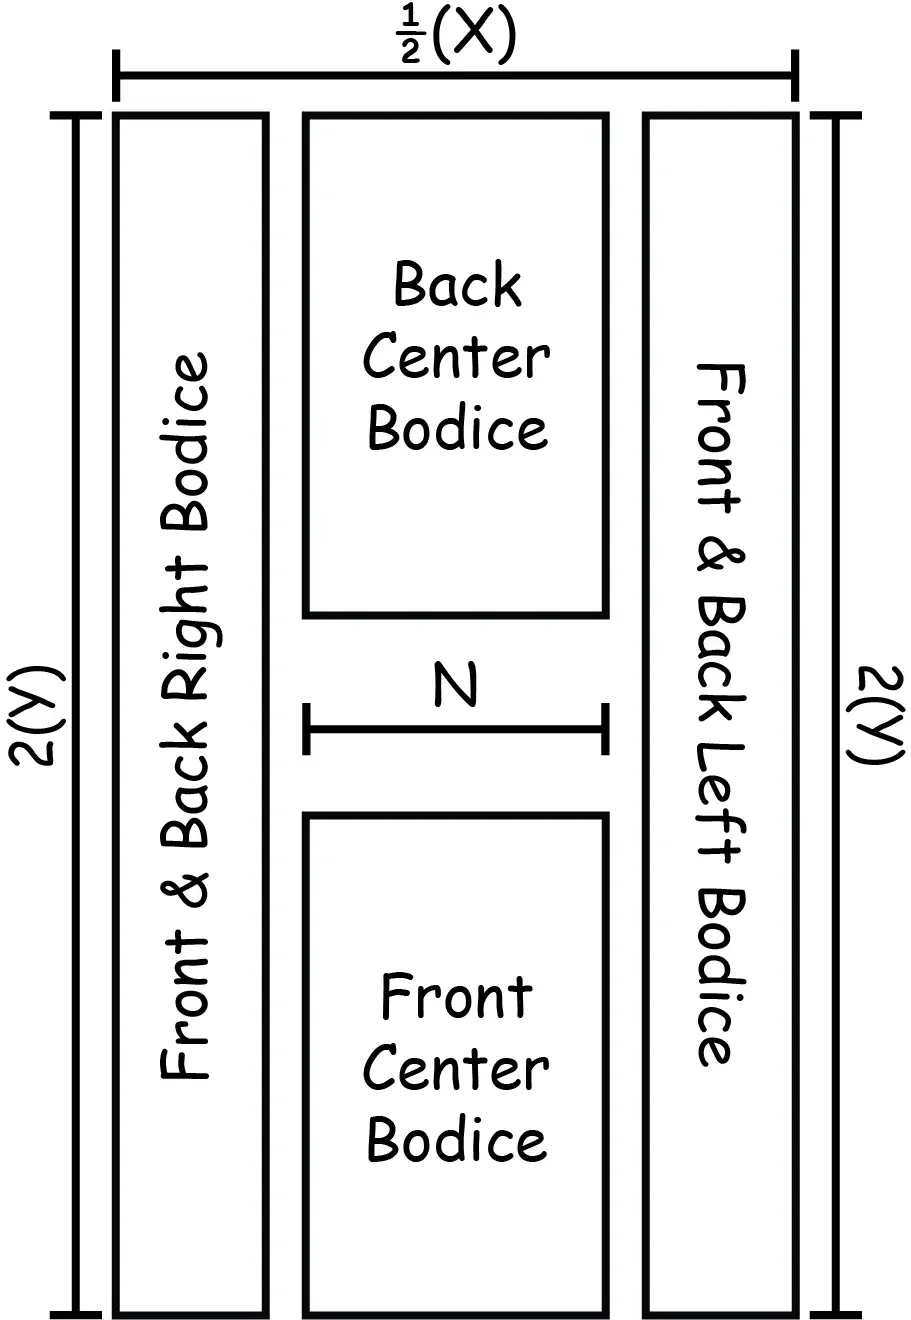
Crochet two center bodices (one front & one back) each with a:
Width = N
Length = Y - desired drop of neckline.
Crochet one right & one left panel (front & back combined) each with a:
Width = (½(X) - N) / 2
Length = 2(Y)
How to Assemble
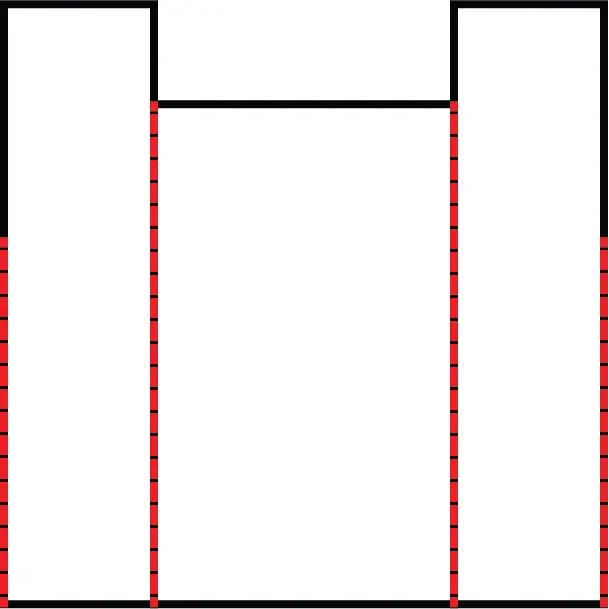
Follow steps 1, 3, and 4 of version 1.
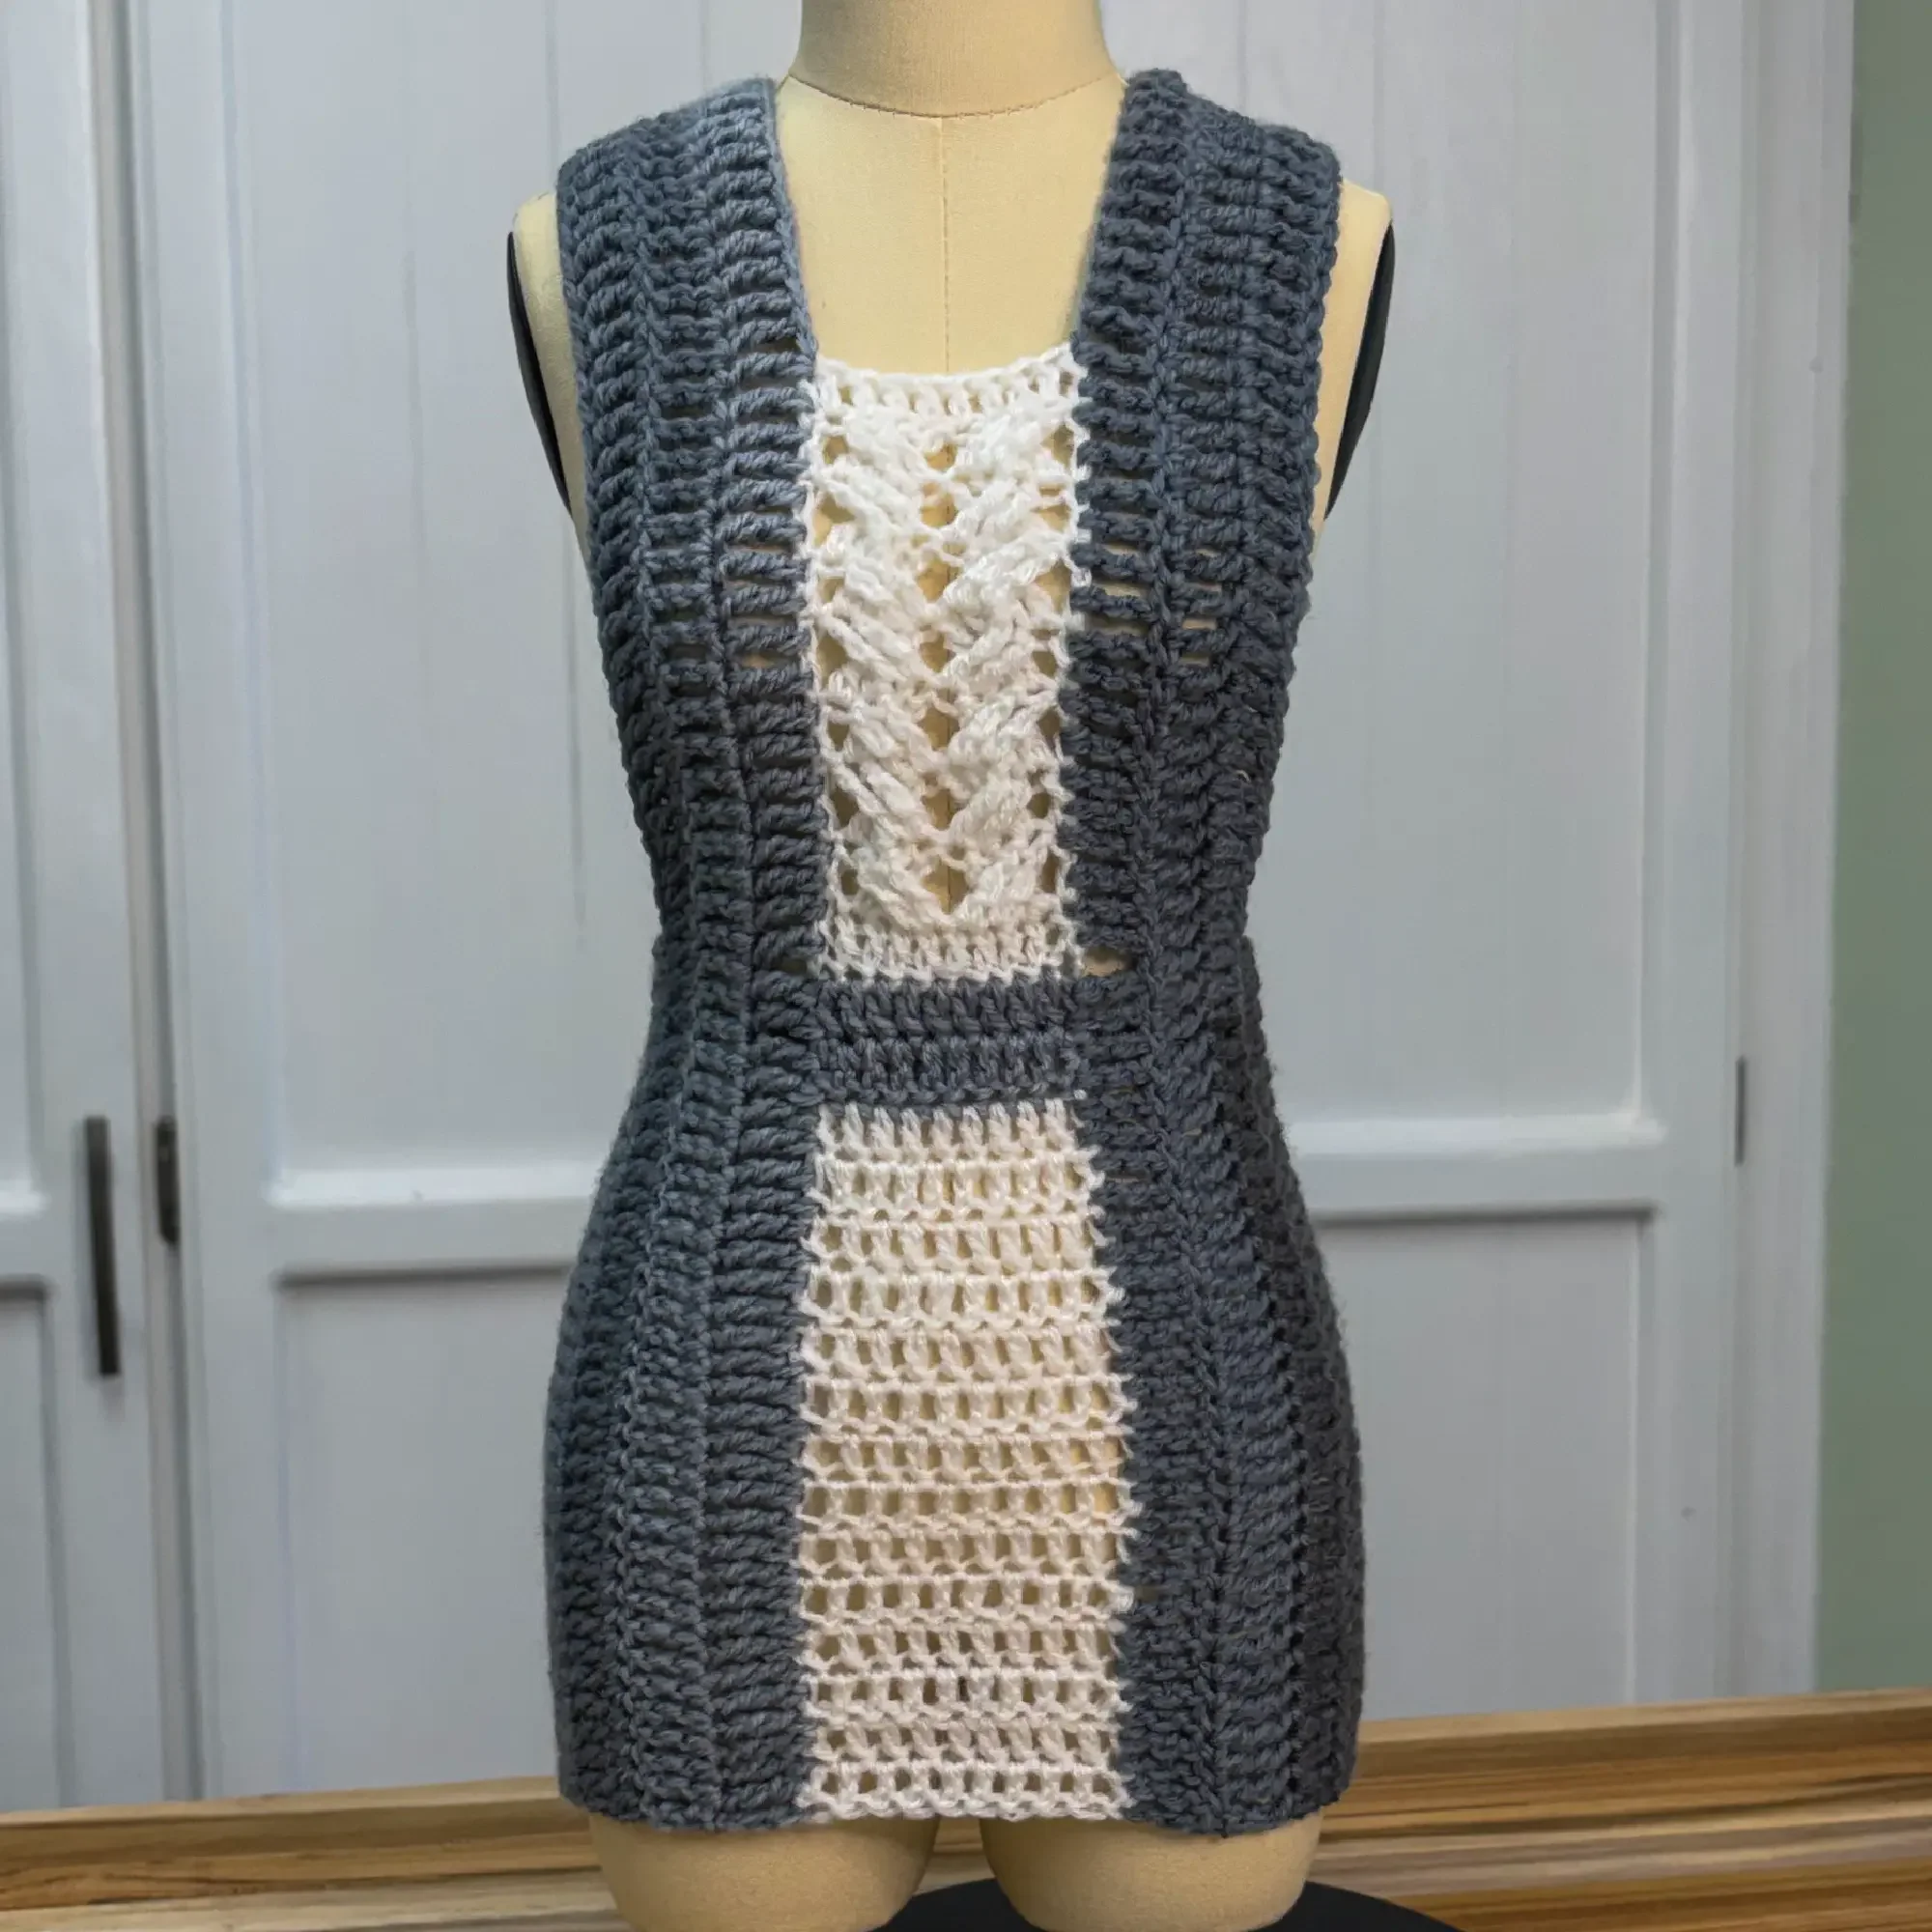
Top F: 8 Panels
Double & Treble Crochet Stitch &
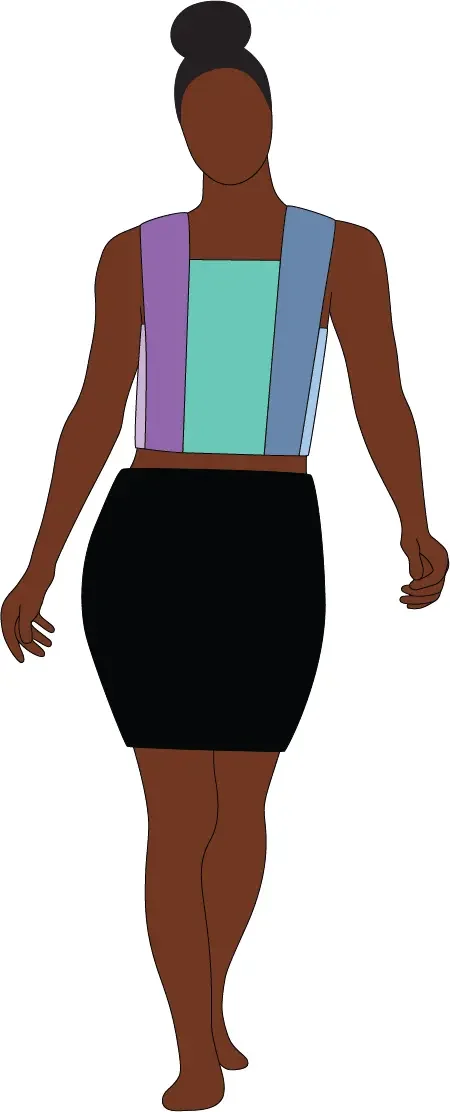
Pieces to Crochet
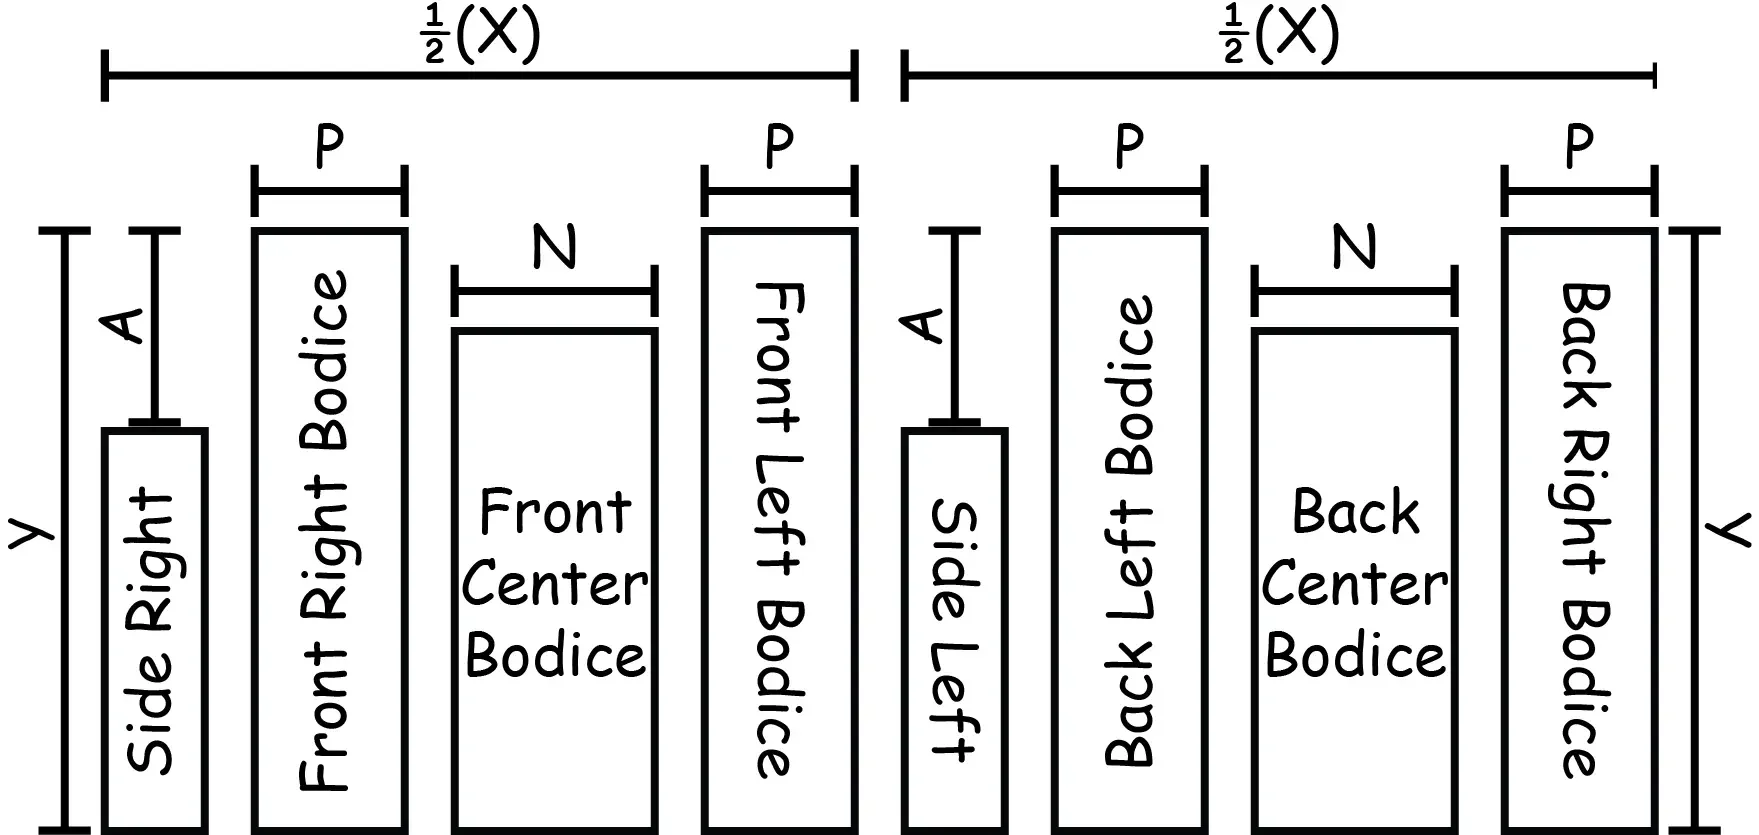
Crochet two center bodices (one front & one back) each with a:
Width = N
Length = Y - desired drop of neckline.
Crochet two right bodices (one front & one back) & two left bodices (one front & one back) each with a:
Width = P
Length = Y
Crochet two side panels (one right & one left) each with a:
Width = ½(X) - N - 2(P)
Length = Y - A.
Note: as seen with “Top C: V-Neck and Top E: 6 panels” you can crochet only one right & one left bodice (front & back combined) each with a:
Width = P
Length = 2(Y)
If you combine these panels, end on step 2 below.
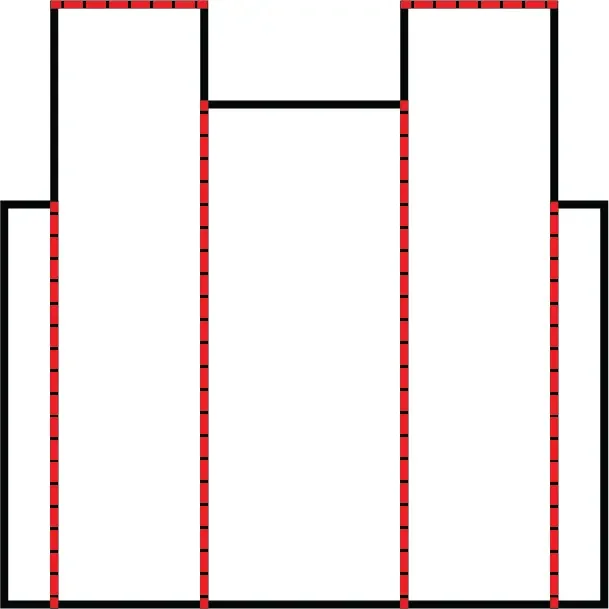
How to Assemble
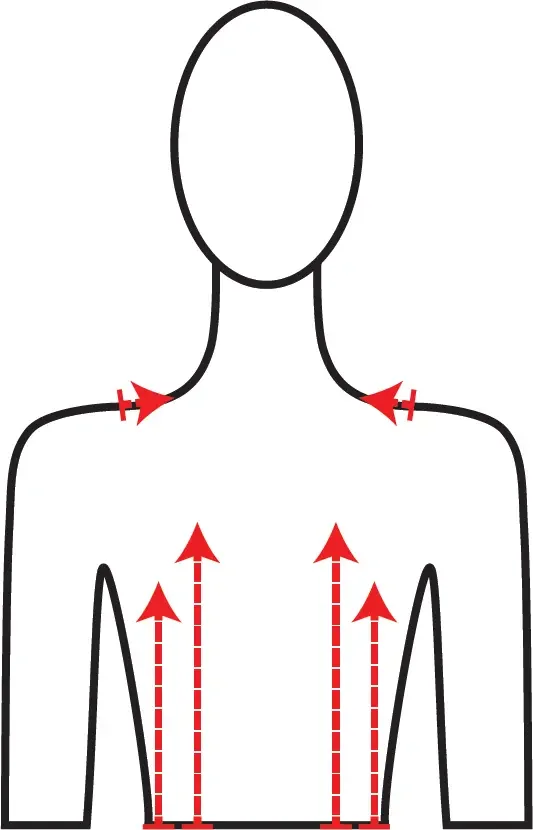
Right and left seams for center front and back – Line up front right bodice to the right side of front center bodice at the bottom edges and attach along the whole length of the front center bodice. Repeat with front left bodice and left side of center front bodice. Repeat the same for back bodice panels.
Side right and left seams – with front right bodice and side right together, attach them starting at the bottom edge along the whole length of the side right. Repeat with front left bodice and side left. Repeat the same for back bodices with side right and side left panels.
Shoulder seams – with front right and back right bodices together attach them across the shoulder from end to end. Repeat with the left bodices.
Straps & Sleeves
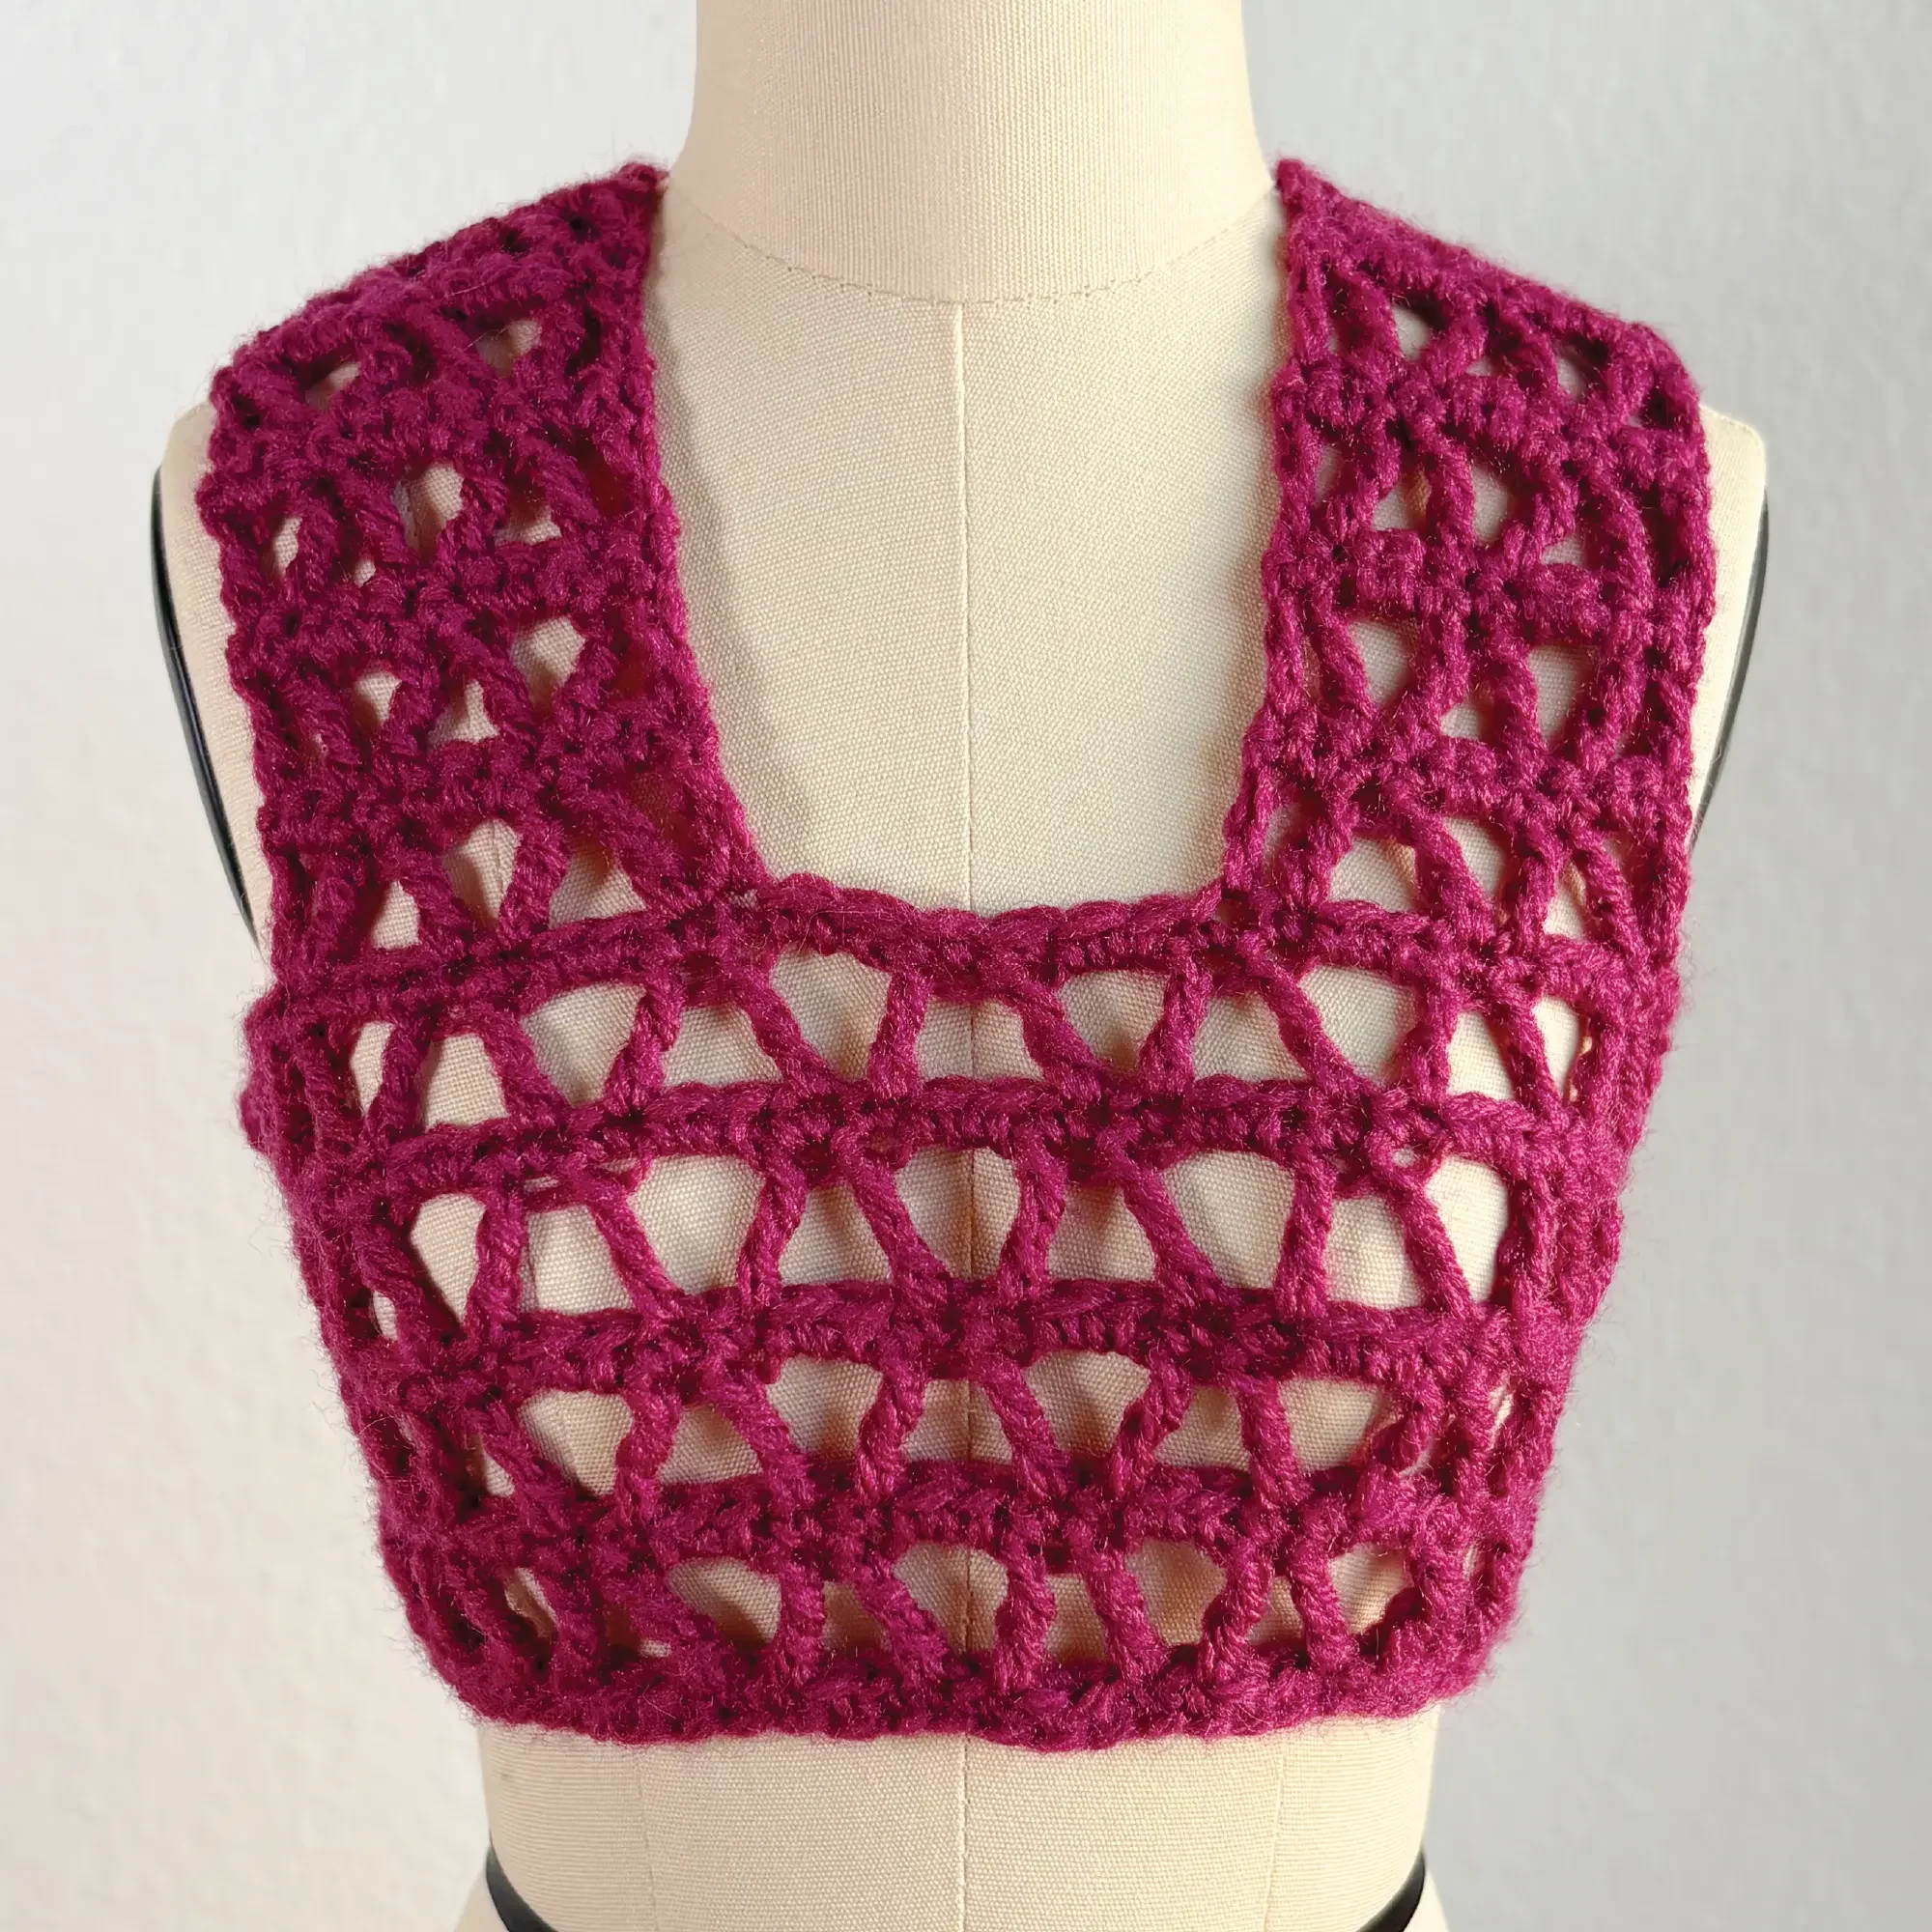
Top G: Shoulder Straps
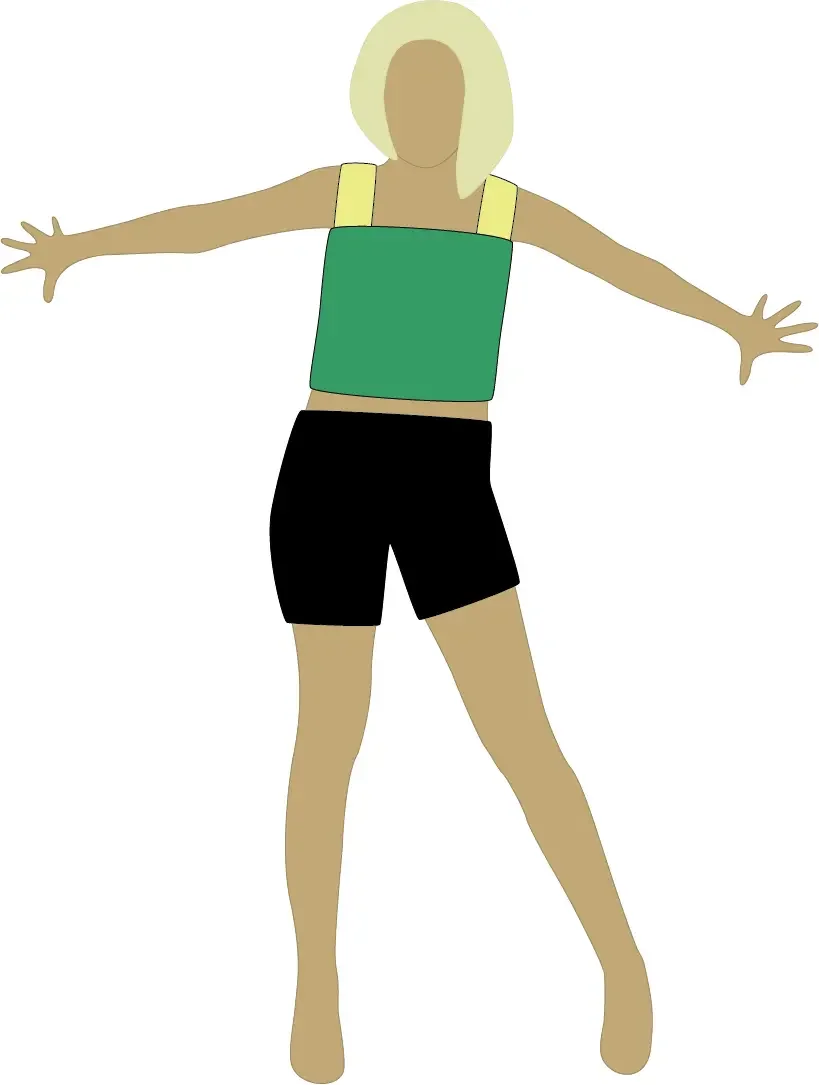
Pieces to Crochet
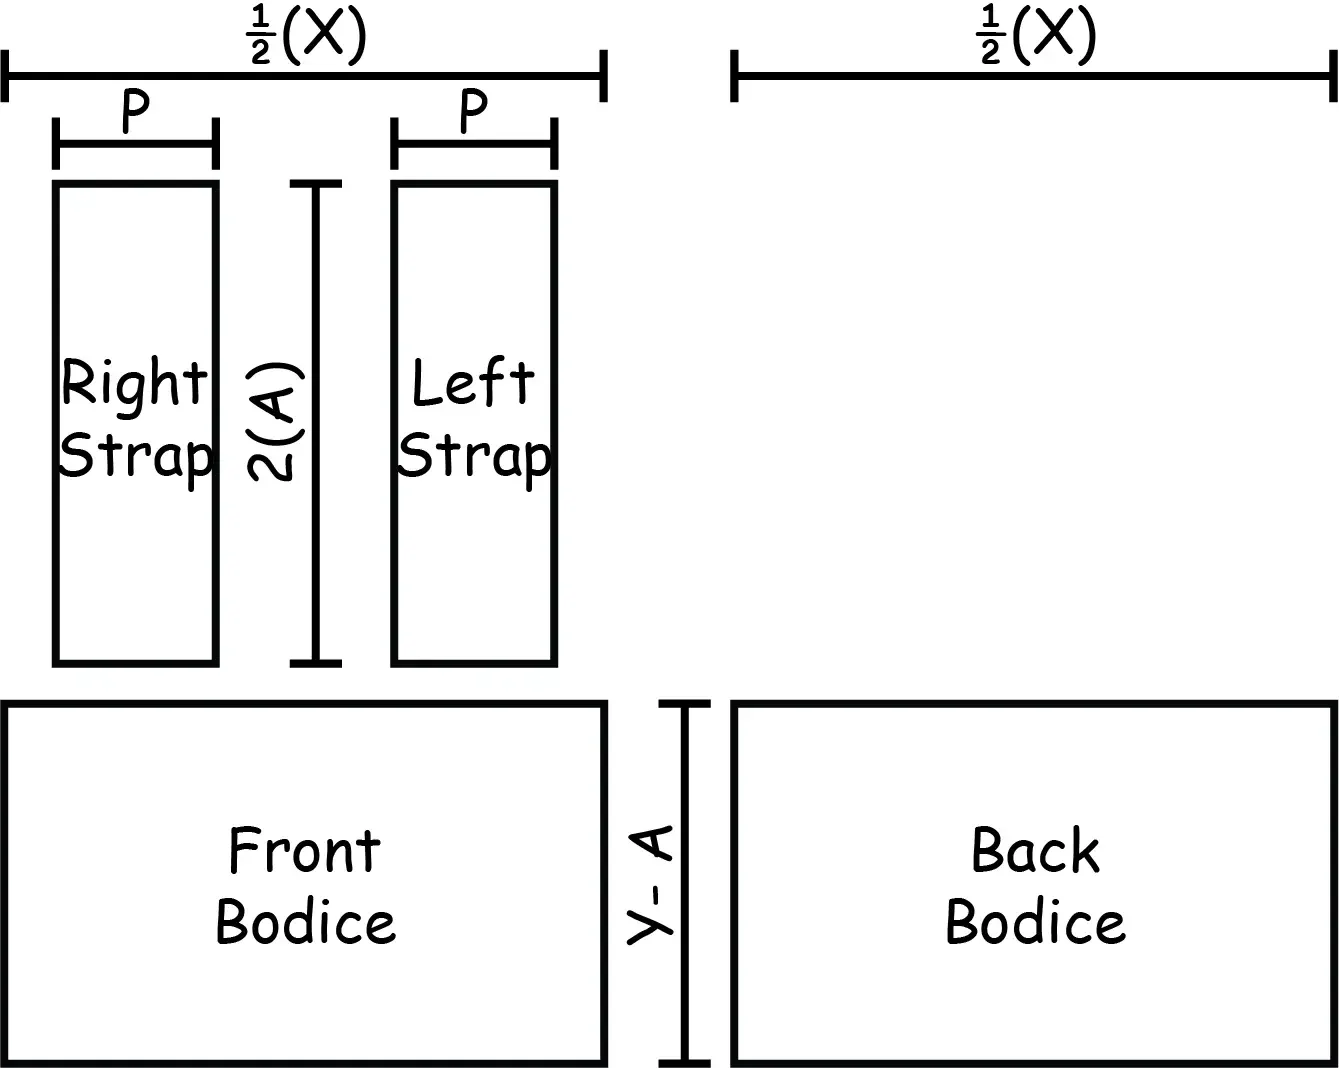
Crochet one front bodice & one back bodice each with a:
Width = ½(X)
Length = Y - A
Crochet two straps (one right & one left) each with a:
Width = P
Length = 2(A)
How to Assemble
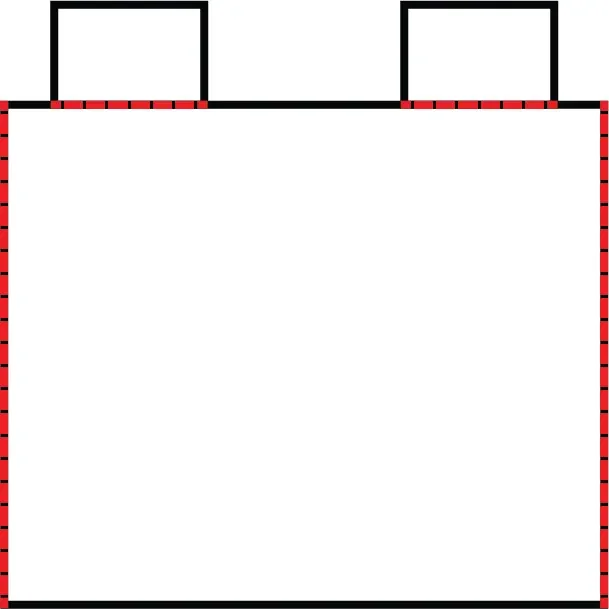
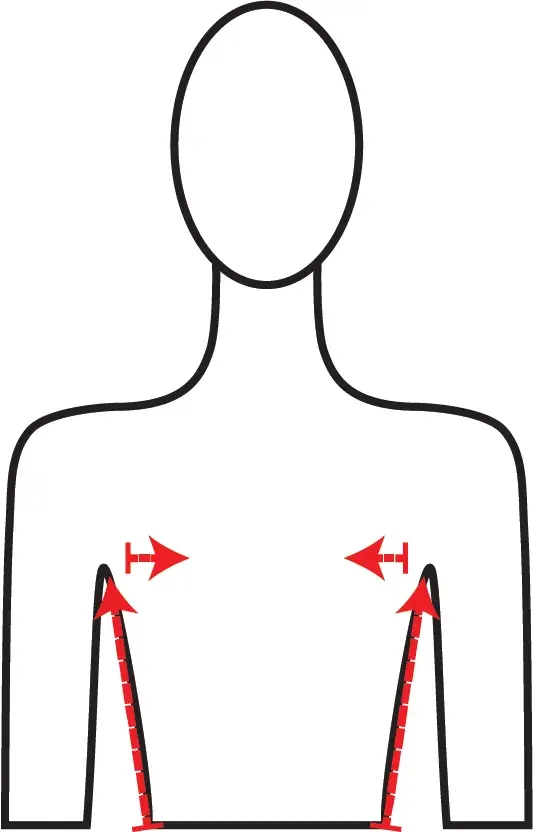
Side seams – with front and back bodice together, attach them starting at the bottom edge of your right sides up to the top. Repeat with left sides.
Mark N – using stitch markers, mark the ends of N (neck width) on both the front and back bodice. The center of N should line up with the center of each bodice.
Strap Seams – line up the inside corner of the right strap with the front bodice where you marked the right end of N. Attach them together along the strap from end to end. Repeat with left strap on the left side of front bodice. Repeat with right and left strap on back bodice.
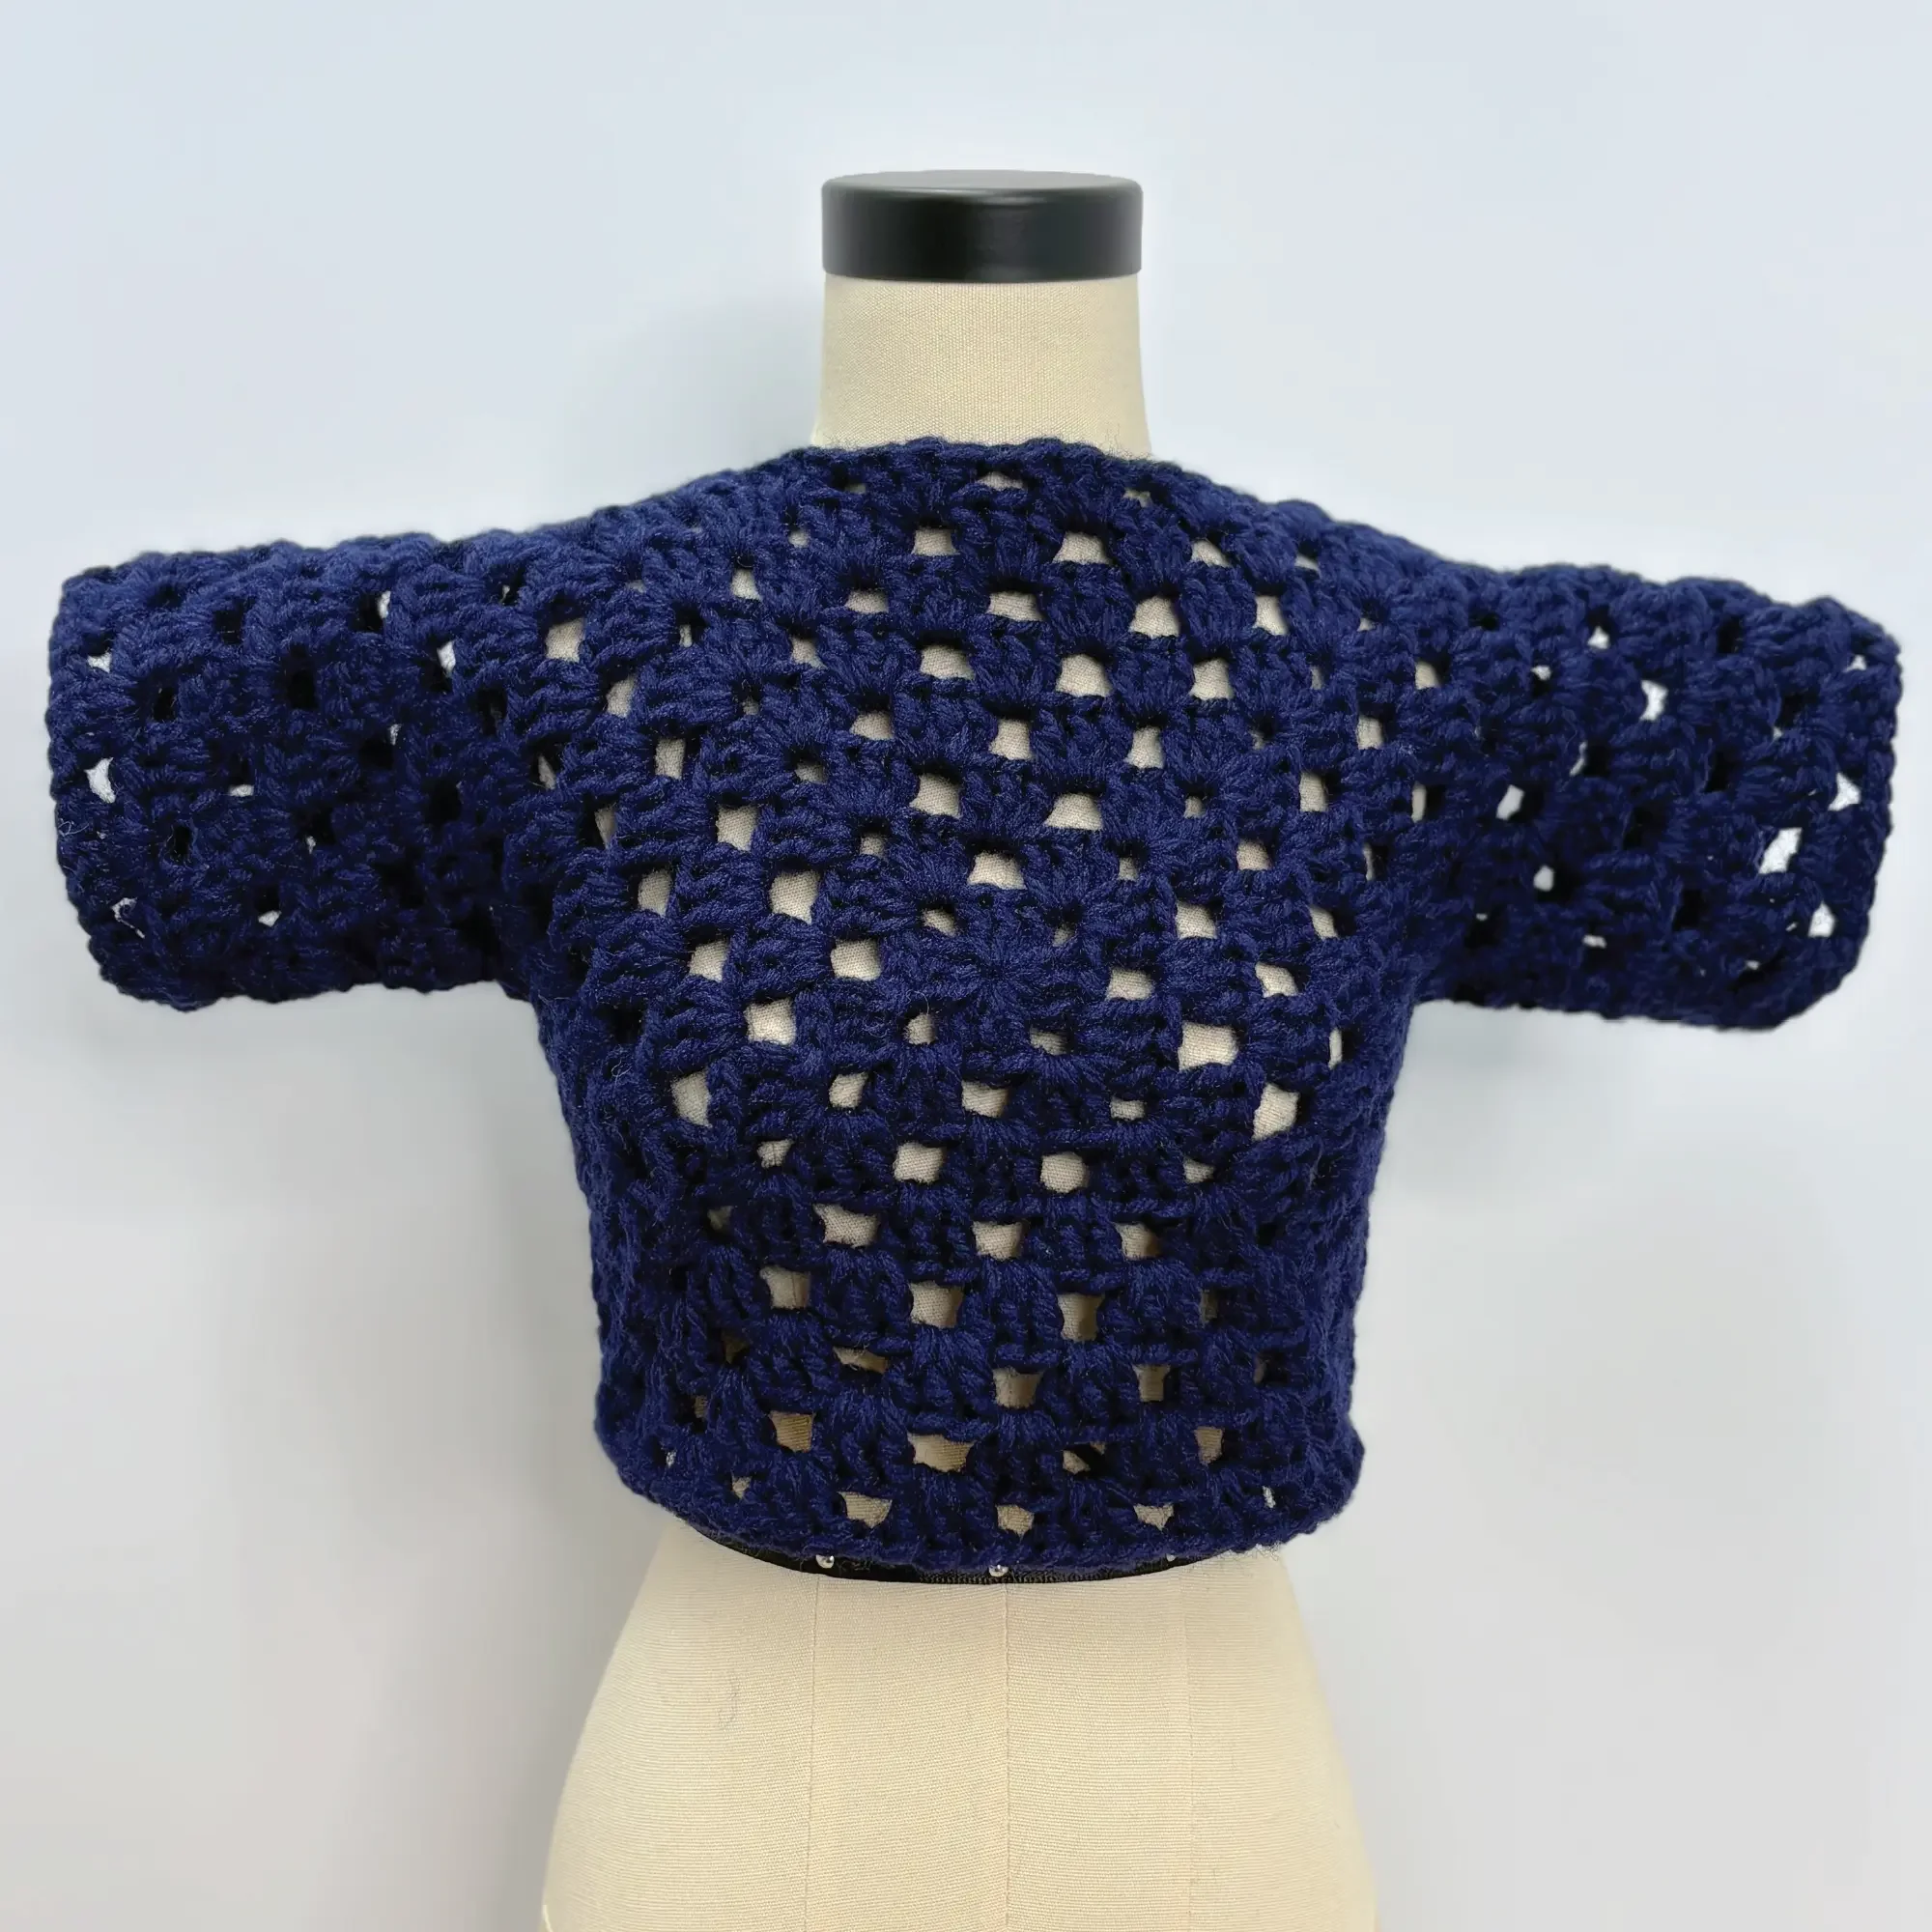
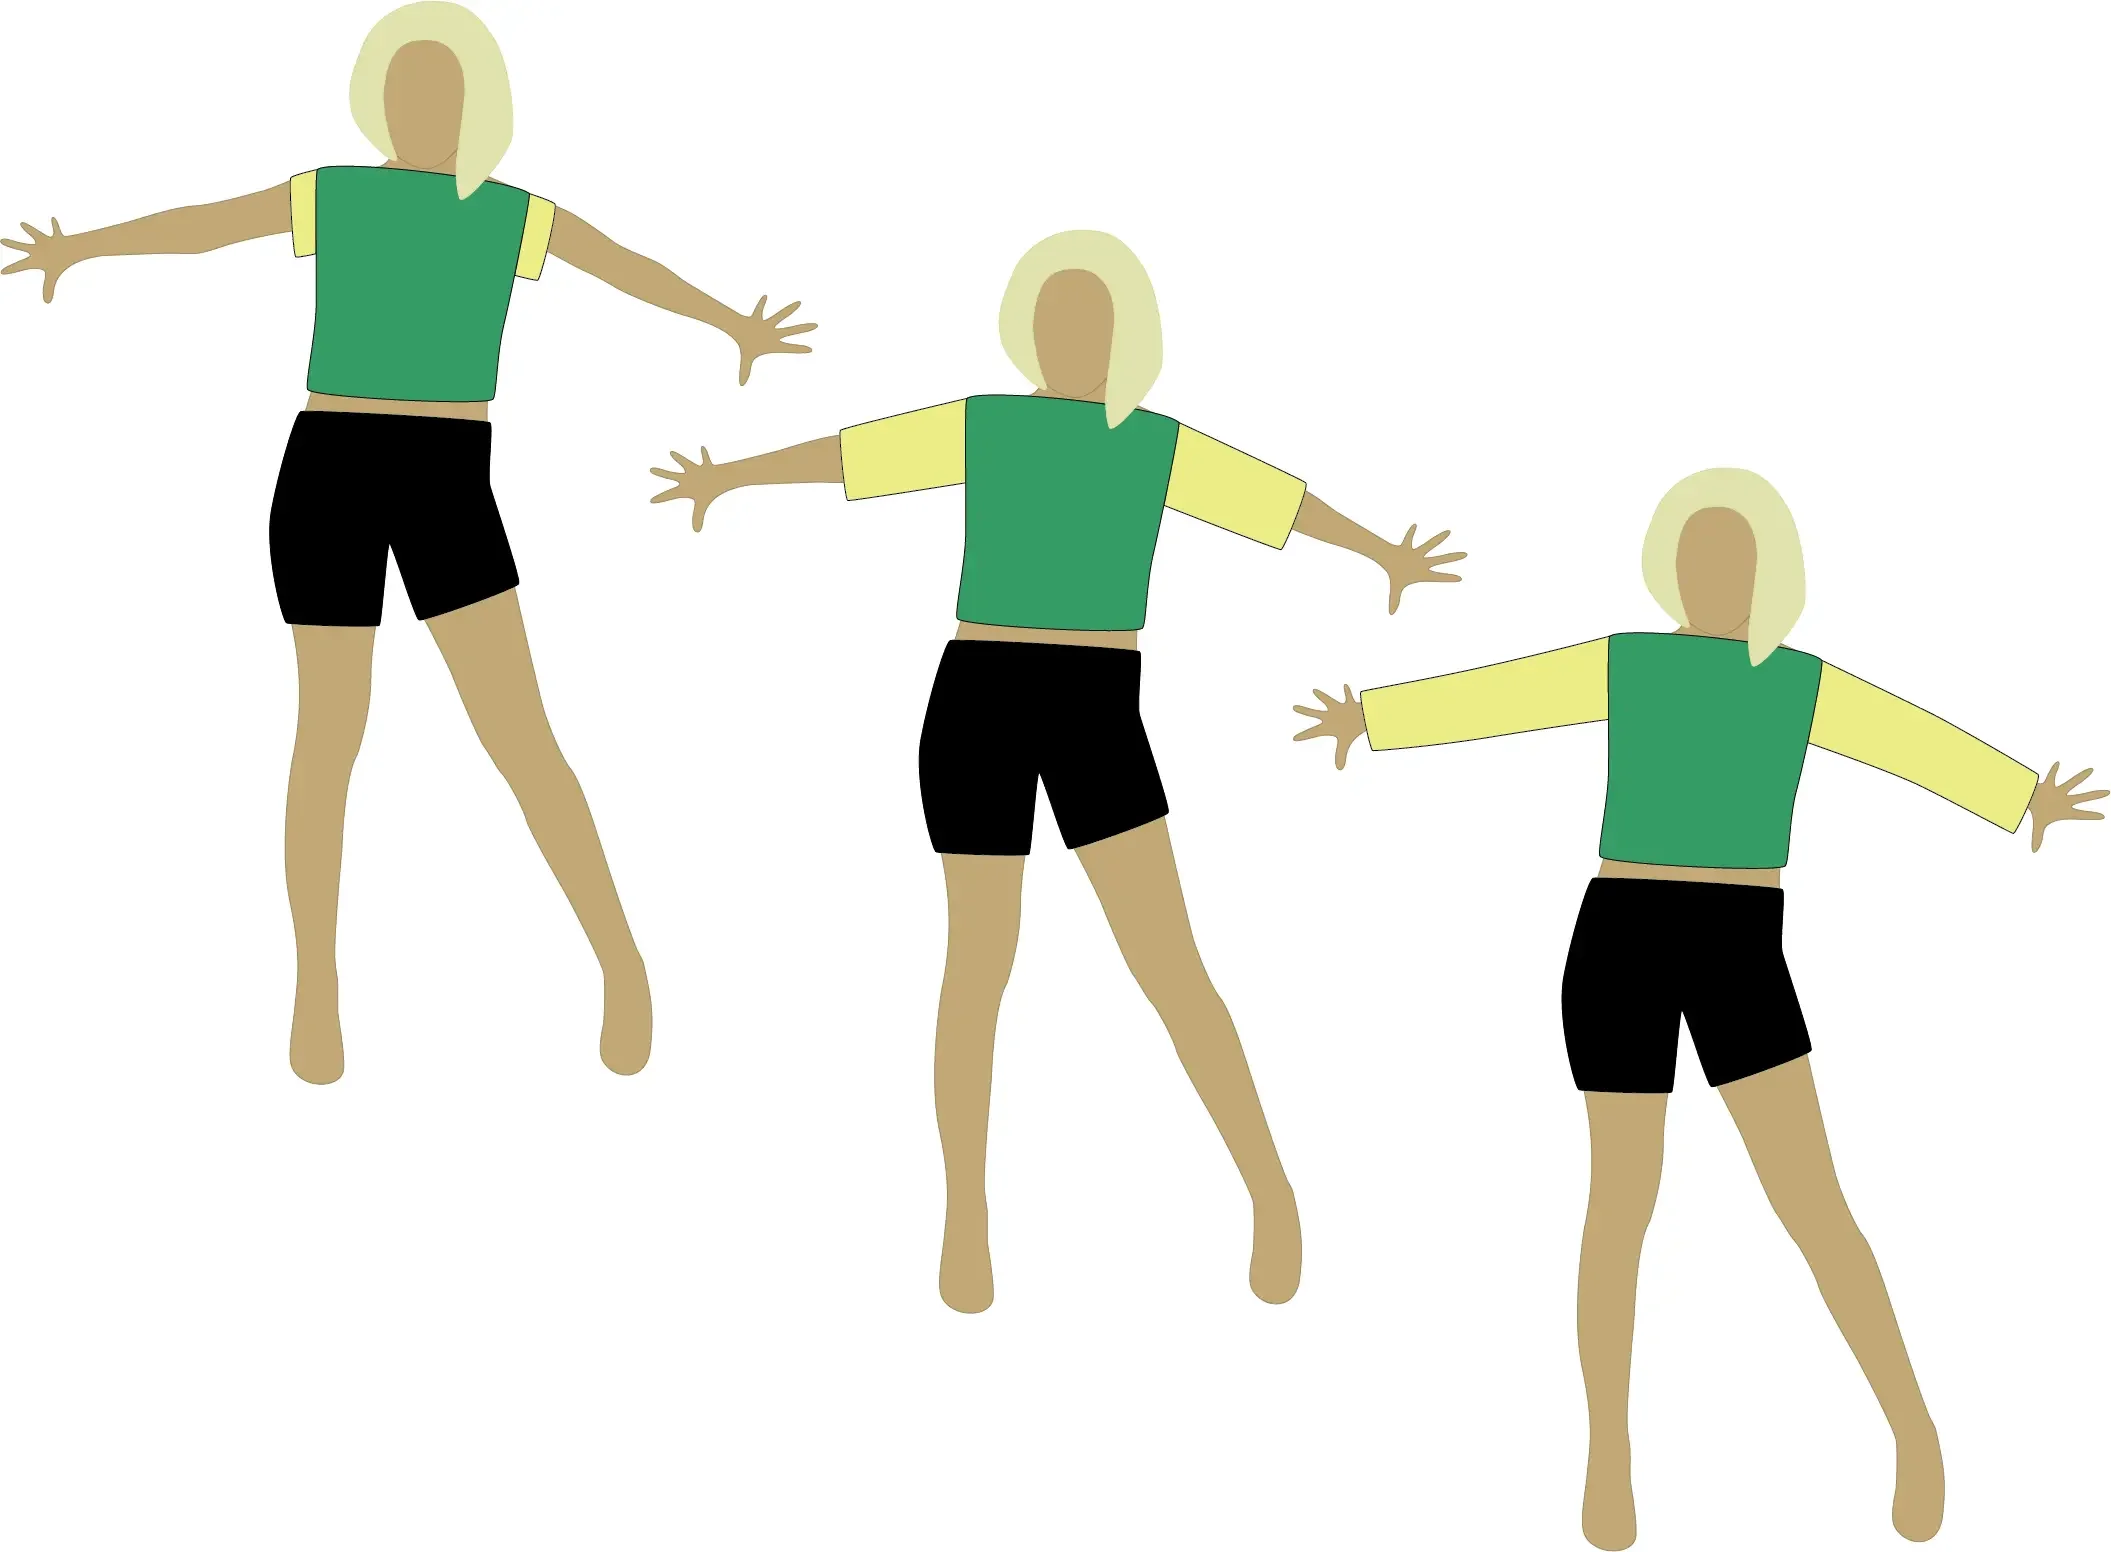
Top H: “Top A” with Sleeves
Pieces to Crochet
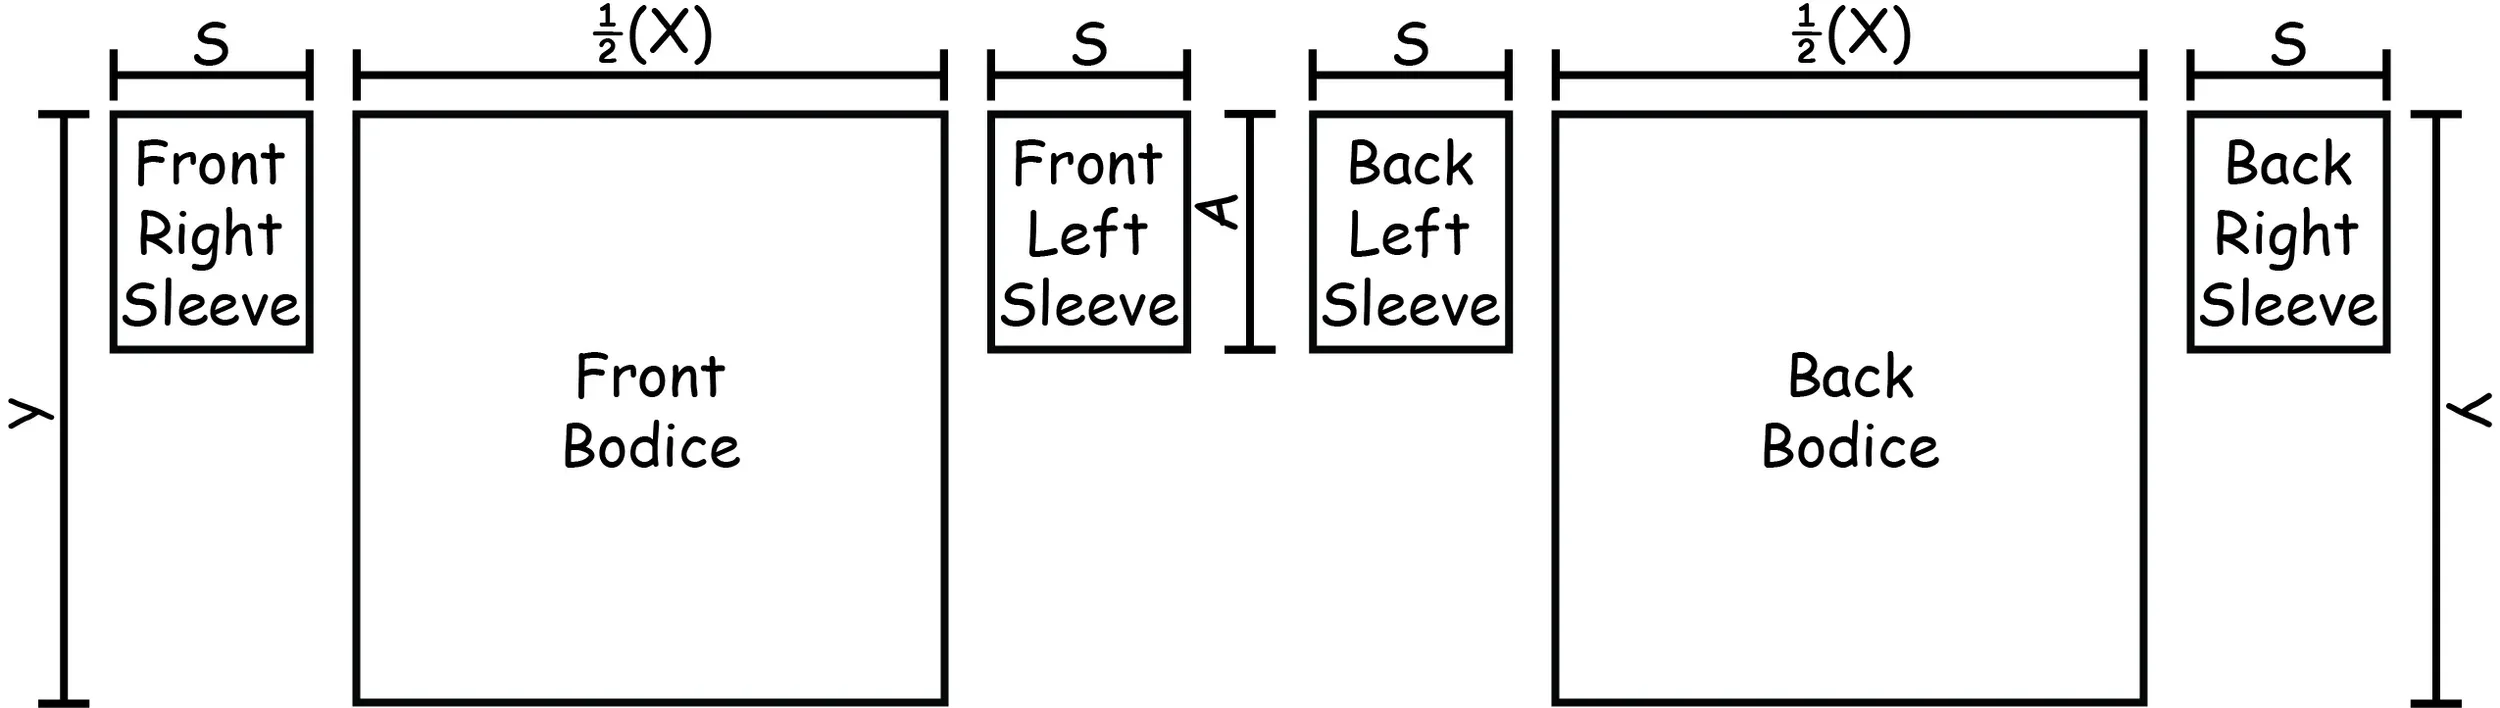
Crochet one front bodice & one back bodice each with a:
Width = ½(X)
Length = Y
Crochet two front sleeves (one right & one left) & two back sleeves (one right & one left) each with a:
Width = S
Length = A
Note: As seen with “Top C: V-Neck and Top E: 6 panels” you can also crochet only one right & one left sleeve (front & back combined) each with a:
Width = S
Length = 2(A)
If you combine these, attach front and back bodice shoulder seams before attaching the sleeves.
How to Assemble
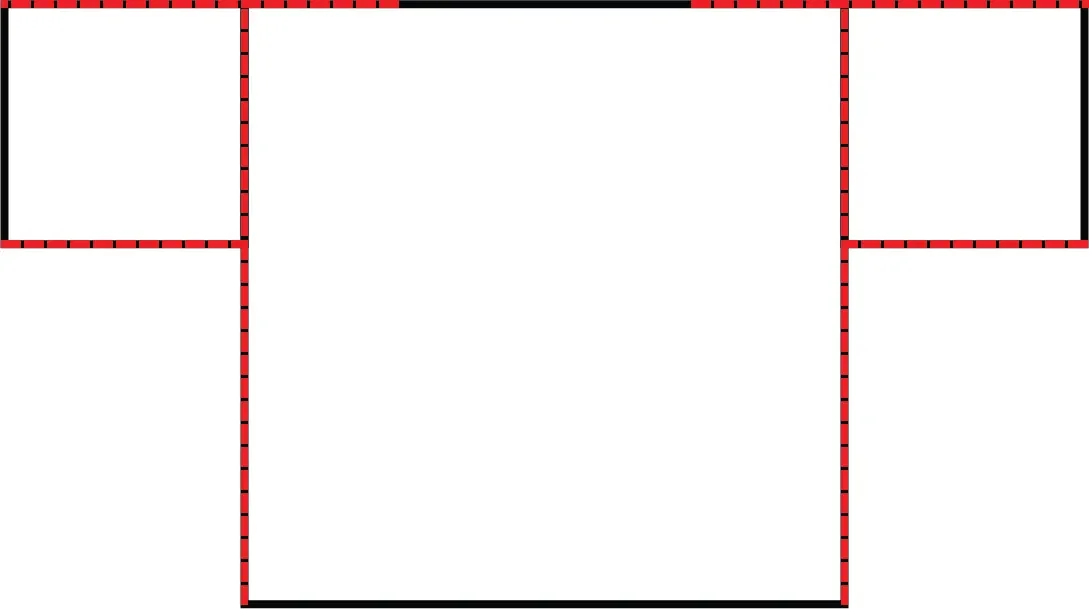
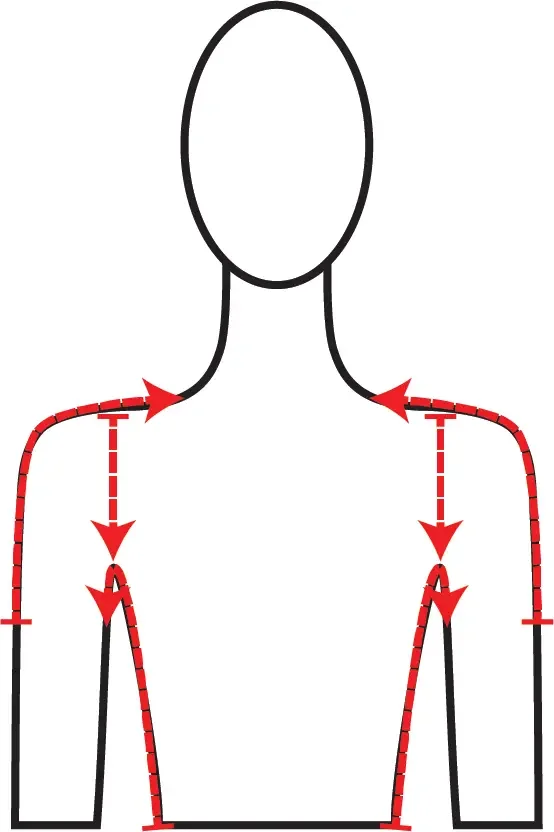
Attach sleeve to bodice – line up the front right sleeve with the corner of the shoulder on the right side of the front bodice. Attach them together along the sleeve from end to end. Repeat with the front left sleeve and front bodice. Repeat with the back right and left sleeve and the back bodice.
Shoulder seams – with front and back bodice together, attach them starting at the edge of the right sleeve toward the center of the bodices. Repeat on left side. This seam can stop an inch after the sleeve or go as far as the edge of the neck. Leave enough room for your head to fit.
Side Seams – with front and backs together, attach the right sides starting at the bottom of the bodice up to the sleeves, pivot and continue along to the end of the sleeve. Repeat on the left side.
Notes:
Along with Top A, you can also add sleeves to any of Tops B - E.
Sleeve can also be added last by working them in the round around the arm opening until desired width (S).
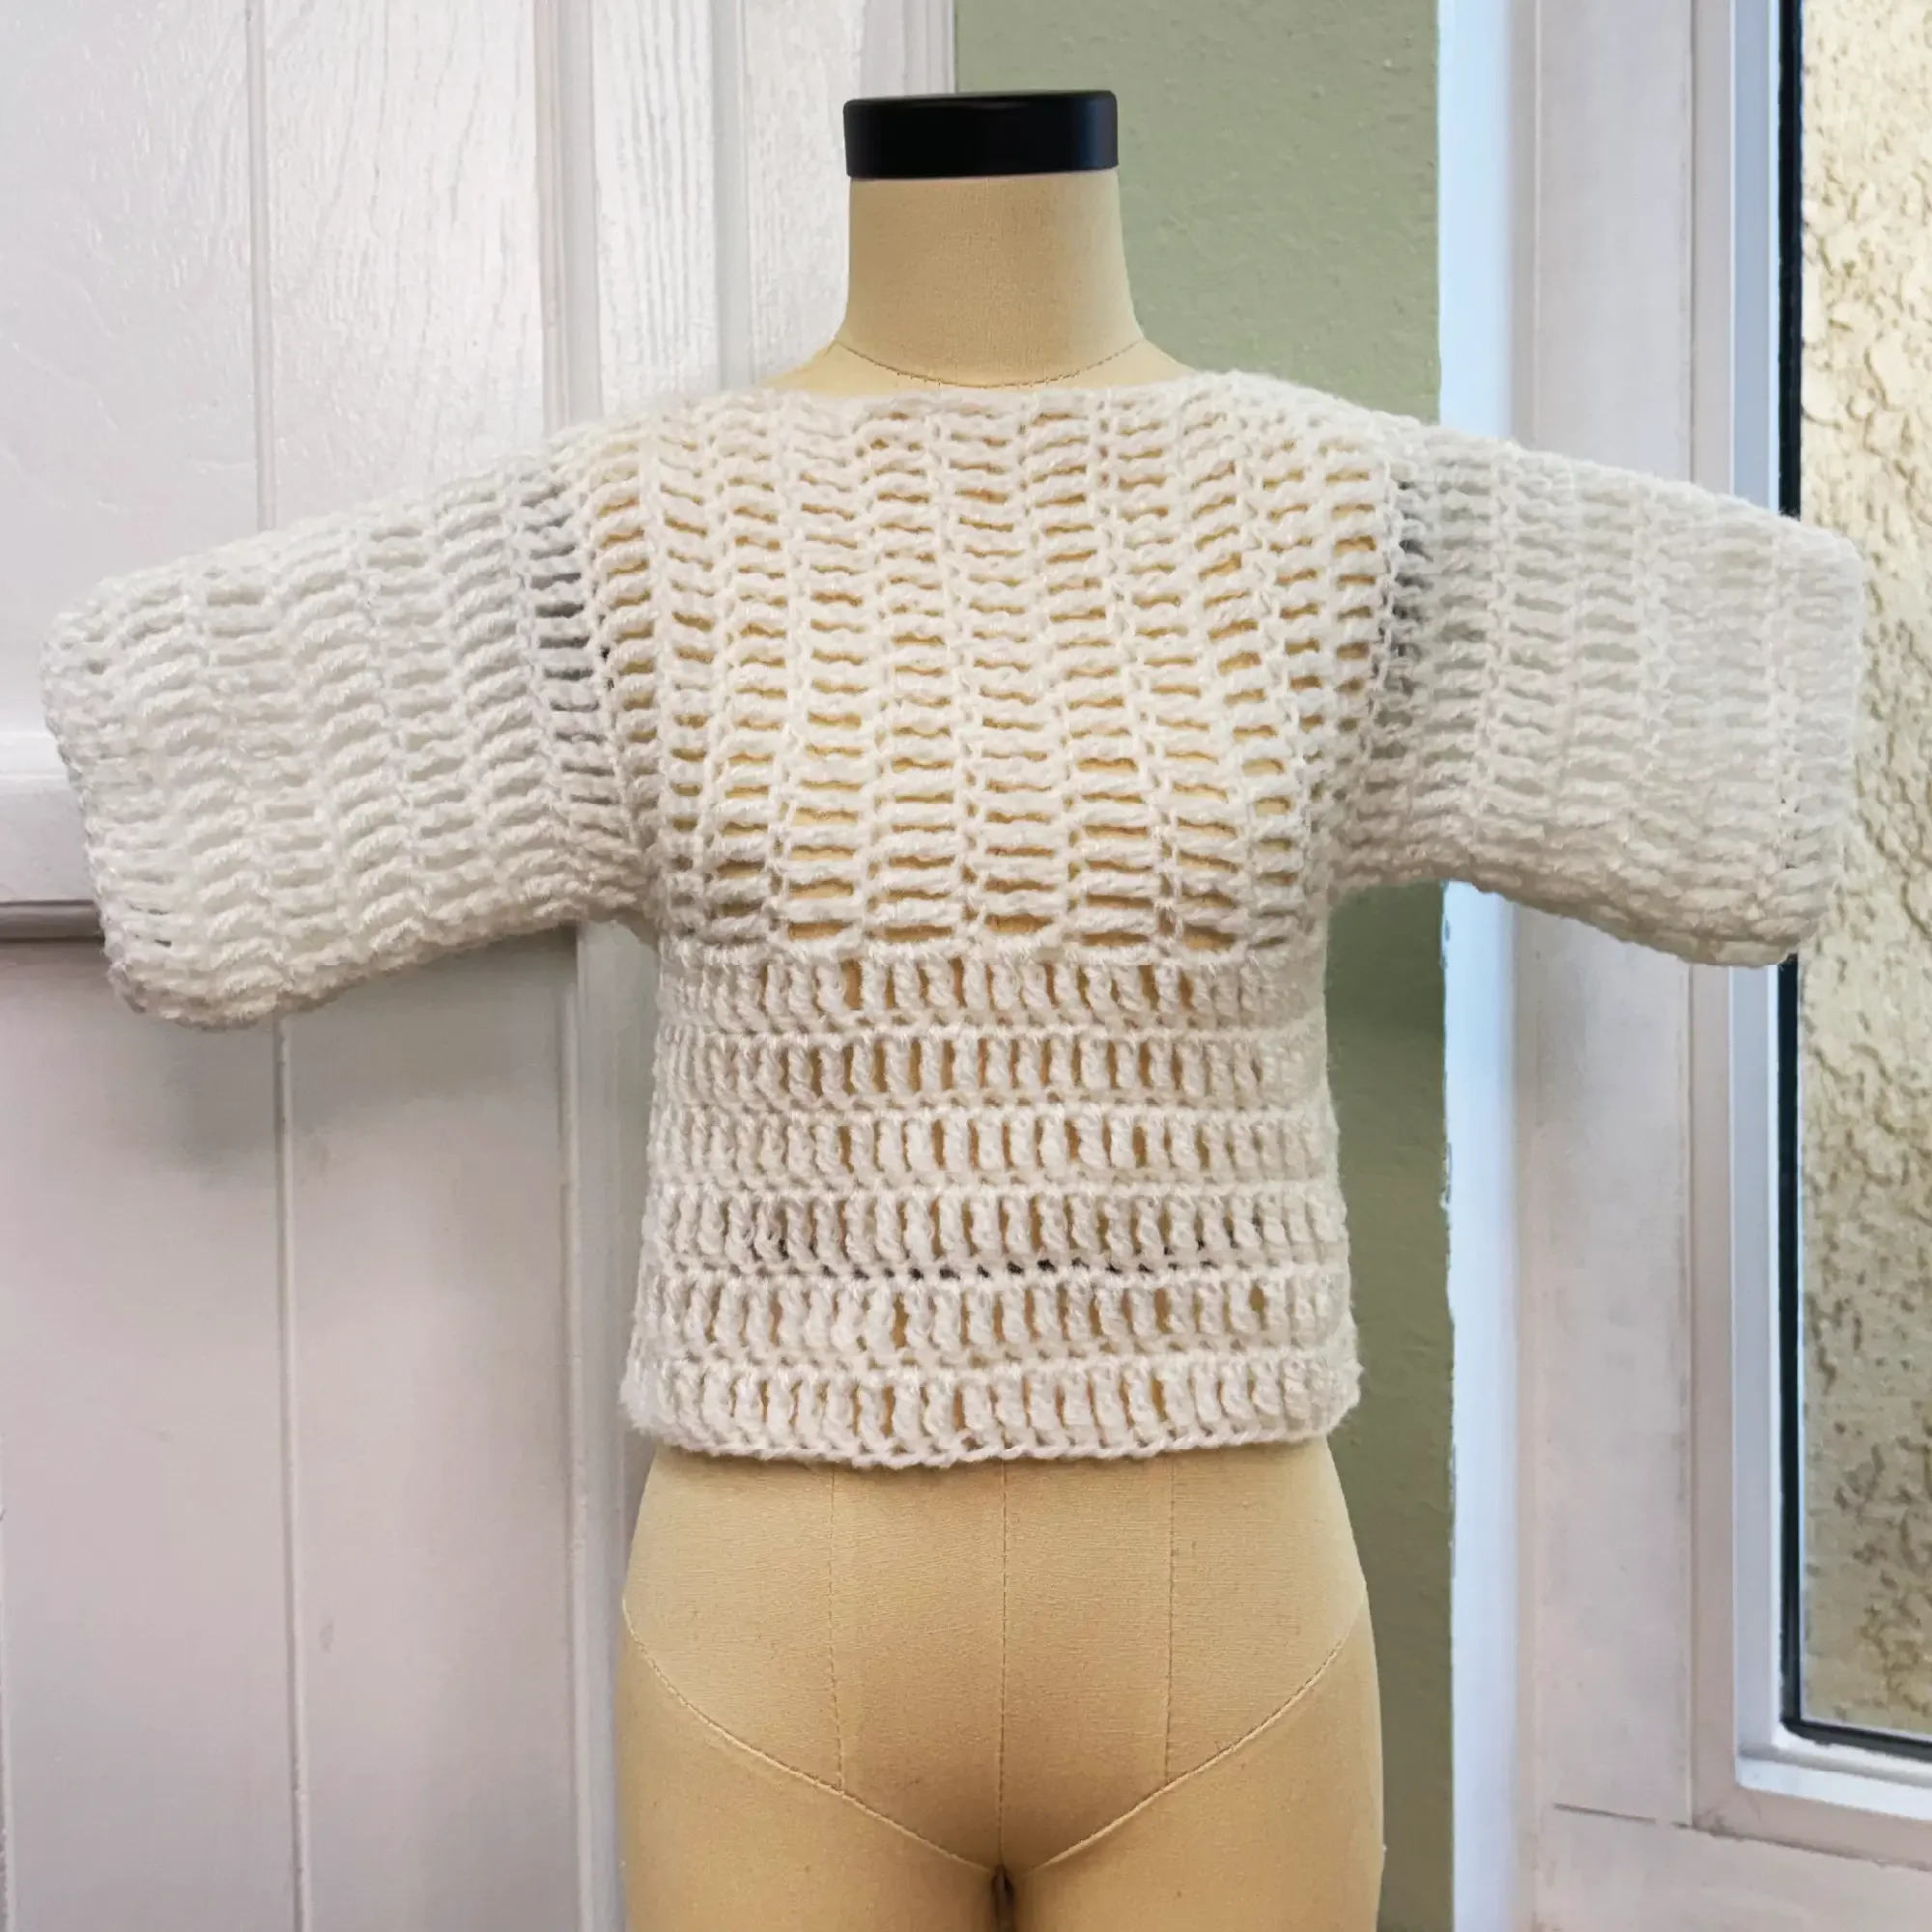
Top I: Sleeves & Bodice Combined
Treble Crochet Stitch
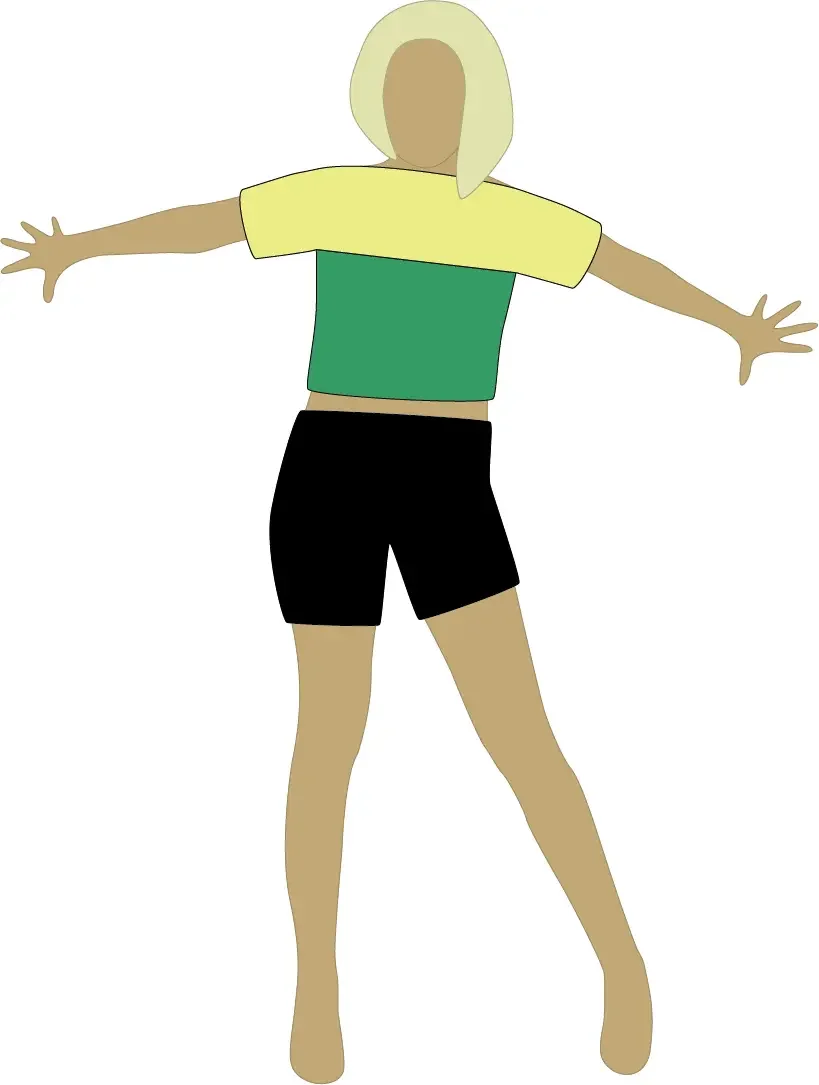
Pieces to Crochet
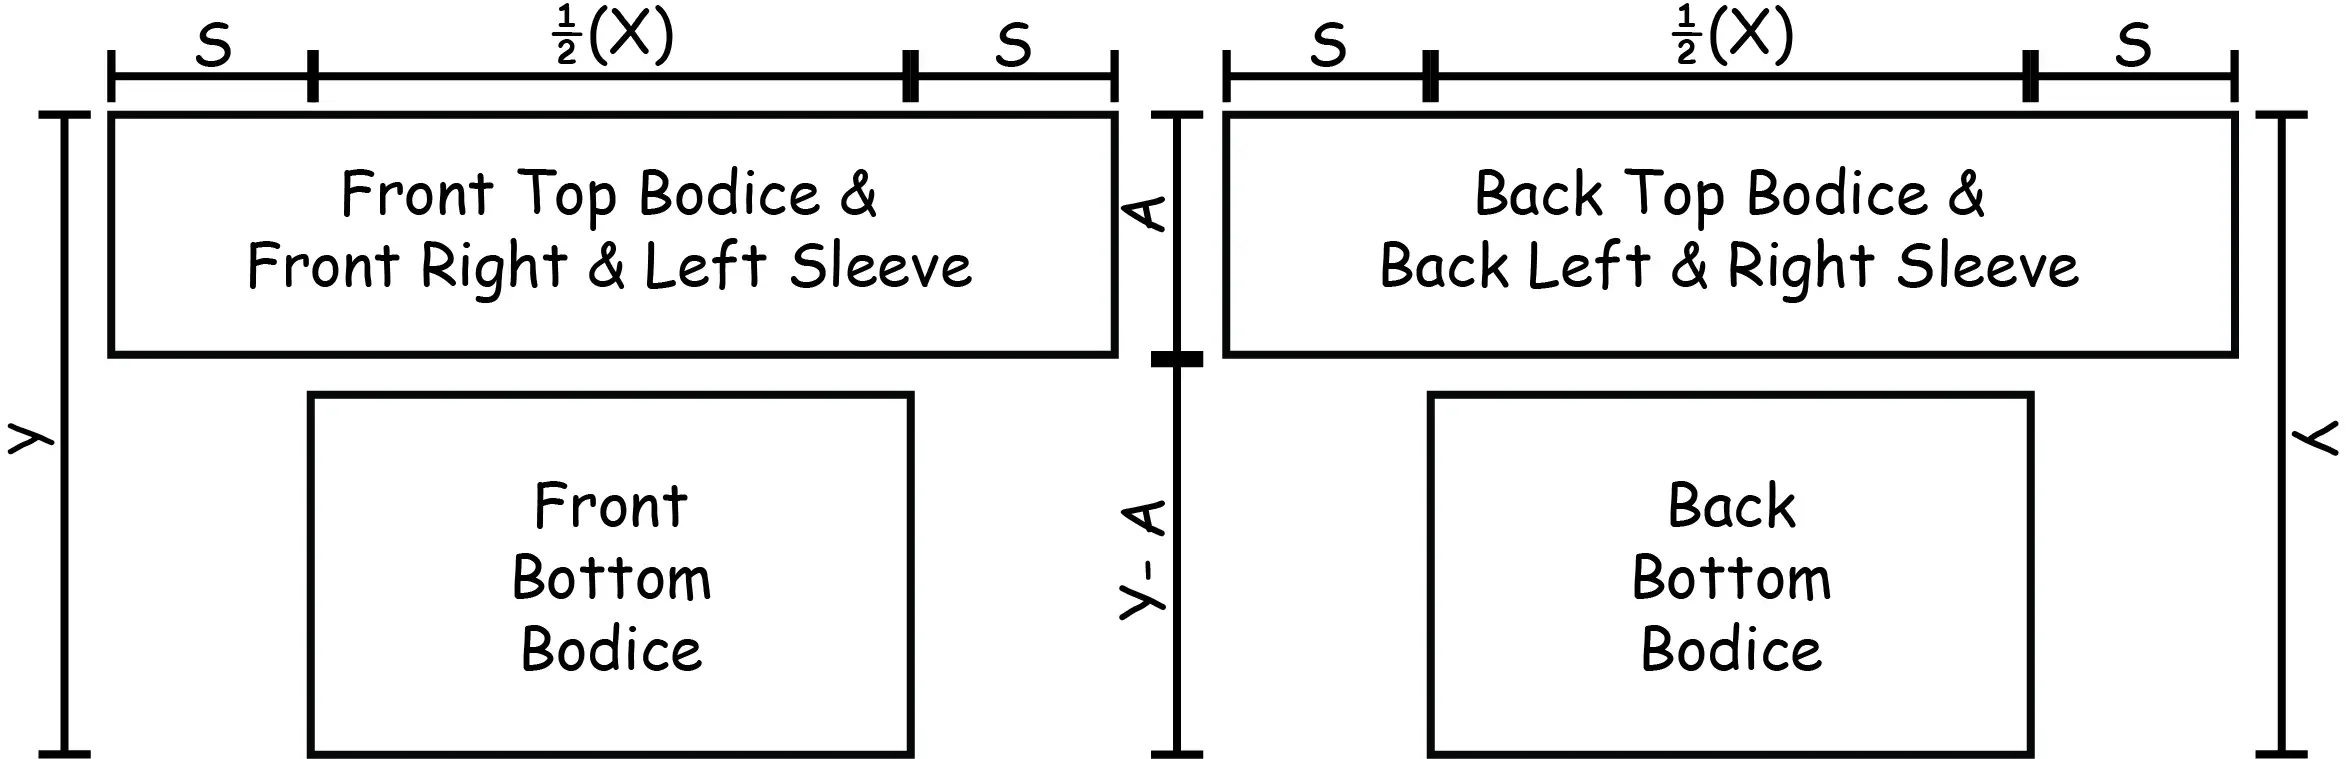
Crochet one front top bodice with sleeves & one back top bodice with sleeves each with a:
Width = ½(X) + 2(S)
Length = A
Crochet one front bottom bodice & one back bottom bodice each with a:
Width = ½(X)
Length = Y - A
How to Assemble
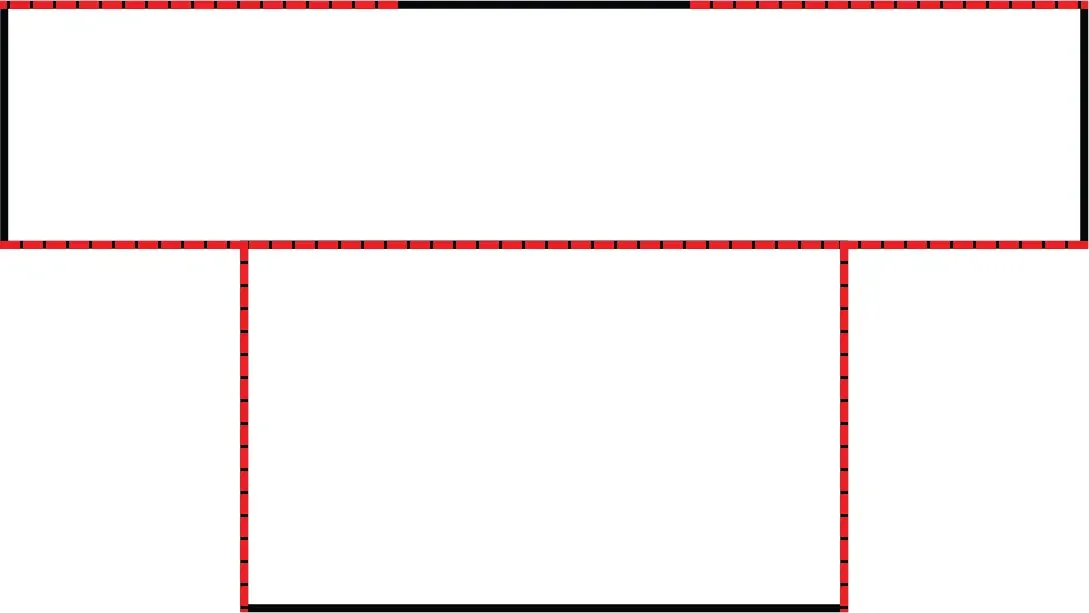
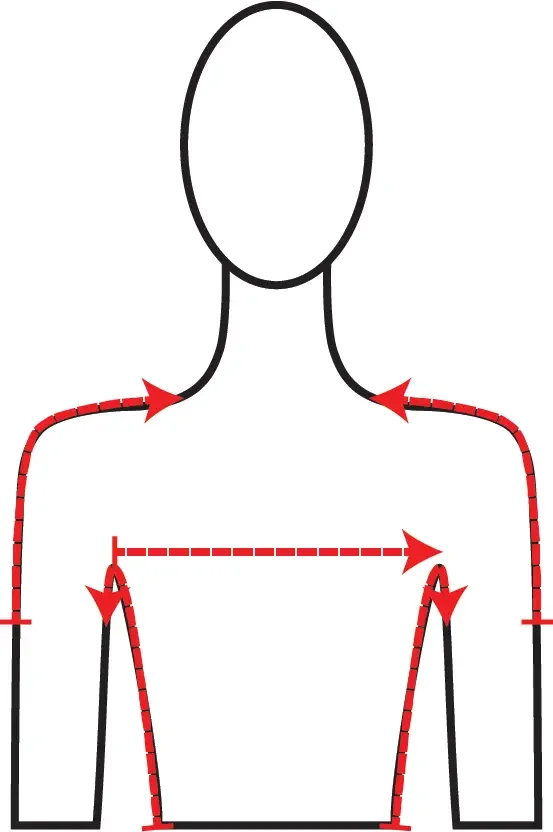
Attach top and bottoms – line up the two front bodices together at their center point with the top bodice above the bottom bodice. Attach them together along the top of the bottom bodice from end to end. Repeat with the back bodices.
Shoulder seams – with front and back bodice together, attach them starting at the edge of the right sleeve toward the neck. Repeat on left side. This seam can stop an inch after S or go as far as the edge of the neck. Leave enough room for your head to fit.
Side Seams – with front and backs together, attach the right sides starting at the bottom of the bodice up to the sleeves, pivot and continue along to the end of the sleeve. Repeat on the left side.
Note: You can combine the front and back bottom bodices into one piece by working in the round. First, attach the two top bodices together along the shoulder seams and the underarm seams (stop where you would pivot for the side seams) then work the bottom bodice in rounds around the bottom opening of the top bodices until desired length (Y-A).
Cuffs, Bands, and Closures
Use these methods to create more fitted tops
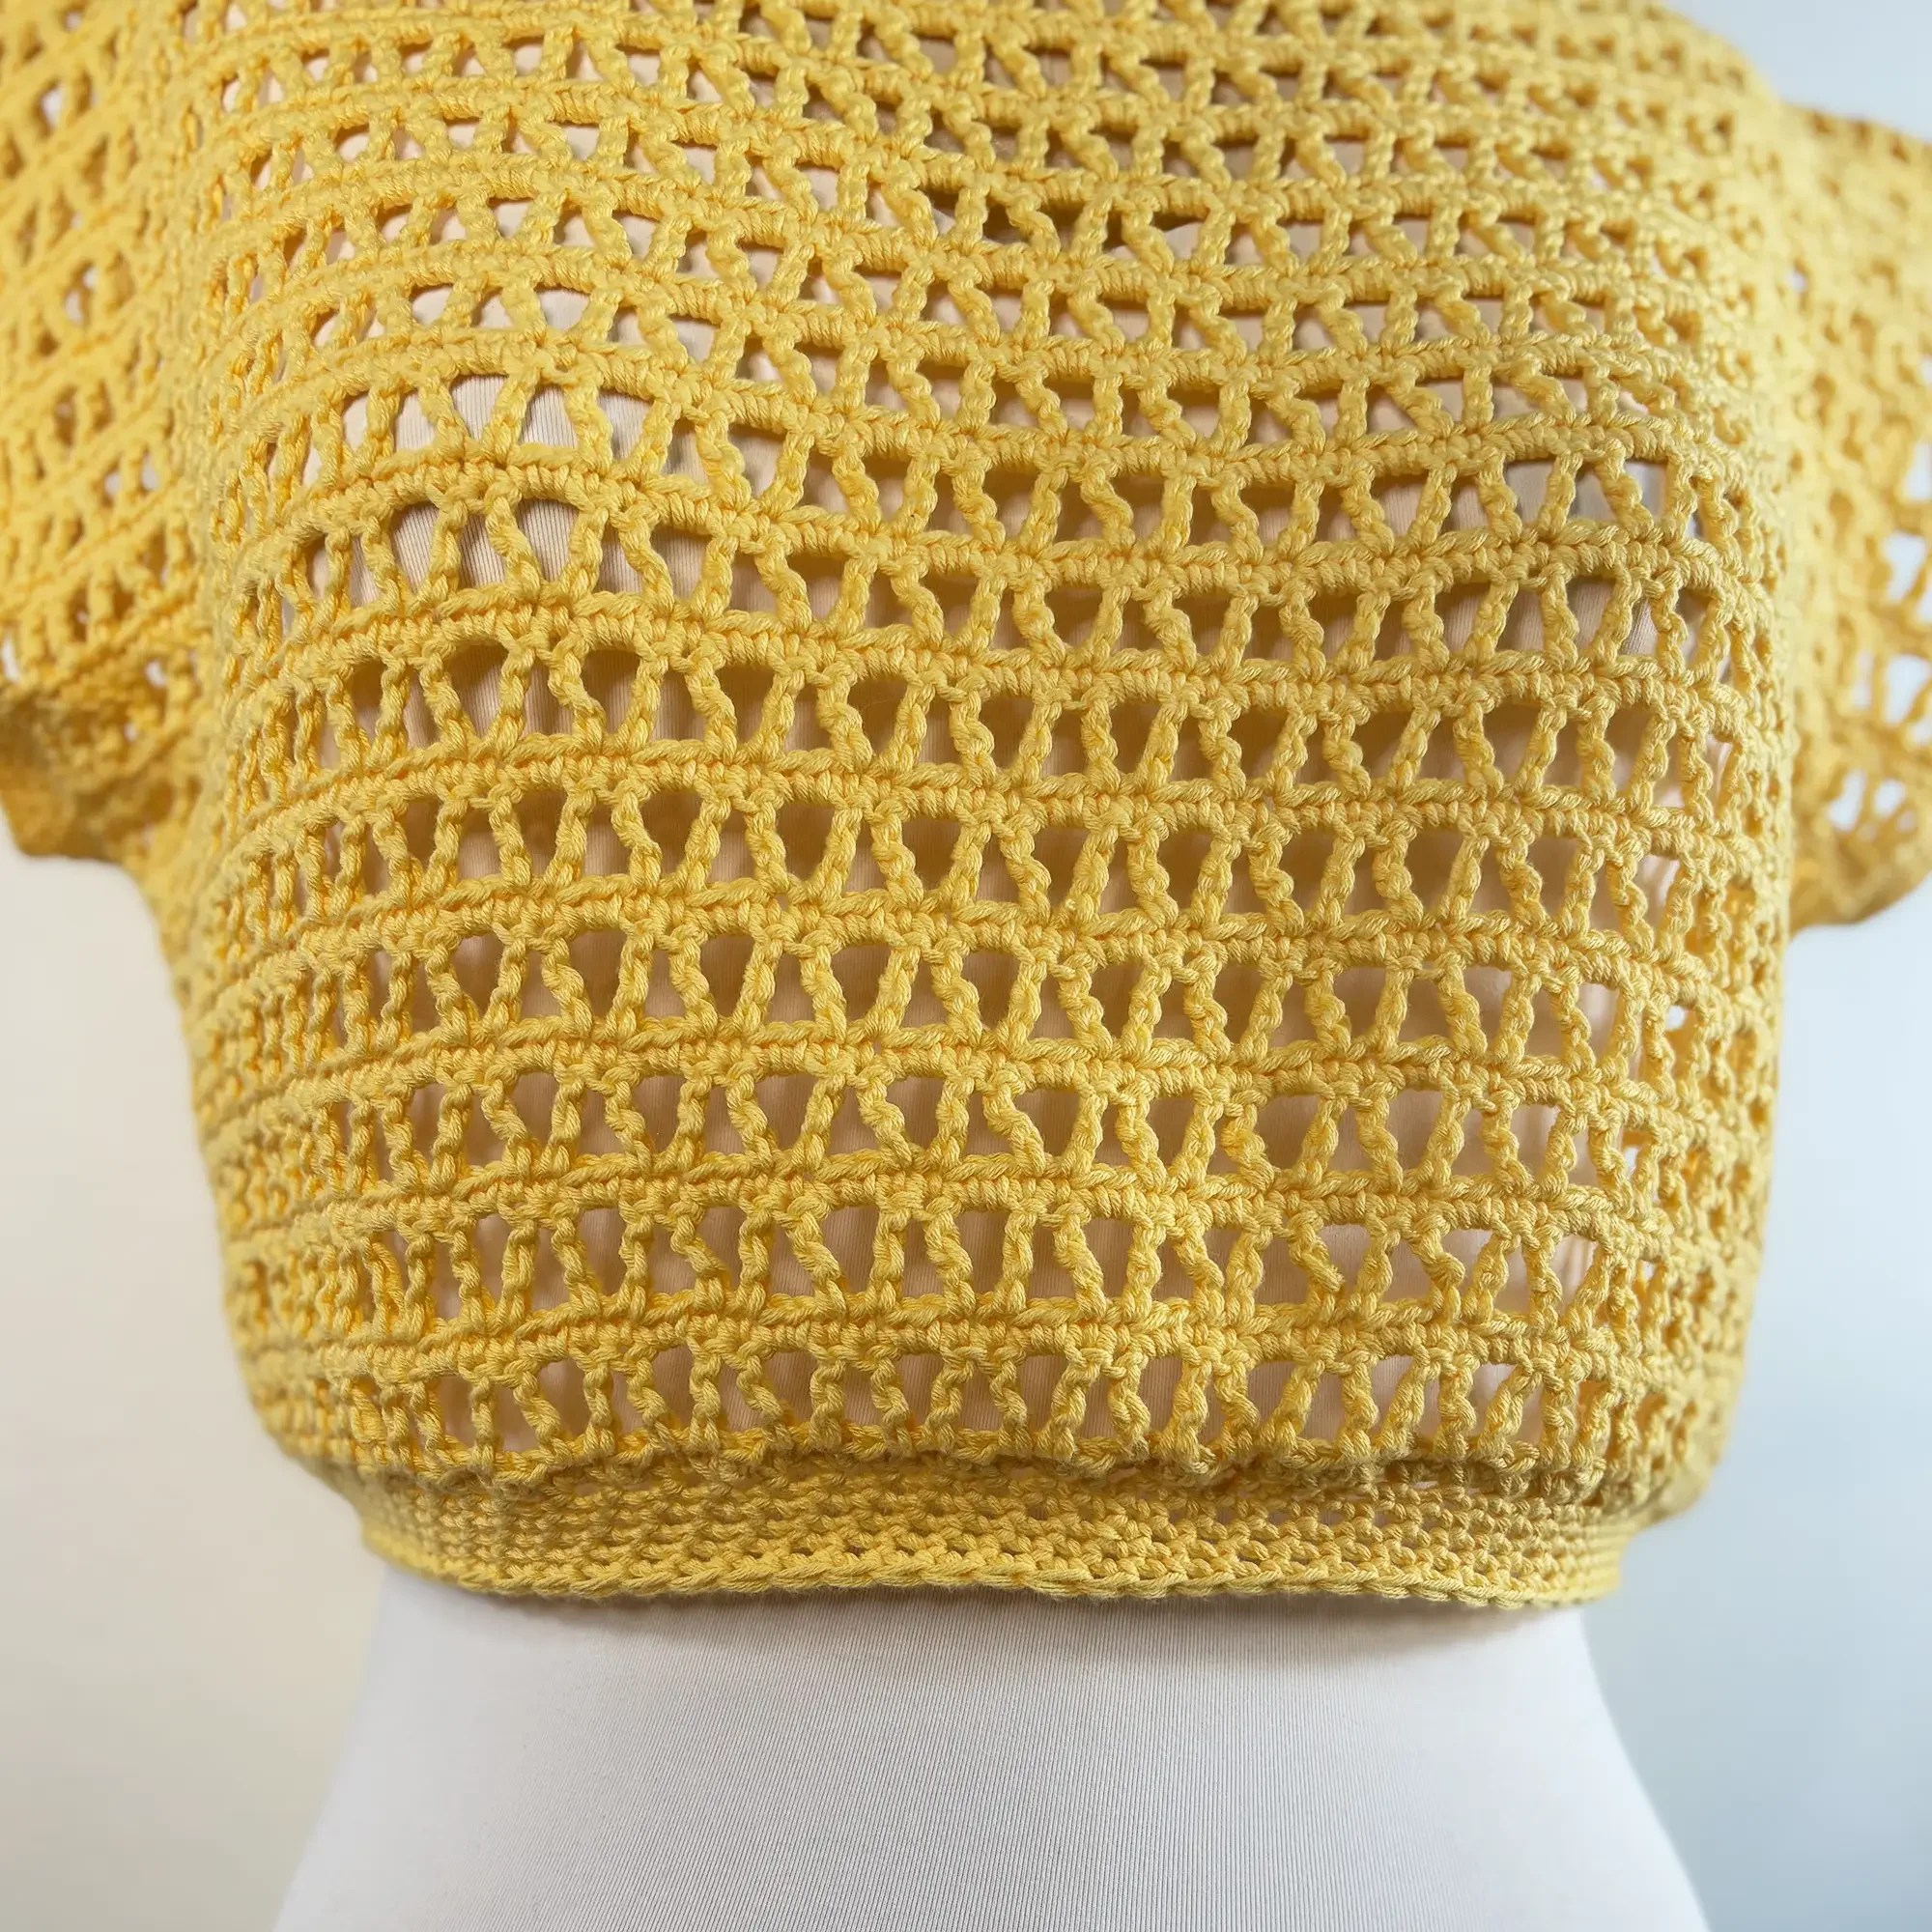
Decrease Stitches
Add sleeve cuffs or a band around the bottom of your top by working multiple stitches as one to decrease the size of the opening. This method may not have much stretch and works best to cinch in over sized tops.
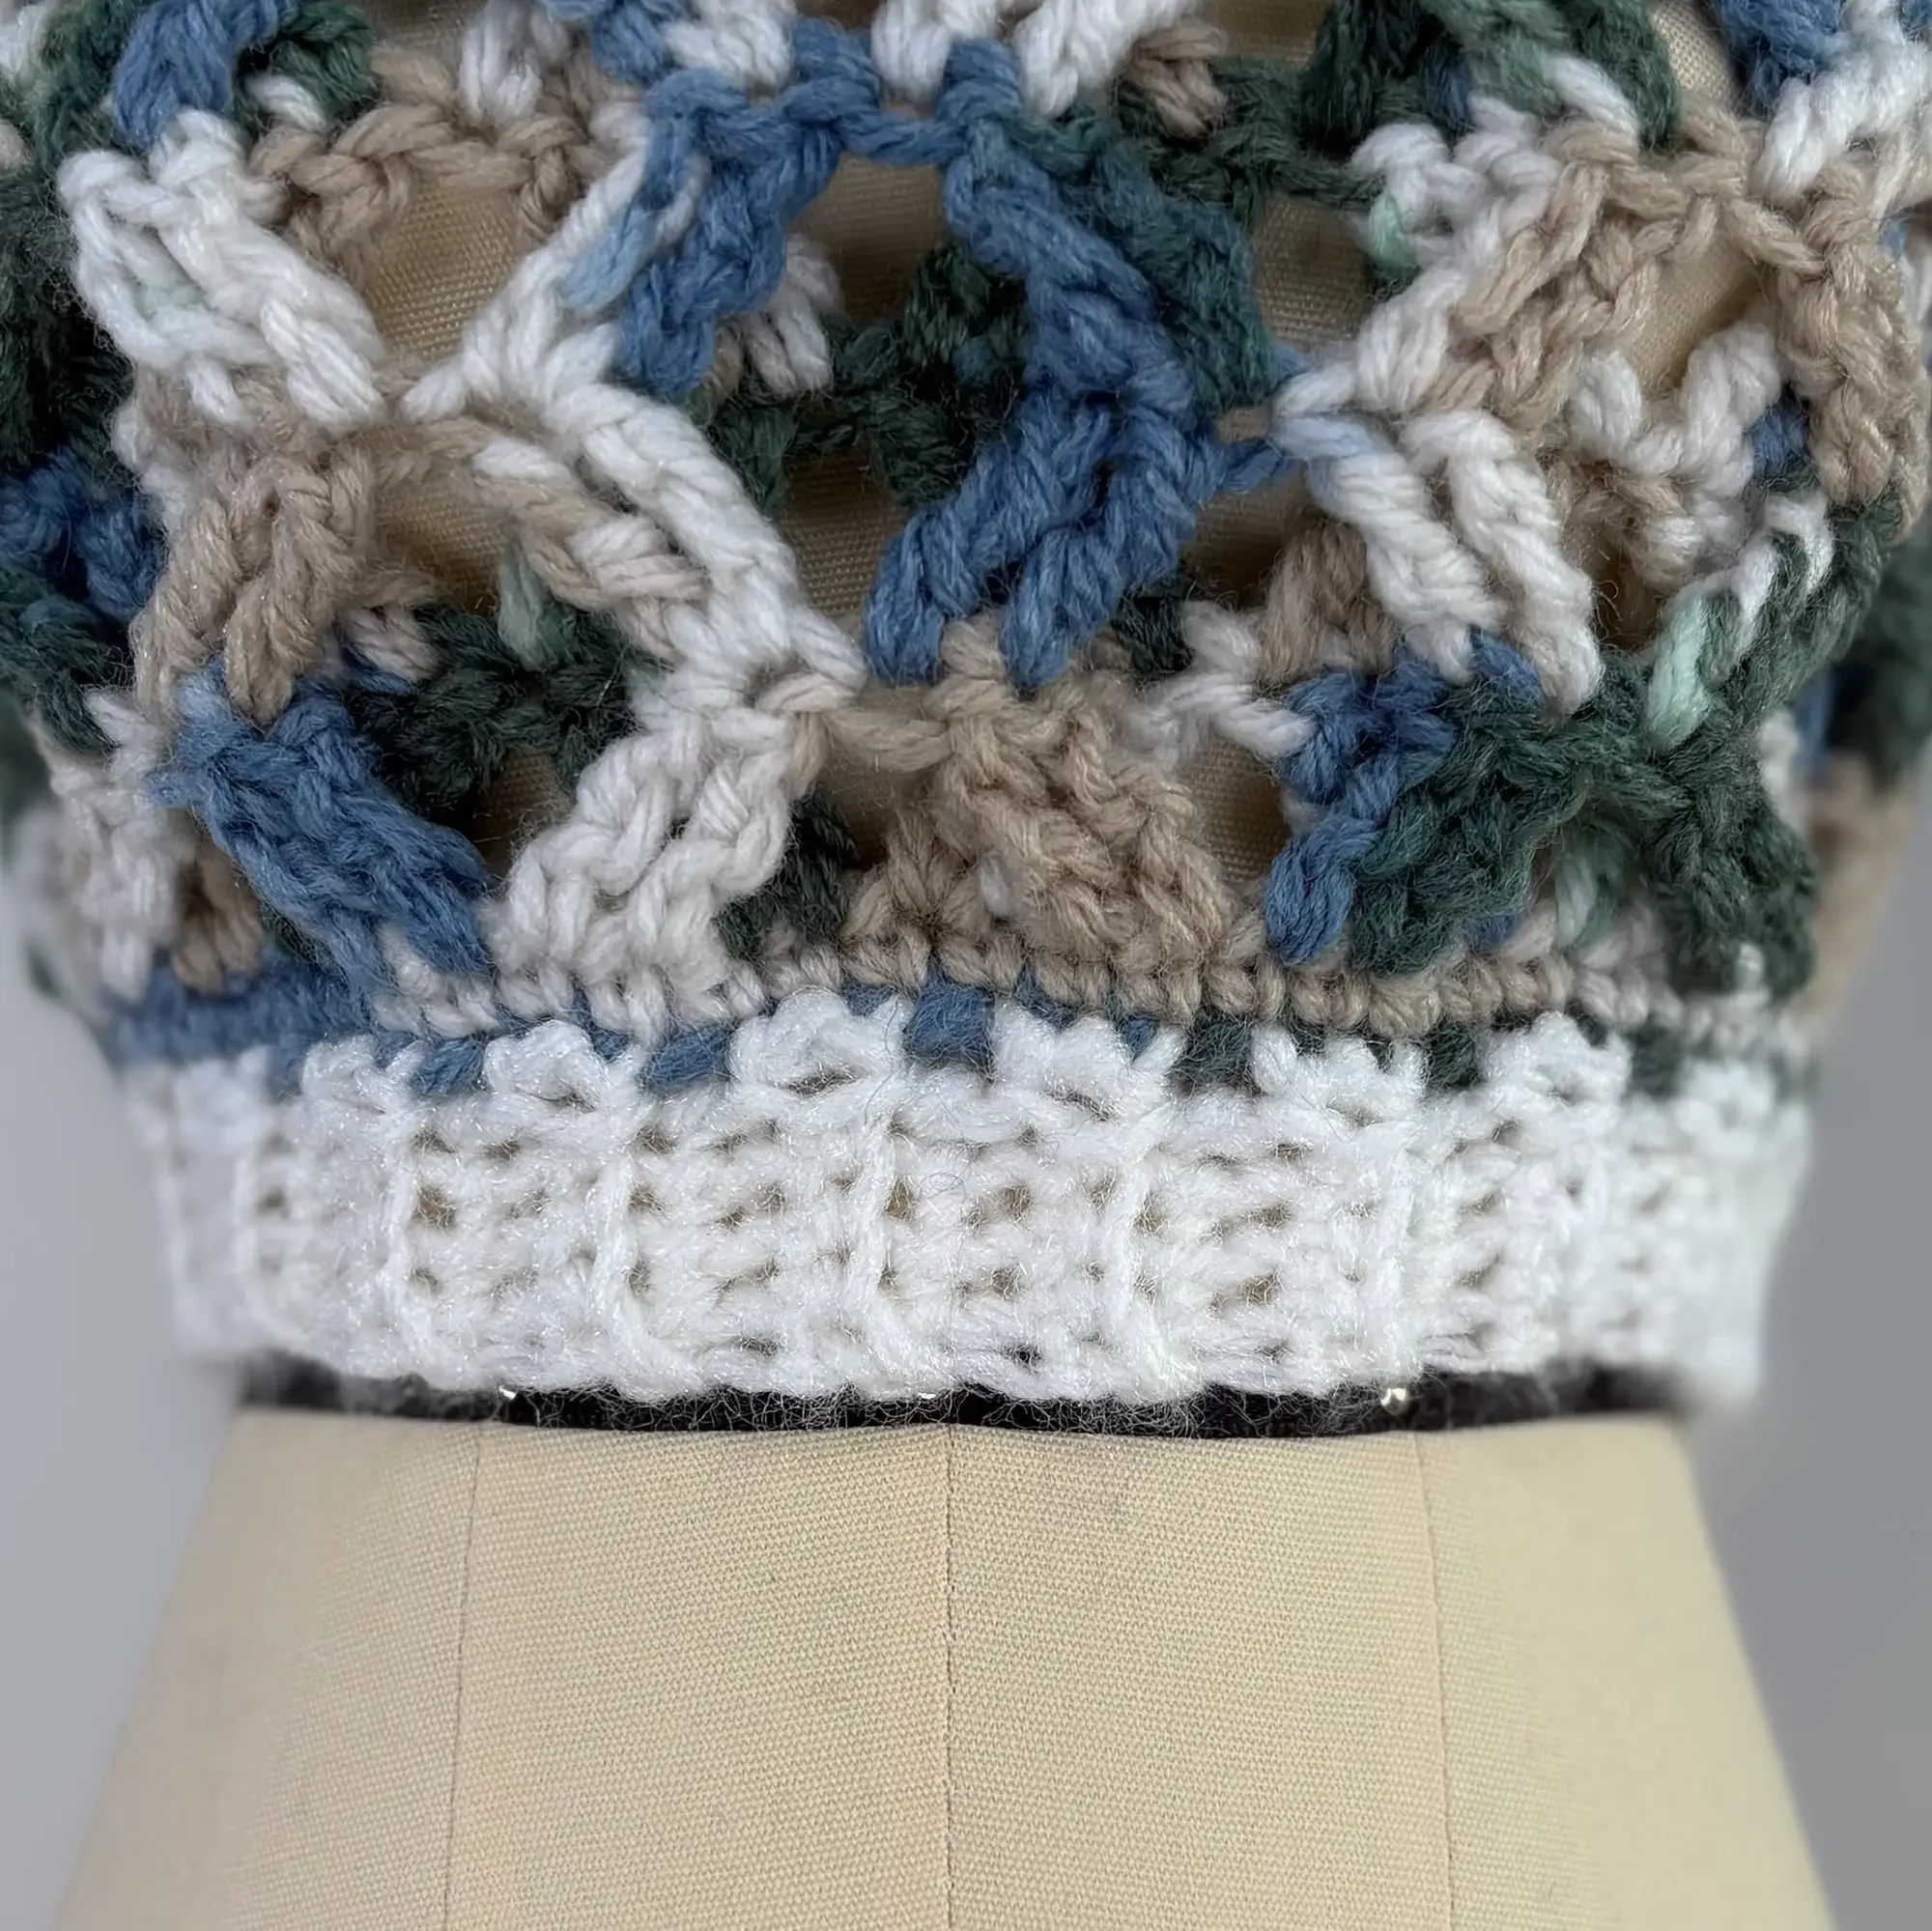
Ribbing
You can also add sleeve cuffs or a band by working rounds of single crochet in the back loops only. Ribbing has more stretch than decreased stitches, allowing for tighter cuffs and bands.
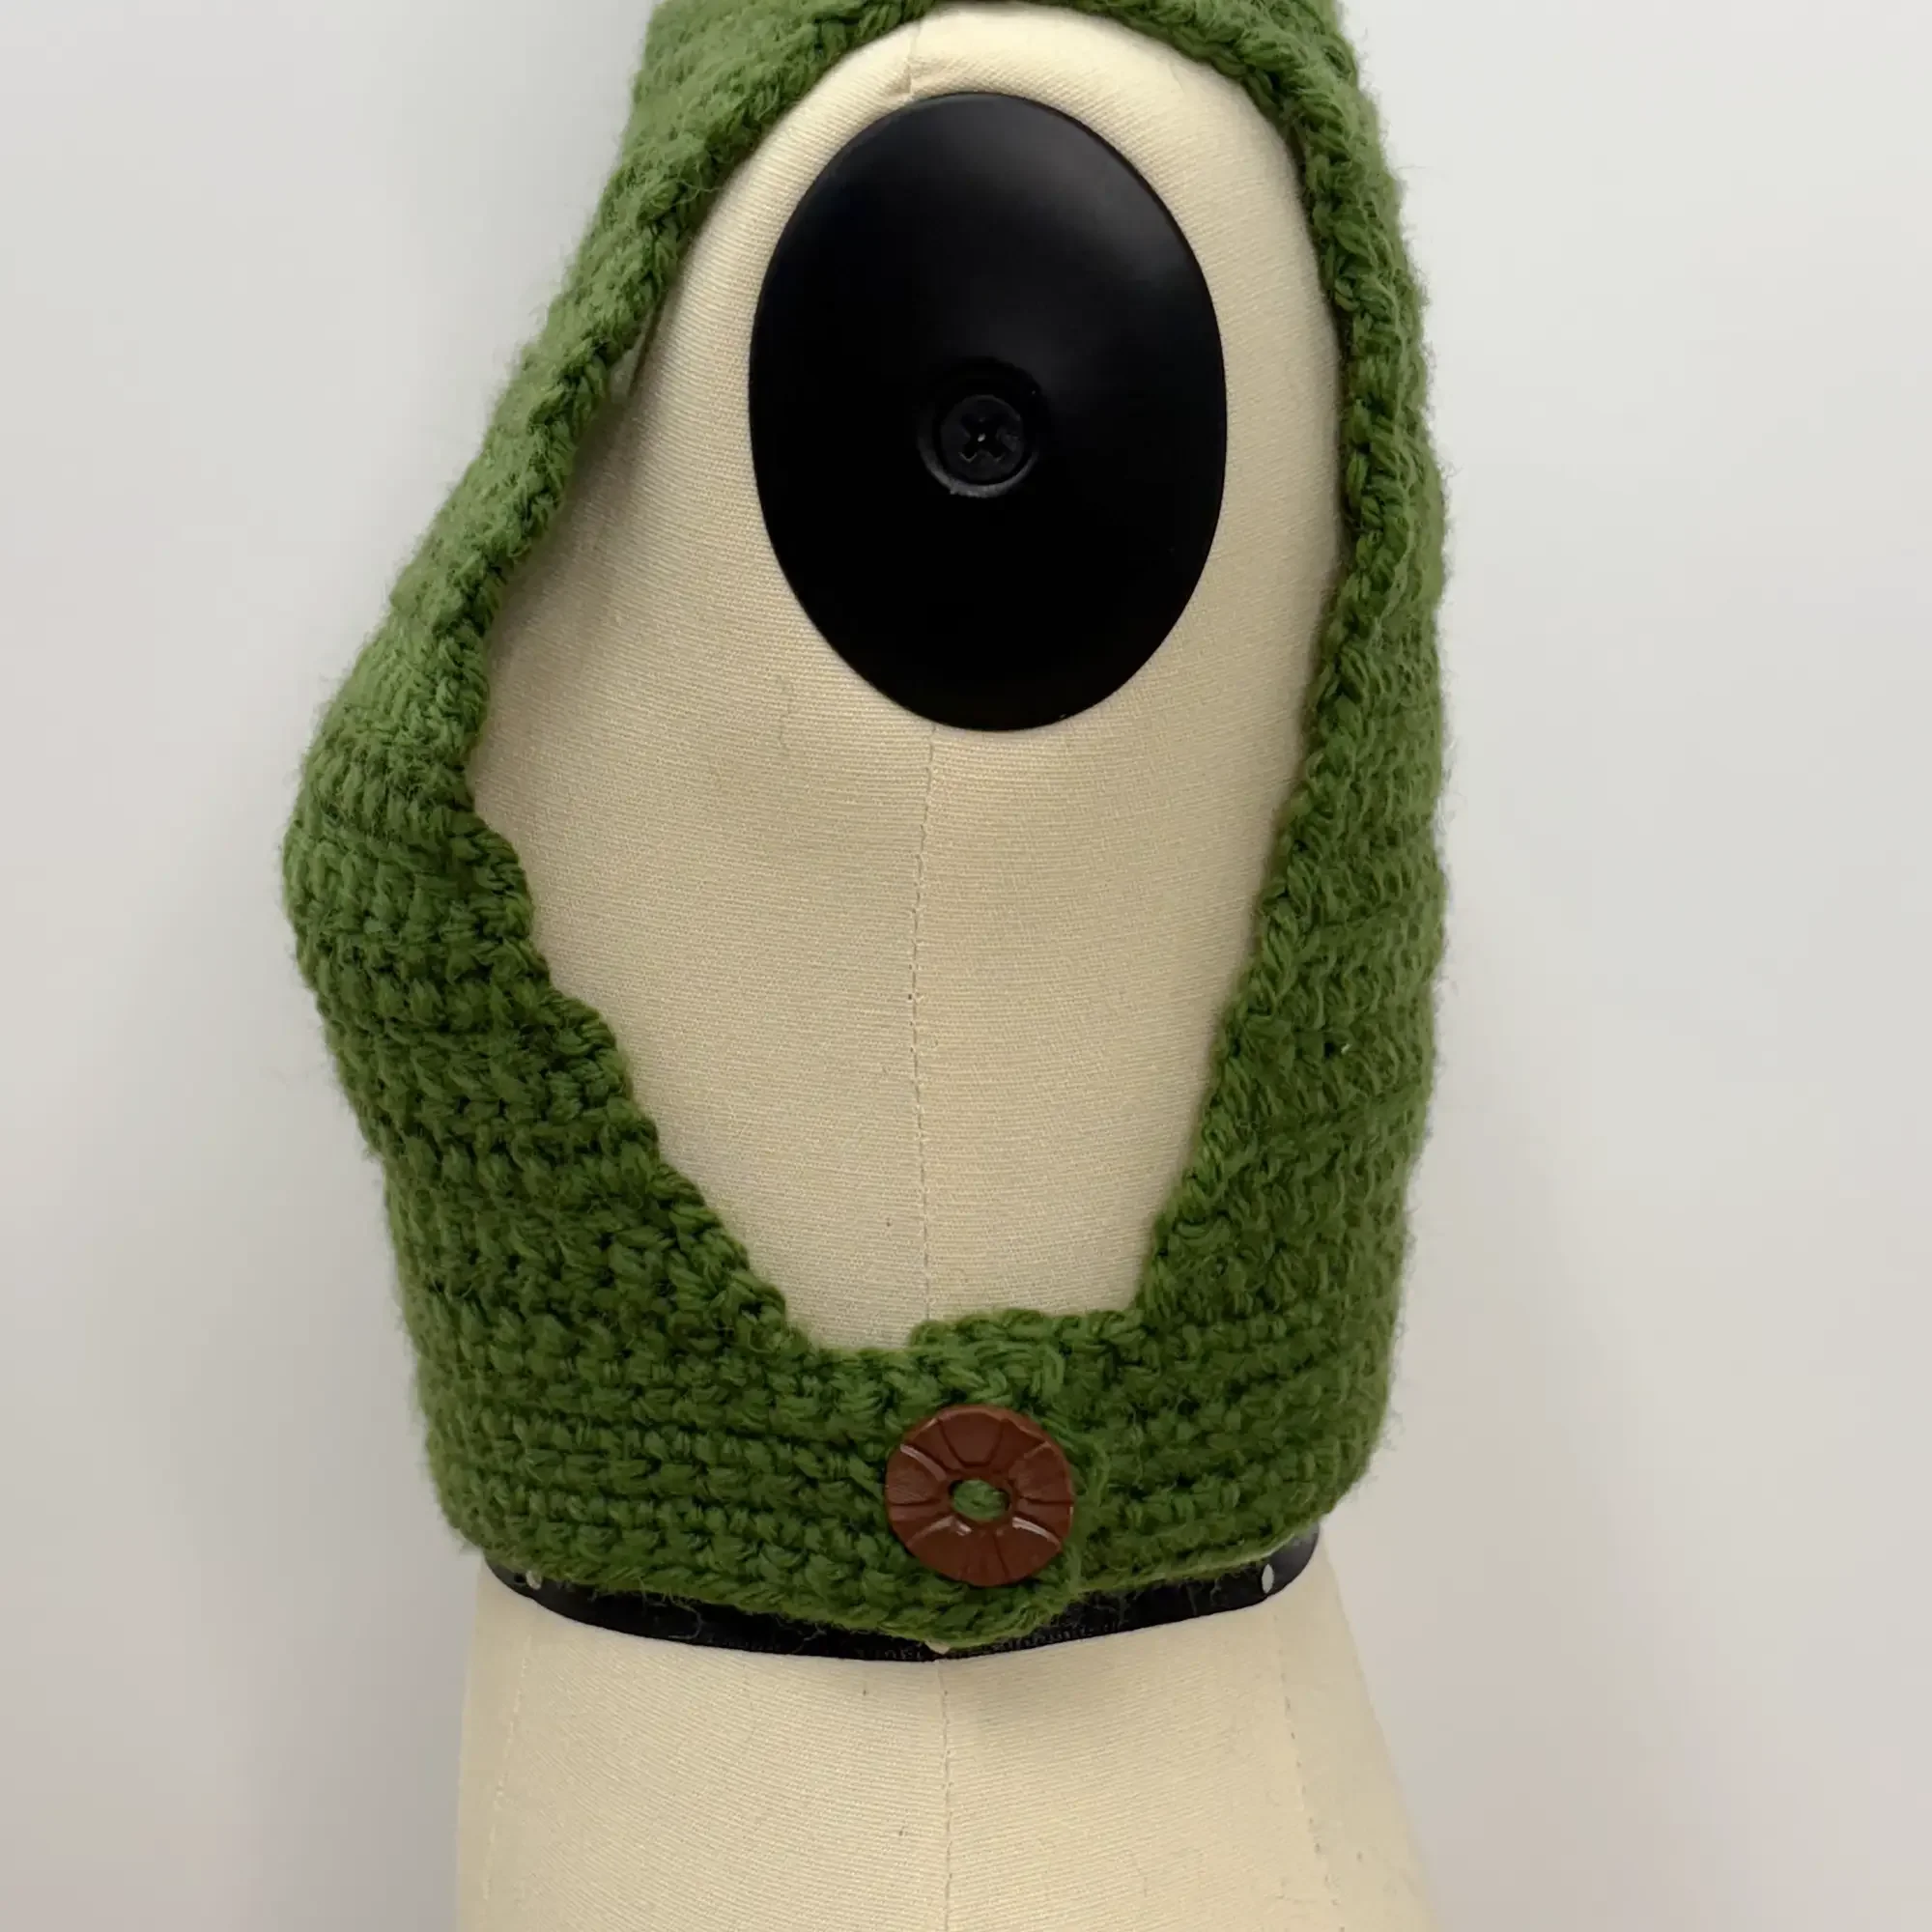
Buttons
Instead of sewing or crocheting a center or side seam closed add one or more buttons and button holes. Extend the width of the panels where you plan to add the button and button hole so they can over lap.
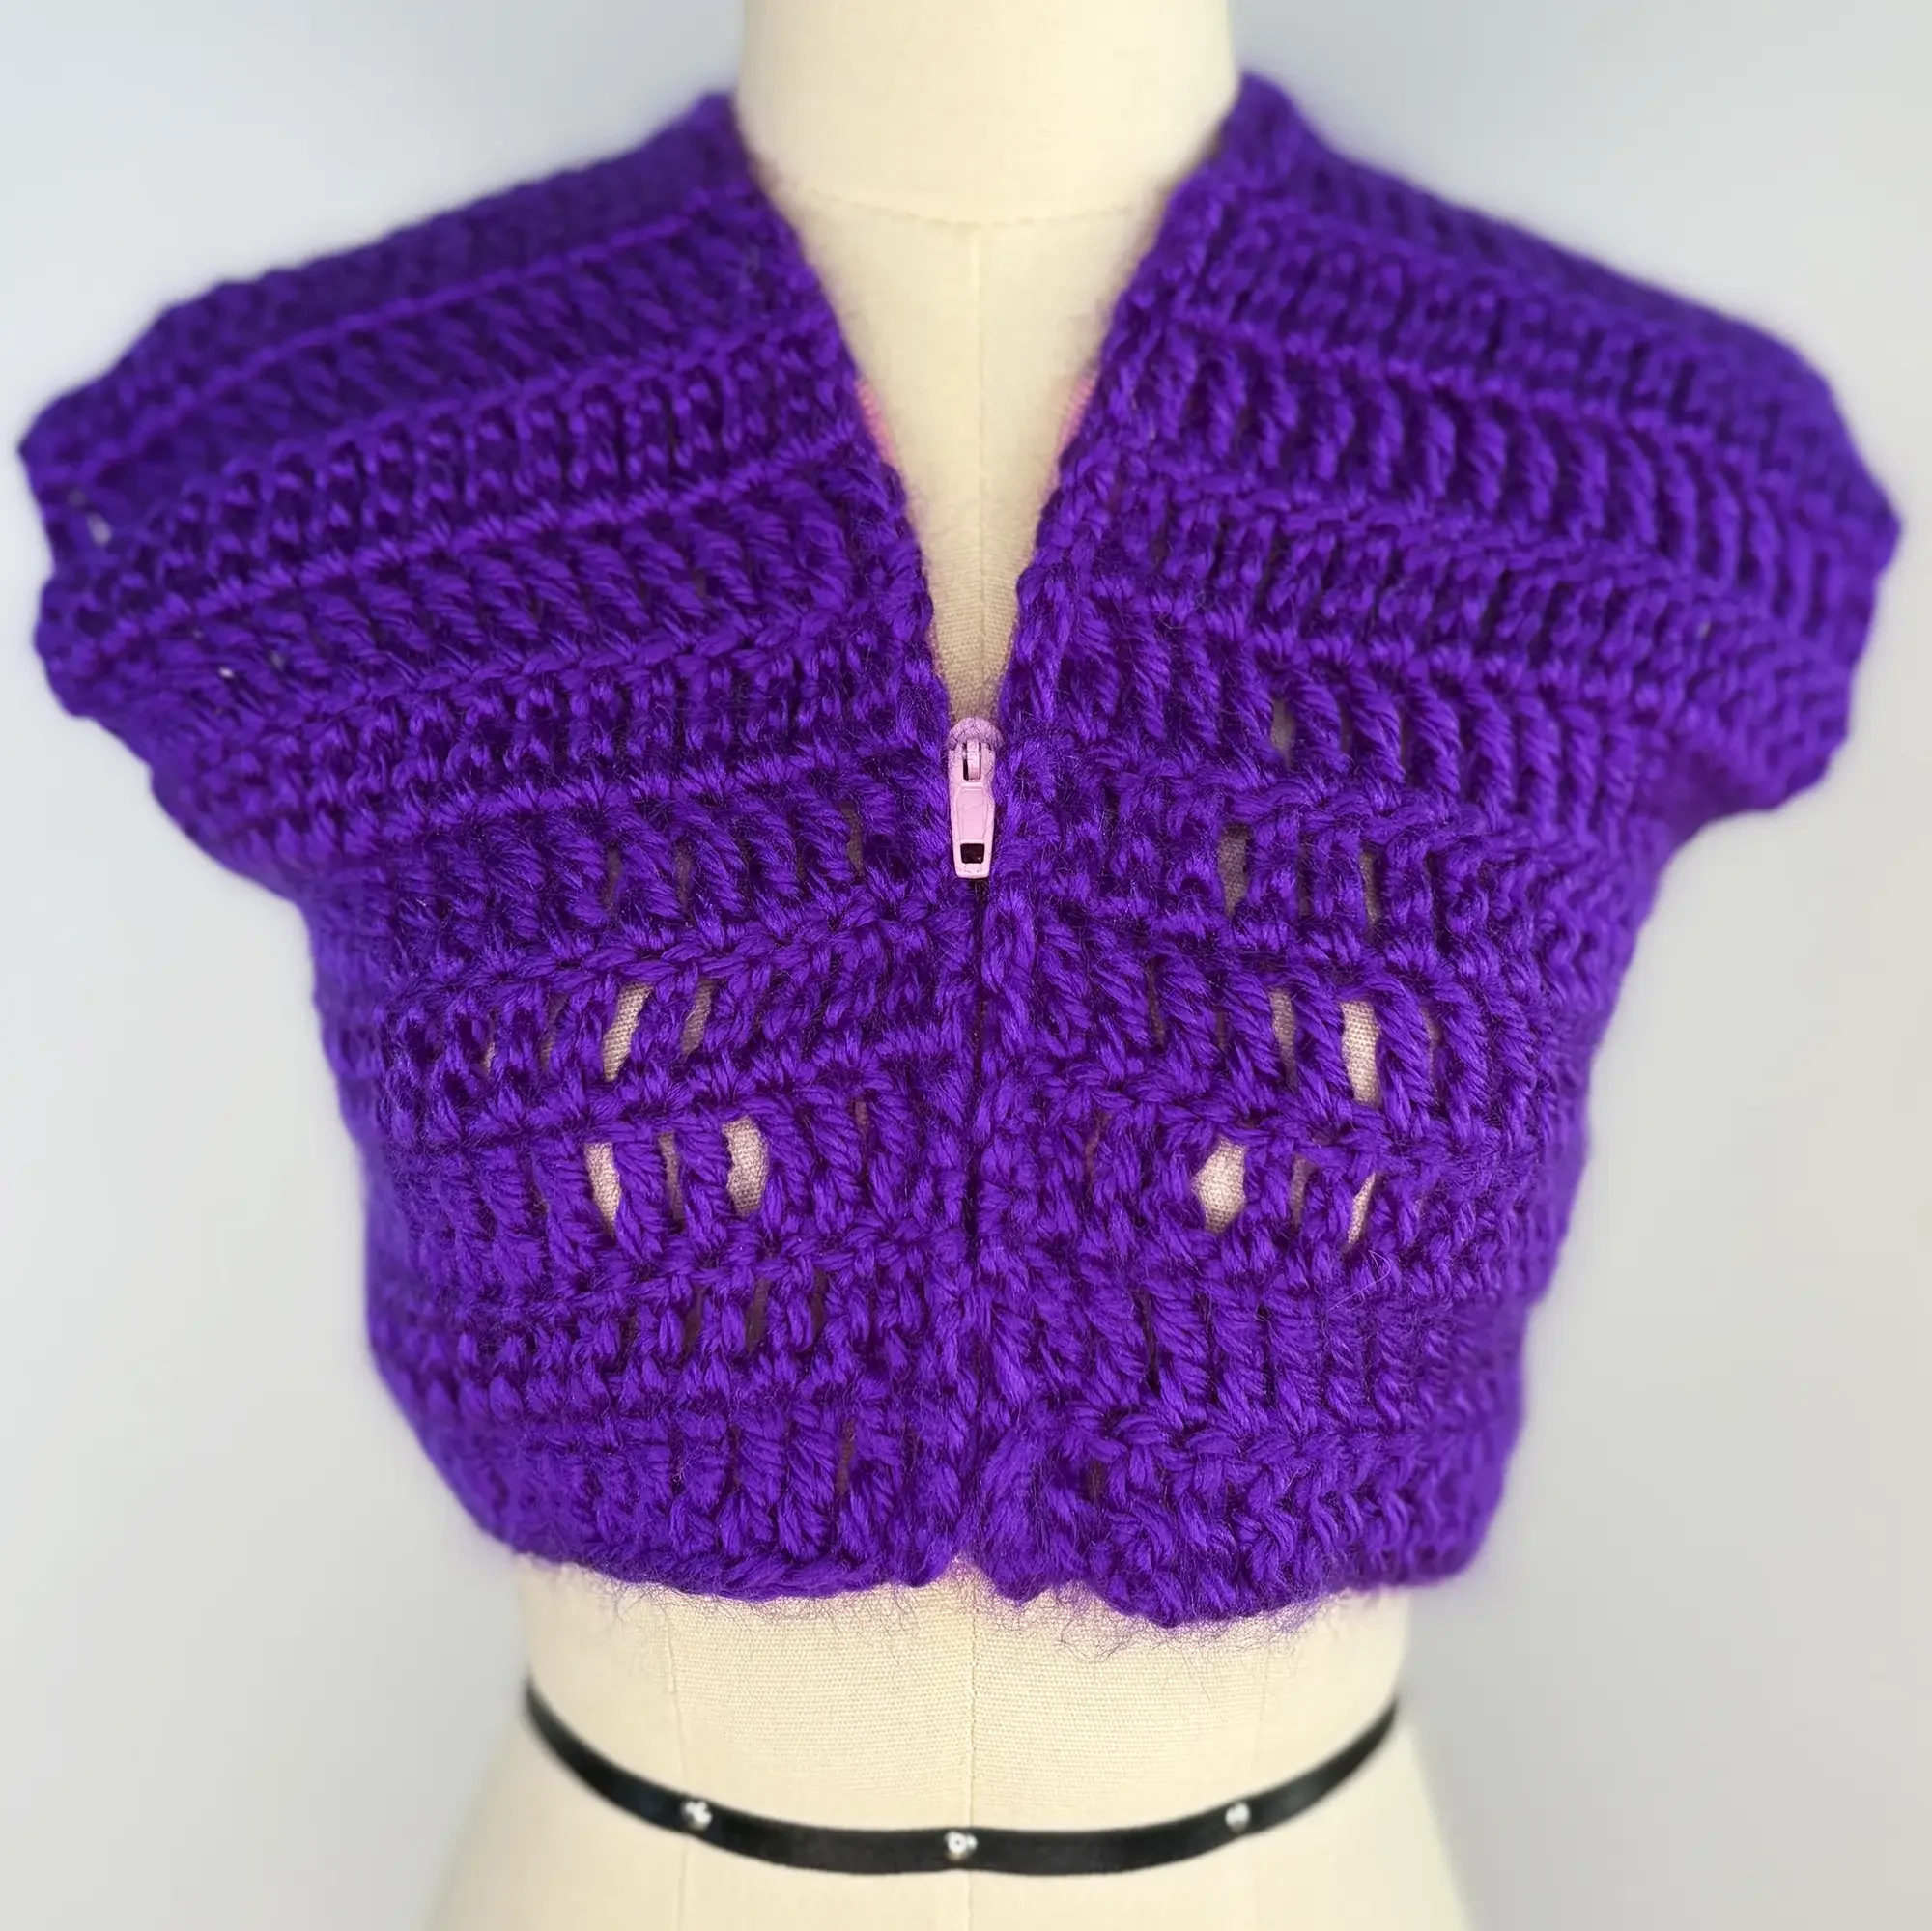
Zipper
Use a zipper with a separating end instead of sewing closed a seam. No need to extend any panels like with buttons